To boost natural light in an older UK home, start with a daylight plan: map brightness by room and time, then upgrade glazing, frames, and seals first to maximize transmission. Use lightweight, sheer treatments, reflective paints, and strategic mirrors to multiply daylight without glare. Clean windows and maintain skylights or roof windows for even distribution. Favor cool, high-reflectivity finishes and passive diffusion to spread light across walls and ceilings. If you keep going, you’ll uncover more precise tactics and step-by-step steps.
Assess Your Light: How Bright Is Your Home Now
Assess your light by mapping how bright each room feels at different times of day. You’ll establish a baseline for lighting design by tracking daylight patterns, room geometry, and reflective surfaces. Measure window orientation, curtain depth, and shade behavior to predict glare and contrast.
Note how artificial layers interact with natural brightness, so you can plan precise adjustments later. Create a simple grid: room name, morning, midday, afternoon, evening brightness scores, plus note-worthy obstructions. This data guides practical decisions on window installation or tweaks to existing openings, ensuring proportional daylight delivery.
Aim for balanced daylight: enough glow for tasks without harsh hotspots. Document findings with photos and sketches, then translate insights into a concise brief for future improvements—focusing on efficiency, comfort, and architectural integrity.
What Older UK Homes Struggle With Most Daylight-Wise
You’ll often contend with limited window space, which directly caps daylight entering your rooms.
Sun paths can be blocked by dense layouts or neighbouring structures, reducing exposure through the day.
And aging glazing—smaller panes, single or misted glass—further restricts light transmission and clarity.
Limited Window Space
Prioritize reflectivity: light-colour walls, bright ceilings, and strategic mirrors amplify available daylight.
Choose window treatments that balance openness and control—cellular blinds, light-filtering shades, or slim curtains, mounted close to glazing to reduce shade loss.
Consider astral positioning of furniture and décor to avoid blocking light paths, maximizing perceived brightness.
If budget allows, window replacement with high-performance glazing can noticeably lift daylight penetration and thermal behavior, though keep load and jamb integrity in mind.
Combine transparent textures with unobtrusive hardware to maintain architectural honesty while improving overall luminance.
Obstructed Sun Paths
Sun obstruction often stems from floor plans that prioritize enclosure over openness, and from nearby historic outbuildings or narrow plots that force light to skim surfaces rather than flood rooms. Tactics focus on reshaping daylight corridors, maximizing reflective surfaces, and trimming unnecessary partitions where structurally safe.
Use light shelves, strategic glazing adjustments, and vertical cavities to bend rays deeper. Address daylight blocking not with brute force, but with measured, code-conscious interventions that preserve character while brightening core areas.
Dated Glass Quality
Dated glass is the Achilles’ heel of daylight in many older UK homes, where decades of glazing choices, wavy panes, and drifted sealants quietly sap brightness. You’ll notice glass deterioration as early as micro-scratches, haziness, and edge chill, all of which dull transmitted light.
Evaluate pane integrity by looking for clouding between layers, blown-in air pockets, and corrosion around seals. Glass quality governs glare control, thermal performance, and color fidelity, so replace or re-source mismatched panes with modern equivalents that preserve the historic silhouette.
Watch for window condensation, a telltale sign of failed sealing or inefficient cavity fill, which compounds fading and microbial staining. Prioritize low-emissivity coatings, inert spacers, and proper glazing depth to restore luminance without compromising authenticity.
Quick Test: Measure and Grade Room Daylight
You can perform a quick daylight check by noting window size, orientation, and typical sun exposure to assign a baseline metric.
Use a simple grading rubric to translate these factors into a room daylight score, then compare across spaces to spot inconsistencies.
This practical gauge, paired with a consistent method, yields actionable insight for improving light distribution.
Quick Daylight Metrics
Use a simple handheld lux meter at desk height, noting readings under mid-morning and mid-afternoon sun. Record window size, door openings, and any obstructions to determine effective daylight reach.
Compare results against a baseline aspirational range for task clarity, and flag rooms with insufficient daylight hours.
Apply practical refinements: adjust window treatments to optimize glare control while preserving light, and choose wall colors that reflect rather than absorb daylight.
The method remains lightweight, repeatable, and insightful for quick design calibrations.
Room Daylight Grading
Start with luminance in key corners, not just center, to reveal hotspots and shadows. Use a calibrated light meter or a smartphone app at multiple times of day; record automatically with timestamps.
Consider glazing efficiency, light-well geometry, and furniture placement, noting how each move changes the grade. Translate results into actionable tweaks: widen or reposition openings, adjust external shading, and refine internal reflectance through finish choices.
Pair improvements with garden landscaping to maximize daylight penetration and plan exterior painting for durable glare control and consistent color reflection.
Prioritize Light Sources You Should Tackle First
To maximize daylight fast, start by tackling the light sources that most constrain brightness: glazing, shading, and reflections. You’ll gain immediate impact by auditing each area: glazing quality, frame condition, and seal integrity; shading devices that block sun in peak hours; and reflective surfaces that siphon light away from the far corners.
Prioritize fixes that unlock the most daylight per effort, not just the easiest tasks. Install efficient lighting fixtures where daylight falls short, choosing lamps with high CRI and color temperature tuned to daytime hues. Consider daylight sensors to curb artificial lighting when sunlit rooms suffice.
Rebalance windows by removing obstructions and aligning sills with eye level. Document gains, then iterate with targeted hardware tweaks to sustain brightness across seasons.
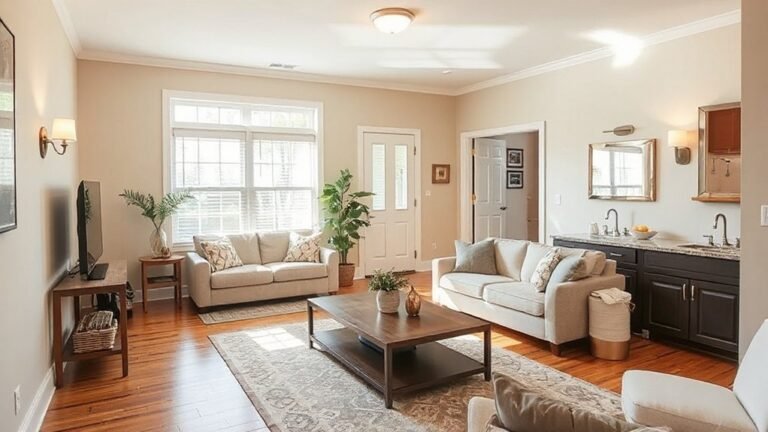
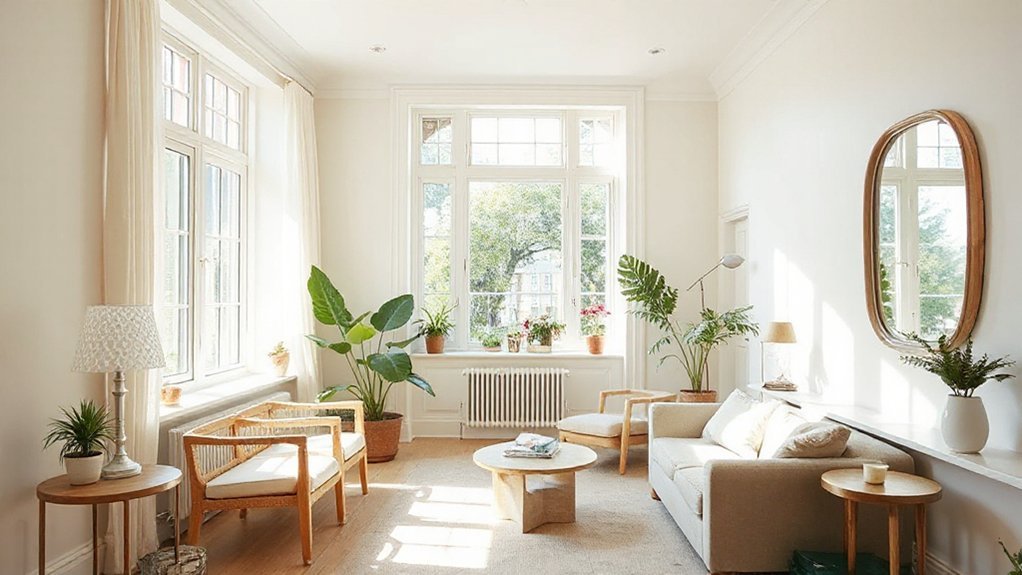
Brighten Rooms With Lightweight Window Treatments
Lightweight window treatments can boost daylight without sacrificing privacy or insulation. You’ll gain subtle lift to every room by selecting fabrics and hardware that don’t weigh down curtains or blinds. Opt for sheer or voile panels, low-profile roller shades, and hård-wearing linen blends that diffuse rather than block light.
Align slat angles and fabric opacity to maximize light reflection while keeping glare manageable. Pair light tones with minimal yet sturdy mounting to preserve sightlines and perceived airiness.
Precision installation matters: guarantee clean edges, even hems, and tracks that glide smoothly. Professional-fitting can optimize insulation benefits without dulling daylight.
- Choose sheer or translucent fabrics for even light diffusion
- Use light colors to amplify light reflection
- Favor slim profiles to preserve room proportions
- Match installation height to ceiling lines
- Test wall-to-window integration for glare control
Reflective Surfaces That Bounce Daylight Effectively
You can boost daylight by pairing pale, reflective wall surfaces with bright window frames that don’t absorb light.
Consider a mid-sheen interior paint to balance glare and depth, while keeping frames crisp and light-filled.
Together, these elements optimize light bounce and maintain a calm, cohesive aesthetic.
Reflective Wall Surfaces
- Choose high-reflectance paints that complement existing trims
- Apply uniform sheen to avoid uneven brightness
- Test small panels before full room rollout
- Pair with light-coloured ceilings for upward bounce
- Prioritize durable wall treatments over ultra-matt surfaces
Window Frame Brightening
Window frames can be brightened effectively by selecting reflective finishes and careful detailing that maximize daylight bounce without glare. You’ll choose materials with low iron content to reduce yellowing, and aim for a subtle satin or semi-gloss that reflects rather than absorbs. Finish edges cleanly to prevent dull shadows and guarantee even illumination across panes.
When detailing, align frame profiles with glazing planes to minimize obstructions to daylight pathways. Paints or laminates with a light, cool base enhance brightness; avoid dark or saturated tones near large windows. Consider edge detailing behind trims to reduce micro-gaps that trap dust and scatter light.
For practical brightening, test a sample section under varying light, confirming consistent reflection without glare or hotspots. This window frame approach delivers understated, measurable brightness.
Interior Paint Sheen
- Finish choice impacts warmth and brightness
- Reflectivity vs. glare considerations
- Hue under daylight behavior
- Practical testing with swatches
- Surface maintenance and durability
Layout Tricks: Furniture Placement for More Daylight
To maximize daylight in tight interiors, start with deliberate furniture placement that clears sightlines to windows and mirrors natural light around the room. Position sofas and low-backed seating away from key windows, creating unbroken lines that let sun travel deeper.
Align major pieces along walls to avoid blocking doorways or radiators, and use strategically placed mirrors to bounce daylight without creating glare. Zone layouts should reflect tasks near sources of light, not obstructing them; keep focal points oriented toward windows during the day.
Choose compact, multiuse furniture to reduce clutter and preserve reflectivity. Remember garden landscaping outside to frame light access, and guarantee window security remains intact with sturdy, unobtrusive hardware.
This disciplined approach yields brighter rooms with perceptible depth and clarity.
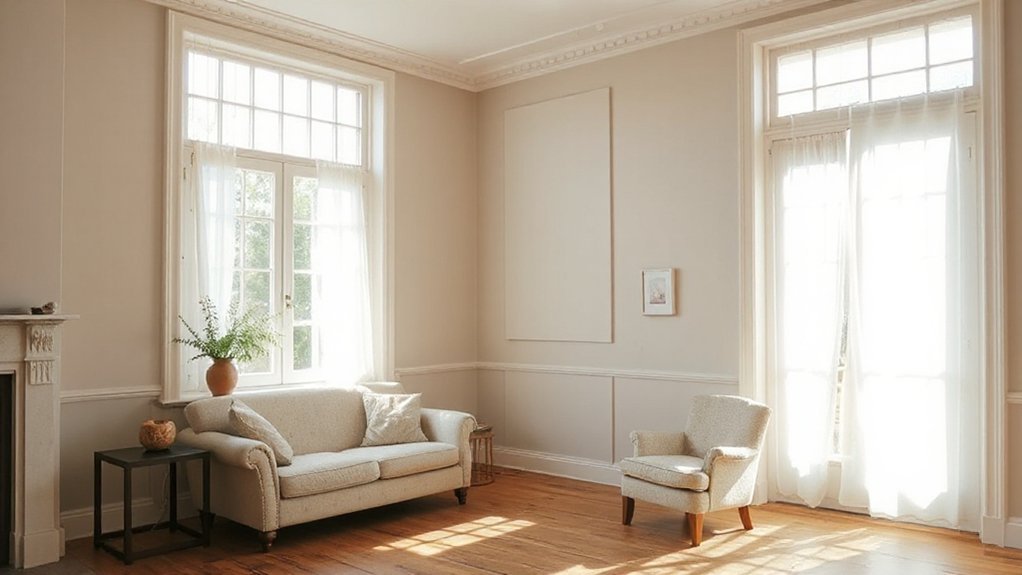
Light, Airy Color Palettes That Feel Brighter
You’ll start by brightening spaces with whites that read as clean light, then balance with soft pastel hues to keep warmth without dulling reflectivity.
Consider reflective surfaces—glass, enamel, or high-gloss finishes—to amplify daylight without increasing glare, and pair them with restrained, airy palettes to preserve perceived brightness.
This approach blends practical accuracy with aesthetic rigor, giving you a precise framework to tune luminosity while preserving character.
Brighten With Whites
Opt for whites and light neutrals to reflect more daylight and visually expand small rooms. You’ll create a crisp, cohesive canvas that enhances natural brightness, while maintaining warmth through careful material choices. Use a restrained palette with subtle shifts in undertones to avoid flatness, and let architectural details breathe.
Interior murals can be kept minimalist or subtly suggestive, providing depth without crowding light. Pair whites with textures—linen, plaster, and wood—to cue tactile contrast that reads as brighter, not sterile. Decorative lighting should supplement daylight, emphasizing layered layers of glow rather than glare.
Maintain tonal harmony across walls, ceilings, and trim to preserve openness, and test color at different times of day to confirm perceived brightness.
- Choose warm whites with slight undertones for walls
- Introduce texture to prevent flat reflections
- Prioritize soft, diffused lighting above harsh fixtures
- Apply interior murals sparingly to avoid crowding light
- Use decorative lighting to sculpt shadows, not overpower brightness
Reflective Surfaces Tactics
Reflective surfaces amplify daylight by bouncing light deeper into rooms, so choose finishes with subtle gloss and smooth textures that don’t glare. You’ll maximize brightness by aligning reflective materials with natural light sources, avoiding busy patterns that trap eye.
Surface treatments matter: for walls, consider satin or low-sheen emulsions that reflect without blasting glare; ceilings benefit from white or cool-toned sheens to lift scale.
Floors can accept polished timber, light ceramic, or epoxy with a gentle gloss to distribute daylight evenly.
Use reflective accents sparingly—glass, chrome, or mirrored elements—so they amplify rather than dominate.
Pair surfaces with light, airy palettes: cool whites, pale neutrals, and subdued blues.
Test samples at different times of day, then refine until the palette feels seamless, luminous, and calm.
Soft Pastel Hues
- Visual balance with undertone consistency
- Layered neutrals for tonal depth
- Light-sourced accents to define edges
- Texture-rich textiles and finishes
- Scale-aware application across rooms
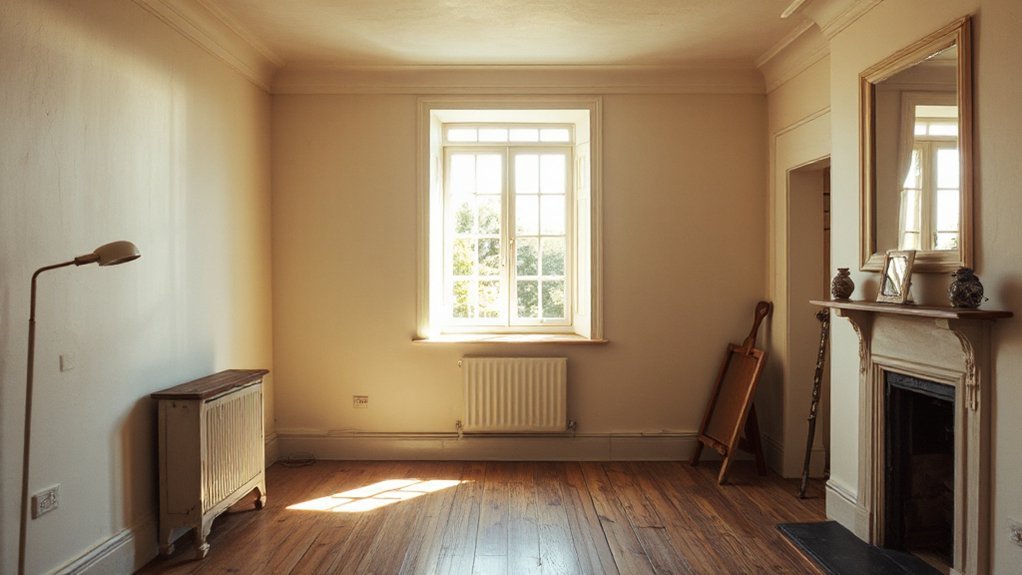
Ceiling and Wall Tweaks to Maximize Brightness
Ceiling and wall tweaks can dramatically boost natural brightness in older UK homes without major renovations. You optimize light by recalibrating surfaces: raise the perceived ceiling height with lighter verticals, and reflectivity rises when you choose high-gloss or satin finishes on walls. Avoid heavy textures that absorb daylight; smooth plaster or minimal grain keeps surfaces luminous.
Use a white or pale wall color with subtle cool undertones to synchronize with daylight shifts, preserving visual clarity. Ceiling height matters: where possible, preserve clean cornices, but employ light, bright paints to elongate lines and reduce shadows.
Directional lighting should complement, not compete with, daylight; position fixtures to bounce light across walls and ceiling. Finally, test color swatches in multiple rooms to confirm stability under varying sun angles.
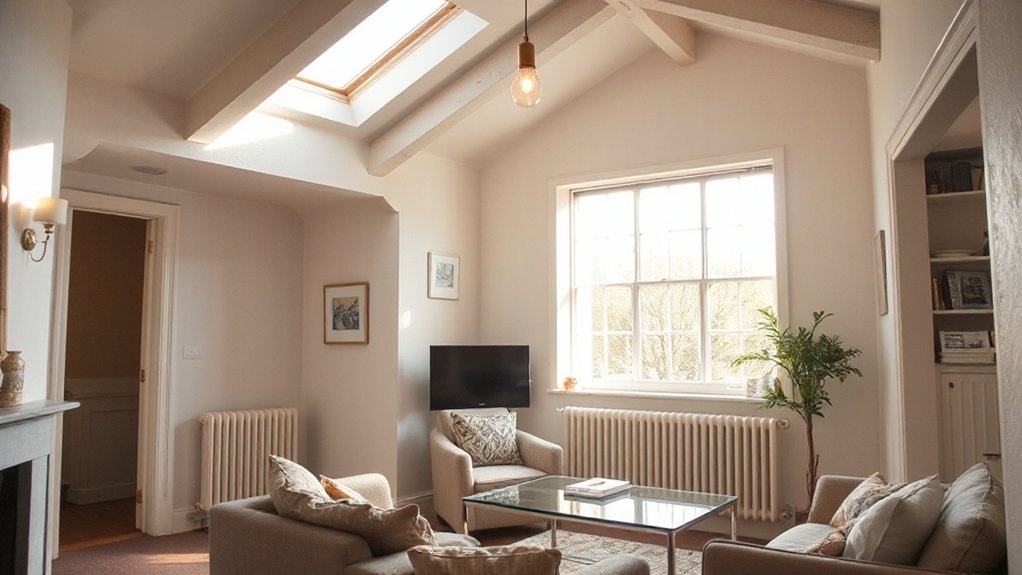
Openings and Passive Skylight Planning for Period Homes
You’ll start by weighing Crown Glass considerations against era-appropriate glazing to preserve character while maximizing light.
Align skylight placement with room geometry and eaves clearance to optimize daylight without overheating.
Then apply passive diffusion strategies—such as frosted or opal liners and strategic baffling—to soften glare.
This approach keeps openings truthful to period homes while delivering consistent luminance throughout the day.
Crown Glass Considerations
Crown glass introduces distinct light and thermal behaviors that must be factored into openings and passive skylight plans for period homes. You’ll respect historical glazing properties while optimizing daylight quality, glare control, and insulation.
Crown glass’s characteristic waviness twice refracts brightness, softening contrast but complicating precise shading and tinting decisions. You’ll balance sash sizes, glazing thickness, and spacer choices to minimize heat loss without sacrificing antique character.
Consider secondary glazing as a reversible upgrade, preserving historic integrity while improving performance. Align glazing quality with frame depth, lintel strength, and roof geometry to avoid cold bridges.
Plan for future retrofit access and maintainability, ensuring ventilation meets modern expectations.
- Crown glass realities reshaped daylight versus thermal performance
- Historical glazing influences sash dimensions and shading
- Secondary glazing as a reversible performance upgrade
- Reflective considerations for passive skylights
- Maintenance, cleaning, and durability implications
Aligning Skylight Placement
Prioritize skylight placement that aligns with key seating or working zones, ensuring even diffusion and avoiding focal hot spots. Evaluate roof window dimensions for proportion with room height, preserving architectural integrity and proportional rhythm.
Consider roof pitch, rafters, and insulation continuity to prevent thermal bridges. Use initial sketches to test multiple positions, then refine with calibrated measurements.
Final decisions should integrate structural feasibility, flashing compatibility, and moisture management. With careful positioning, skylight placement yields meaningful daylight gains while maintaining historic fabric and energy efficiency.
Passive Light Diffusion Strategies
Passive light diffusion hinges on thoughtful openings and passive skylight planning that respect a period home’s architecture while maximizing daylight quality. You’ll combine precise geometry, proportion, and unobtrusive glazing to amplify brightness without glare or heat gain.
Plan openings that align with structure, using sash or fixed panes as needed, and favor light shelves and mullion detailing that diffuse rather than direct sunlight. Integrate passive skylights with ventilated, low-profile cads to minimize thermal penalties.
Consider solar shading and window films to balance light, reduce overheating, and preserve historic character. Prioritize clean lines, soft diffusion, and material honesty to maintain ambience while improving comfort and energy efficiency.
- Strategic opening geometry for diffusion
- Low-profile skylight integration
- Solar shading for glare control
- Window films for heat and UV balance
- Material and detail honesty
When to Consider Conservatories and Light-Friendly Extensions
When your goal is to maximize daylight without undertaking major structural work, conservatories and light-friendly extensions can be a smart compromise. You should evaluate alignment with the sun path, orientation, and existing footprint before committing.
Conservatory design benefits from a low-pitched roof, large glazing, and slim sightlines to minimize visual bulk while maximizing diffuse light. Prefer lightweight framing and proper thermal breaks to curb heat loss and condensation.
Plan for shading controls and ventilation to avoid overheating in summer. Local planning rules and building regulations vary; verify compatibility and potential grants.
Consider integrated lighting and finishes that reflect daylight deeper into rooms. Use light-friendly extensions to preserve original character while extending usable space, ensuring seamless transition with careful thresholds and matching material cues.
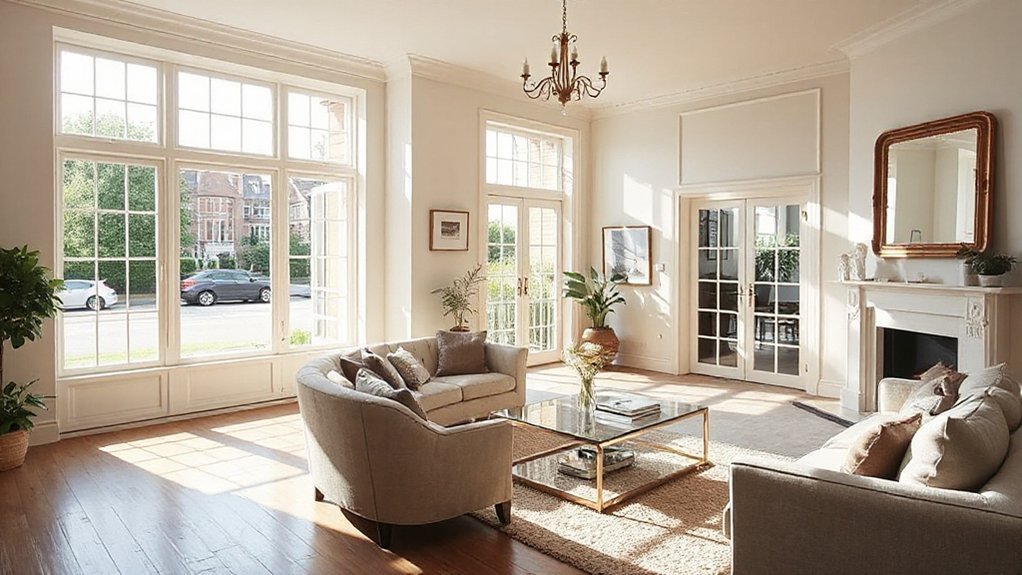
Glass and Glazing Upgrades for Character Homes
Could upgrading glass and glazing truly transform a character home without erasing its soul? You’ll balance historic charm with contemporary efficiency, selecting glazing that respects period details while boosting daylight.
Prioritize slimline frames, multi-pane configurations, and clear, low-emissivity glazing to retain authentic aesthetic. Use warm spacer bars and UV-filtering glass to protect interiors and furnishings without muting light.
Consider high-performance insulated units that fit traditional muntins, ensuring glazing innovation doesn’t overwhelm historic fabric. Draft-proof seals improve comfort and reduce heat loss, making light usage sustainable.
Where possible, leverage skylights or roof windows with discreet cassettes to preserve proportions. Integrate glazing with existing masonry, preserving charm while enabling brighter, more even illumination.
- Slimline frames that honor original sash styles
- Multi-pane glazing with authentic muntins
- Low-emissivity, UV-filtering glass
- High-performance, compatible insulated units
- Discreet skylights for upstairs light balance
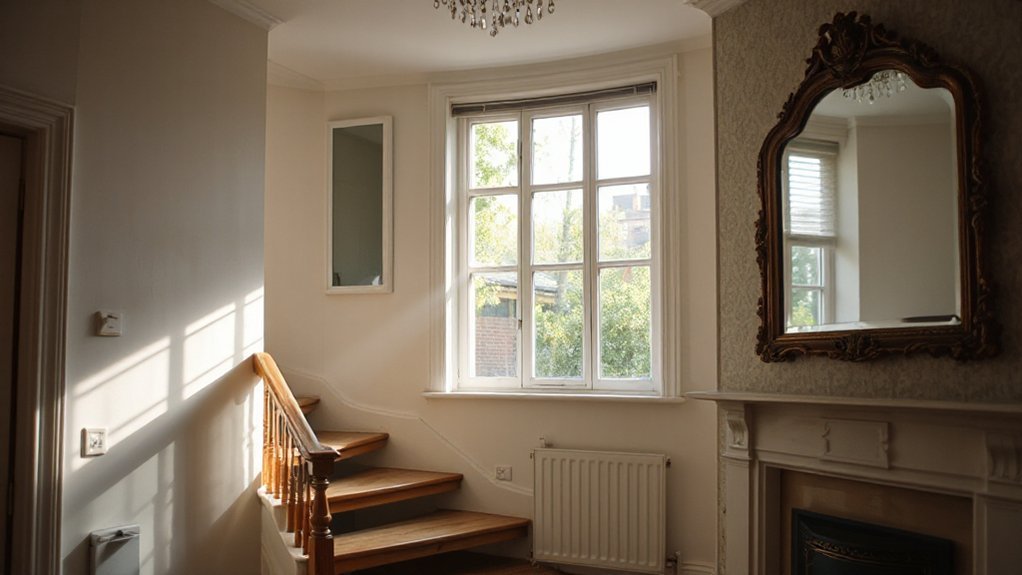
Mirrors That Double Your Daylight in Small Spaces
Mirrors can multiply daylight in compact rooms without widening the footprint. In small spaces, choose a high-quality mirror with a minimal bevel to reduce visual bulk. Place it opposite or adjacent to a primary light source to maximize daylight reflection without creating glare.
For stairwells or narrow hallways, mount a vertically oriented mirror to elongate the perception of space, while keeping frame profile slim and neutral to avoid visual clutter.
In living rooms, position a large, wall-hung mirror across from a window to bounce daylight toward seating zones, enhancing warmth and readability of textures. Consider mirrored panels on cabinetry or glass-tile backsplashes to extend brightness subtly.
Remember mirror placement governs light flow; avoid obstructing windows or doorways.
Floor Choices That Enhance Brightness Underfoot
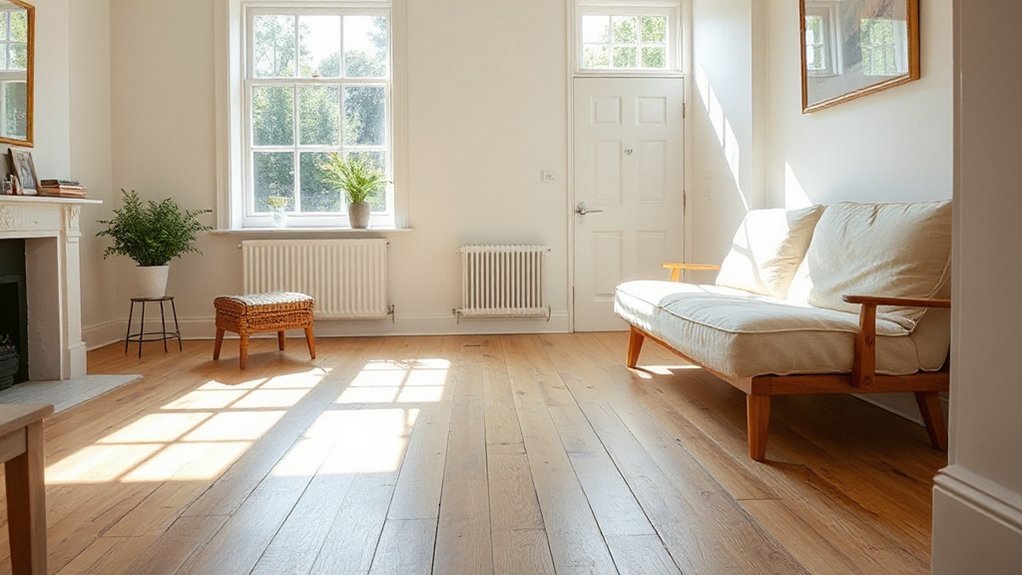
Floor choices that brighten underfoot start with light, reflective surfaces and a tight grain. You’ll optimize underfoot brightness by selecting flooring materials that bounce natural light across rooms, avoiding dense, dark tones. Aim for pale, low-gloss finishes that reduce glare while maintaining durability.
Consider wide planks to minimize seams, which can trap shadows and dull perception. Subfloor warmth matters too; choose materials with light coloration and consistent grain to enhance cohesion. Maintenance should be simple, preserving reflectivity over time.
The goal is a calm, luminous base that supports layered textures and furniture without stealing light. Pairing light hues with smooth textures helps the space feel larger and brighter.
- Light, reflective finishes
- Pale wide-plank designs
- Low-gloss, durable coatings
- Consistent grain and tone
- Easy maintenance for longevity
Layered Lighting to Complement Natural Light
Layered lighting should be planned around natural daylight, using a mix of ambient, task, and accent layers that amplify rather than compete with it. You’ll create daylight zones that feel cohesive with windows and reflective surfaces, avoiding harsh overlaps.
Start with ambient light that evenly fills spaces without glare, then add task lighting where you read, cook, or work, keeping color rendering high for true tones. Use accent lighting to sculpt architectural features or art, but keep it subtle so daylight remains the focus.
Choose dimmable LEDs with a warm-to-neutral color temperature to evolve with the sun’s progression. Position fixtures to minimize shadows on brightly lit surfaces, and harmonize finishes to reinforce a calm, coherent daylight-driven mood throughout the home.
Routine Cleaning to Keep Daylight Flowing
Regular cleaning keeps daylight moving freely through a space, so establish a simple routine that removes dust and smudges from windows, glazing, and reflective surfaces at least weekly.
Consistency preserves glare control and true color rendering, minimizing shadow density across rooms. Focus on accessible elevations first, then ceiling or skylight glare corridors, keeping sills clear and tracks lubricated to maintain smooth operation.
Use microfiber, non-abrasive cleaners, and avoid ammonia on coated glass to prevent residue. Align cleaning cadence with seasonal garden landscaping changes and outdoor lighting to prevent dirt transfer indoors.
- Tidy sills and frames to eliminate dust traps that dull incoming light
- Clean skylights/roof windows for unobstructed daylight
- Wipe glass with streak-free technique, dry with microfiber
- Check seals and tracks for smooth operation
- Schedule seasonal exterior refresh to support outdoor lighting integration
Power Limits and Affordable Lighting Solutions
Choose affordable fixtures that don’t compromise color accuracy or longevity, favoring metal‑halide replacements only when necessary and phasing in LED alternatives with robust heat sinking. Assess existing wiring for compatibility and future upgrades, avoiding oversizing circuits.
Embrace daylight-aware planning—control sensors, timers, and zoning to prevent waste. Record performance data to validate improvements, and invest where return exceeds cost, ensuring consistent brightness without overreliance on electric light.
Room-by-Room, Budget-Friendly Brightness Boosts
To boost brightness room by room on a budget, start with a precise map of tasks and daylight opportunities, then upgrade the most-used zones first. You’ll prioritize intent over impulse, aligning direct daylight gains with your daily habits.
Focus on color contrast and window orientation to maximize perceived brightness: light walls reflect more, darker accents frame glare-free focal points, and windows aligned to shift sun angles through the day.
Target high-traffic rooms, then scale to secondary spaces with efficient, low-cost tactics. Use mirrors strategically to double daylight intervals and swap heavy drapes for light-linen options.
Plan a phased refresh that respects structure, not just aesthetics. Small, measured changes yield measurable brightness without major upheaval.
- Map tasks and daylight opportunities
- Prioritize high-traffic zones first
- Leverage color contrast and window orientation
- Replace heavy drapes with light fabrics
- Use mirrors to extend daylight hours
Seasonal Strategies to Keep Interiors Bright Year-Round
Seasonal strategies hinge on adapting daylight tactics to the changing sun track and weather patterns, so you stay bright without cranking artificial light. You’ll align window treatments with seasons, using lighter drapes in summer to reflect heat and darker, insulating linings in winter to trap warmth.
Arrange furniture to maximize daylight reflections off pale, matte surfaces and keep focal points near existing windows. Seasonal decor should emphasize brightness with mirrors, glass, and high-contrast accents that bounce light deeper into rooms.
Maintain energy efficiency by sealing gaps around sashes and updating glazing where feasible, cutting cold drafts while admitting diffuse daylight. Schedule skylight or clause-fed therapies to exploit low-angled sun in shoulder seasons.
Apply these tactics consistently for year-round clarity and comfort.
Frequently Asked Questions
How Can I Legally Increase Natural Light in Listed UK Homes?
Yes, you can—legally, you must obtain planning permissions and consult Historic preservation authorities before altering listed properties. Make sure alterations respect significance, avoid compromising character, and document decisions; work with conservation officers to align design and statutory requirements.
Do Interior Blinds Block More Daylight Than Curtains?
Interior blinds generally block more daylight than curtains, especially blackout blinds, so choose lighter blind types for added brightness. Window tinting can reduce glare, but consider its impact on color fidelity. Opt for sheer curtains or translucent blinds.
Which Rooms Gain Most From Roof Light Additions?
A striking 30% of total daylight can be gained with roof light installation in suitable rooms. You’ll maximize daylight optimisation in kitchens and bathrooms, where such additions dramatically reduce artificial lighting needs and improve spatial perception.
Can Orientation Limit Daylight Improvements in Older Homes?
Yes, orientation can limit daylight improvements in older homes. You should optimize window placement for sun path, and mitigate with external shading to control glare while maximizing passive light and energy efficiency. Consider setbacks for seasonal shading and reflectivity.
What’s the Cheapest Way to Boost Daylight Without Renovations?
Like a whispered memory guiding light, you’ll boost brightness on a budget with DIY solutions. You’ll prioritize inexpensive, practical steps: apertura windows, reflective interiors, light-colored walls, and strategic furniture placement for maximum daylight without renovations.
Conclusion
In the glow between old walls, you’ll see light bend to your will. Picture narrow stairs opening to a brighter kitchen, a sash of sun stitching the living room with quiet gold. You measure, prune blinds, swap bulbs, and scrub panes until every ray has a clear stage. Precision meets poetry as rooms warm with color and clarity. With steady steps, you reclaim daylight you forgot existed, turning dimness into deliberate brightness you can feel in every moment.