Start by identifying your 1930s style and assess structure readiness, then tackle envelopes first to cut drafts: insulate walls, attic, and floors with dense mineral wool or rigid foam, seal joints, and restore sash windows. Modernise heating and ventilation with smart zoning and an ERV/HRV, sizing systems to measured loads. Restore plaster and brick with breathable, lime-based methods, plan open spaces without losing character, and pick period-appropriate finishes. If you keep going, you’ll uncover practical steps and safeguards that keep the charm intact.
Identify Your 1930s Style and Structure Readiness
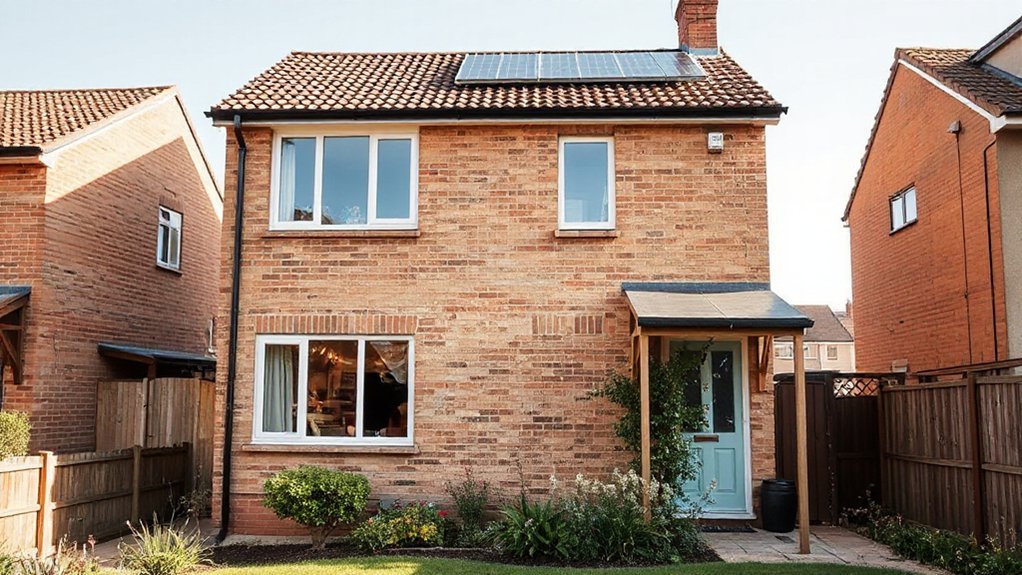
To identify your 1930s style and assess structure readiness, start by auditing both exterior and interior details that define the era—bungalow or semi-detached massing, chimney placement, sash windows, panelled doors, and period cornice lines.
You’ll map architectural authenticity by matching materials, textures, and profiles to original forms, then validate structural integrity through load paths, brickwork joints, party-wall conditions, and roof geometry.
Note how plaster, timber, and metalwork reflect era conventions, guiding your repair or replacement choices. Prioritize detailing that preserves character while enabling safe modernization.
Your assessment should yield a clear taxonomy of features to retain, adapt, or complement, ensuring you maintain the house’s identity. This groundwork informs subsequent upgrades without compromising the 1930s essence.
Envelopes First: Improve Insulation, Weatherproofing, and Drafts
You’ll start by tightening the building envelope with targeted insulation upgrades, focusing on walls, attic, and floors to minimize thermal bridges.
Address drafts and weatherproofing at joints, openings, and penetrations to maintain steady indoor temperatures with passive gains.
This practical, design-minded approach sets a precise baseline for comfort, energy use, and long-term durability.
Insulation Upgrades
Are you maximizing comfort and efficiency from the outside in? Insulation upgrades focus on the envelope’s performance, prioritizing continuous layers and minimal thermal bridging.
You’ll assess existing cavities, then select high-performance materials to raise insulation efficiency without sacrificing wall aesthetics. Use dense mineral wool or properly installed rigid foam where required, ensuring airtight seals at joints and penetrations.
Consider exterior board systems with breathable, energy-rated facings to maintain moisture control while reducing heat loss.
In floors and ceilings, target consistent thermal resistance and eliminate cold bridges around joists.
Document precise R-values for each assembly, confirming compliance with local standards.
Drafts and Weatherproofing
Window restoration can restore sash alignment and glazing efficiency, reducing drafts without compromising historic character.
Draught proofing should target likely ingress points—perimeter floors, sill gaps, and service penetrations—using materials that balance performance with aesthetics. Use high-quality, compatible sealants and weatherstrips that resist movement and moisture.
Test improvements with a blower door or simple smoke test to confirm results. Maintain ventilation to avoid condensation, ensuring a balanced, breathable envelope that preserves comfort and long-term durability.
Modernize Heating and Ventilation Efficiently
Modernize heating and ventilation by prioritizing efficiency and control. You’ll optimize comfort without waste by matching systems to room usage, insulation, and occupancy. Use smart thermostats to modulate heat precisely, and enable energy recovery to reclaim exhaust energy for preconditioning incoming air.
Design airflow paths for balanced pressure and minimal leaks, pairing mechanical ventilation with heat exchange where feasible. Select equipment sized for actual loads, not peak assumptions, and keep controls intuitive for daily use.
- Install zoning and smart thermostats to tailor temperatures by room and time
- Implement energy recovery ventilation (ERV/HRV) to reclaim heat with fresh air
- Size boiler, radiators, and fans to measured loads and dynamic occupancy
- Integrate automated fault detection and maintenance alerts for sustained efficiency
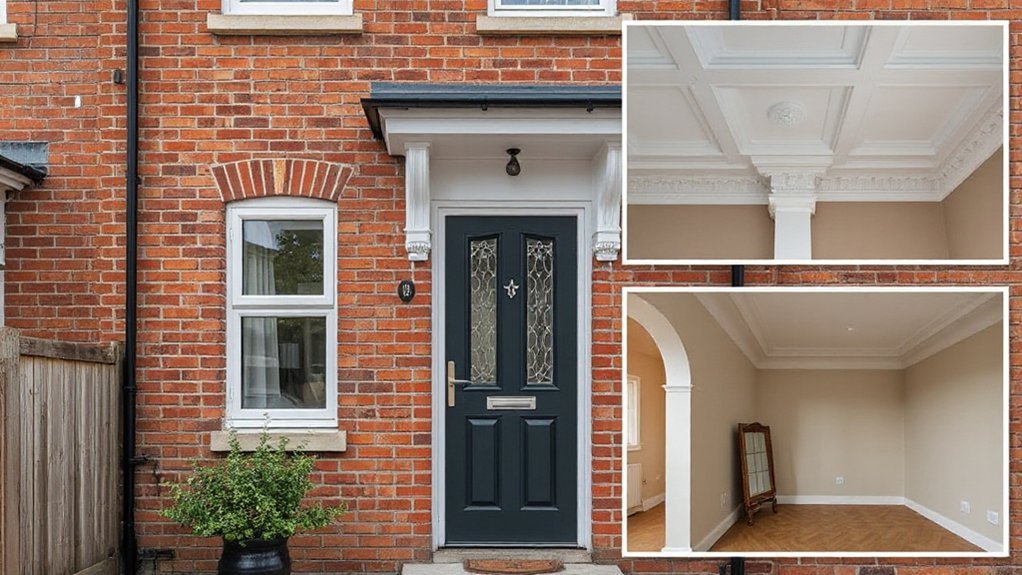
Restore Original Plaster and Brick With Care
Preserving the building’s tactile character starts with evaluating plaster and brick for stability, moisture, and historical integrity. Then, plan targeted repairs that respect original methods.
You’ll diagnose failing plaster joints, hairline cracks, and brick dowels, logging damp signatures and salt efflorescence. Prioritize reversible interventions and compatible materials to avoid future harm.
For plaster restoration, matching lime-based mortars and lime plaster textures preserves breathability and thermal mass, while preserving acoustic softness. Use careful removal of deteriorated layers, guided by profiles and thickness, then re-ladle or trowel with skill to maintain a consistent finish.
For brick preservation, clean with low-suction methods, reseat loose units, and repoint with historically appropriate mortar. Document alterations for future maintenance, ensuring both plaster restoration and brick preservation reinforce the building’s original cadence and character.
Plan Open Spaces Without Losing Character
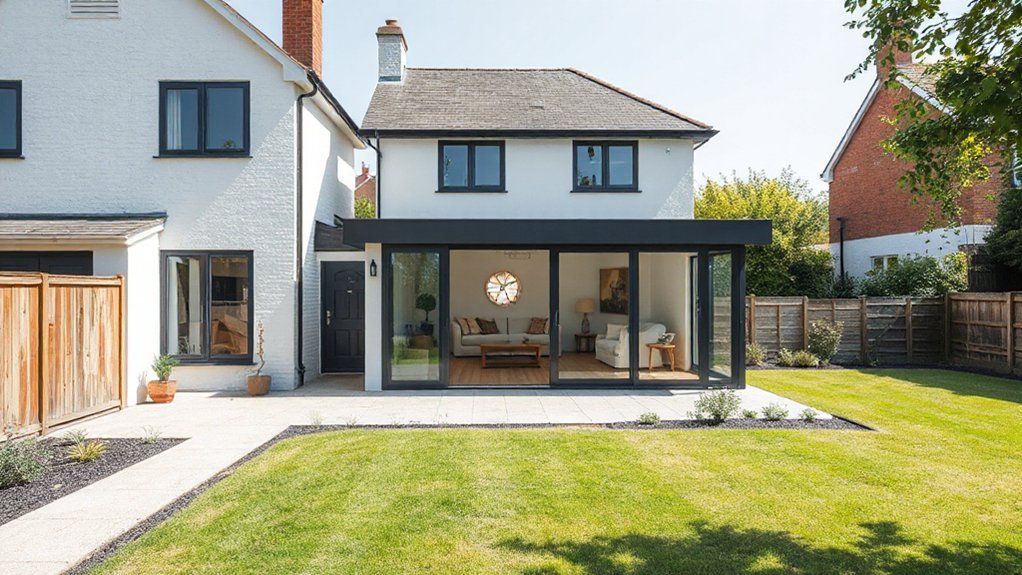
You can plan open spaces by prioritising clear sightlines and logical zoning that respect existing layouts.
Keep the balance between flow and defined areas, using open plan zones that still preserve key features like chimney breasts or cornices.
This approach blends openness with the house’s character, guiding where to expand without erasing its original identity.
Open Plan Zoning
- Define zones with furniture arrangement that guides movement and visually separates functions without rigid barriers.
- Use finishes and lighting to cue shifts, combining warm timber with cool stone for contrast and cohesion.
- Integrate privacy solutions via strategic screens, shelving, and raised platforms to create intimacy where needed.
- Harmonise acoustic treatment and furniture density to reduce noise spill and maintain a calm, unified ambiance.
Preserve Existing Features
To preserve existing features while planning open spaces, you should assess structural and architectural elements that define the home’s character and determine how to integrate new layouts without erasing them. Start with the historic preservation of mantelpieces, plaster moldings, timber joists, and door surrounds.
Then, map sightlines and focal points. Prioritize architectural integrity by matching materials, finishes, and grain direction in any alterations. Use non-invasive strategies: rearrange services rather than remove decorative fabric, and preserve original alcoves, stairs, and fireplace cores where feasible.
Introduce contemporary openness through careful framing, glass, or partial partitions that respect proportion and scale. Document existing conditions, create a benchmark plan, and test daylight, acoustics, and flow.
The result should feel cohesive, modern, yet true to the house’s lineage.
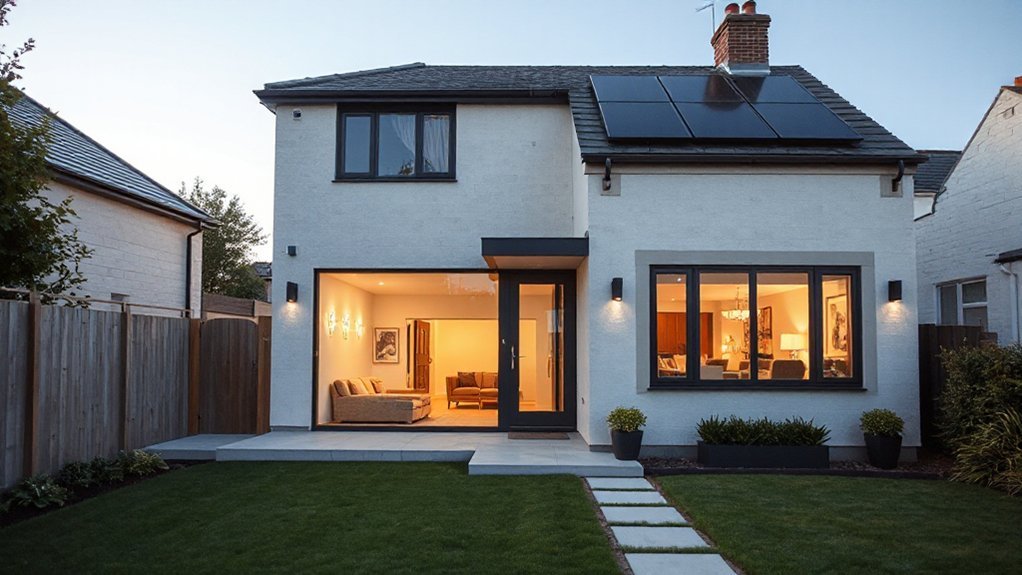
Update Windows and Doors for Comfort and Authenticity
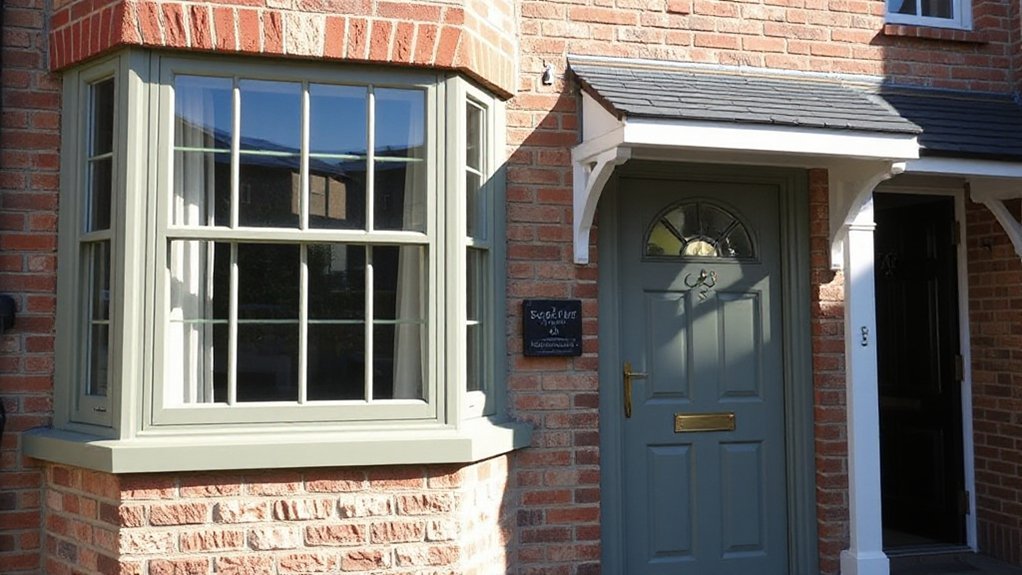
Upgrading the windows and doors in a 1930s semi-detached home blends comfort with authentic character. You balance performance and period appeal by selecting efficient, correctly scaled units that echo historic proportions while meeting modern standards.
Prioritize sash or casement window styles with slim profiles, double glazing, and reputable A-rated hardware to maintain vintage charm and reduce heat loss.
Doors should suit existing plasterwork, with solid-core cores and insulating linings to tighten shells without compromising rhythm.
- Match window styles to period proportions while upgrading glazing for energy efficiency
- Choose durable hardware with authentic detailing and weather resistance
- Use timber options with low-emission finishes to preserve interior air quality
- Align door profiles with existing architraves to maintain continuity and charm
Clever Lighting to Highlight Period Details
You can master the effect by layering ceiling glow to softly sculpt existing cornices and plasterwork. Use heritage tap lighting to pick out timber details and hardware without glare, keeping controls simple and dimmable.
Pair accent wall illumination with precise aim to reveal period textures while preserving a calm, cohesive scheme.
Layered Ceiling Glow
- Plan layered layers: uplights, cove lighting, and backlit panels near focal details.
- Align with architectural lines to emphasize cornices and plasterwork.
- Select dimmable sources to modulate mood and reduce glare.
- Integrate fittings with ceiling beams for seamless aesthetics.
Heritage Tap Lighting
Positioning is deliberate: taps are set to skim cornices, architraves, and fillets, casting precise glints along profiles rather than broad washes. In practice, you select fixtures with low glare and adjustable optics, enabling micro-adjustments as furniture shifts or finishes age.
This technique supports period hardware restoration by highlighting patina, brass grain, and engraving without masking them with modern chrome. You balance brightness with ambient layers so textures breathe.
Documentation and maintenance notes ensure wiring remains unobtrusive, and calibrations survive renovations. Heritage tap lighting therefore marries technical control with visual storytelling.
Accent Wall Illumination
- Choose low-profile wall washers or cove lighting to frame mouldings without washing out contrast.
- Calibrate color temperature around 2700–3000K to preserve warm patina while enhancing detail.
- Use dimming controls to shift from task focus to mood reverence as needed.
- Align fixtures with wall planes to create gradients that emphasize depth and texture.
Period-Appropriate Flooring and Finishes With Moderndurability
Period-appropriate flooring and finishes should be chosen for both character and durability, balancing authentic period cues with modern practicality. You select materials that echo the era’s texture while meeting today’s wear demands.
Opt for wide-plank oak with a low-sheen finish or well-rendered parquet to evoke vintage charm without excessive maintenance. For resilience, pair natural stone or ceramic tiles in entries and kitchens with underfloor heating compatibility, ensuring moisture resistance and long life.
Wall finishes should align with gloss levels and plaster textures typical of the period, using lime-based renders or limewash for breathability and character.
Consider engineered timber where structural limits exist, and choose durable, repairable surfaces rather than disposable trends to maximize flooring durability and cohesion.
Eco-Friendly Upgrades That Respect the Era
Moving from period-appropriate finishes to eco-friendly upgrades, you can reduce environmental impact without compromising the house’s character. You’ll balance performance with period-style restraint, selecting materials that perform today without shouting the era.
Prioritize airtight detailing, passive cooling, and daylighting to minimize energy use while preserving proportion and texture. Use sustainable materials that age gracefully and resist wear, and opt for eco friendly paints that maintain subtle undertones and sheen consistent with original finishes.
The goal is refinement, not renovation showmanship, so you’ll test finishes on sample boards and document long-term behavior.
- Choose responsible timber and recycled-content substrates for floors and walls.
- Apply low-VOC, eco friendly paints with durable, matte or satin finishes.
- Implement high-performance yet discrete insulation upgrades.
- Integrate energy-efficient glazing with slim profiles to preserve character.
Budget, Trades, and Maintenance: What Comes Next
Budget, trades, and maintenance come next as you translate design intentions into tangible work plans. You’ll establish a clear budget framework, aligning costs with project phases and contingencies, so you maintain control without stalling progress. Begin with budget planning that accounts for materials, labour, and permits, and document every assumption for traceable decisions.
Maintain a living schedule that reflects realistic lead times and sequencing, then monitor changes to avoid scope creep. Trades coordination becomes the backbone of execution: define responsibilities, specify interfaces between trades, and set short, precise communication cycles to keep onsite friction low.
Implement a maintenance calendar early, with routine checks that protect investment and prevent retrofits from becoming reactive fixes. Constantly reassess risks, optimise for efficiency, and preserve the home’s character alongside modern performance.
Frequently Asked Questions
How Do I Balance Modern Tech With Period Integrity?
You balance modern tech with period integrity by prioritizing interior aesthetics and energy efficiency; integrate concealed wiring and smart controls into cabinetry or walls, while preserving original detailing. Optimize insulation, daylight, and acoustics to maintain authentic ambience and efficiency.
What Permits Are Typically Required for 1930S Homes?
You’ll typically need approvals for alterations affecting character, so consult Historical preservation guidelines and Building regulations; expect planning and possibly listed-building permissions. Coordinate with conservation officers, document changes, and guarantee fire safety, ventilation, and energy standards meet current requirements.
Can Structural Changes Affect Listed Status or Value?
Could structural changes affect listed status or value, you ask? Yes—structural alterations can influence historic preservation outcomes and resale value. You weigh historical preservation against practicality, ensuring aesthetic harmony while meeting codes, budgets, and long-term performance.
How Do I Budget Unpredictable Restoration Costs?
You should build a contingency fund, allocating 10–20% for unknowns, and track every estimate against actuals; prioritize Vintage charm and Historic preservation, document costs, and use phased milestones to adapt your budget as surprises arise.
What Maintenance Schedule Ensures Longevity of Upgrades?
Back up plan: maintain a proactive schedule, you’ll inspect HVAC, electrical, roofing quarterly and kitchen plumbing annually to protect historic authenticity and vintage preservation. You’ll log wear, replace components, and calibrate finishes for consistent longevity and aesthetics.
Conclusion
You’ve mapped a path where the old brick speaks through new breath: insulation first, then warmth that doesn’t shout, but whispers. Like a well-tuned instrument, the plaster, brick, and timber sing in balance, not battle. You’ll choreograph light to skim period detail, lay durable surfaces, and invite efficient, quiet systems to hum. The house, both archive and ally, grows without losing its handwriting. Modernise with care, and it’ll endure, quietly eloquent, through the seasons.