You’ll avoid a full-scale remodel by confirming the wall isn’t load-bearing before you start, and you’ll plan for proper beam or support if it is. You can transform two rooms into one light, open space with careful layout, finishes, and sound control. But the right approach depends on structure, permits, and timing, so you’ll want a clear path forward. The next steps reveal how to assess feasibility, choose openings, and finalize details for a cohesive result.
Key Takeaways
- Confirm whether the wall is load-bearing by inspecting ceiling joists, beams, and exterior continuity before removal.
- Plan selective reinforcement (headers or steel) only where loads require it, to maintain safety.
- Reroute electrical, HVAC, and plumbing quietly to preserve comfort while creating open space.
- Use soundproofing and vibration controls (underlayment, resilient channels, mass-loaded vinyl) to maintain quiet rooms.
- Define sightlines and lighting with glass partitions, task lighting, and strategic furniture to maximize brightness and flow.
Can I Remove an Interior Wall Without a Major Remodel?
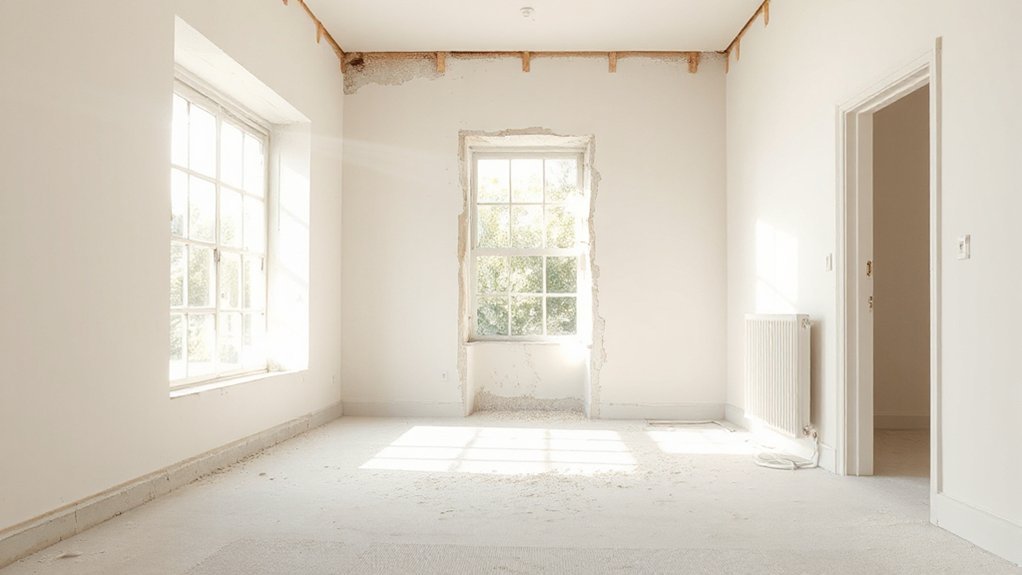
Yes—you can often remove an interior wall without a full remodel, but it depends on the wall’s function and structure. You identify load-bearing status by checking ceiling joists, beam alignment, and exterior walls for continuity.
If non-load-bearing, you typically remove with minor framing, patch drywall, and reroute utilities as needed. You’ll verify electrical, plumbing, and HVAC clearances before cutting, preventing future hazards.
You keep changes focused on improving flow rather than overhauling systems. After removal, you plan decorative accents and wall textures to integrate the space, selecting finishes that visually unify the rooms.
Use steel or laminated studs only where necessary, and cap exposed edges with clean drywall to preserve a seamless look. Maintain access to electrical boxes and ensure code-compliant fire blocking where required.
How to Tell If Your Wall Is Feasible to Remove
To determine whether a wall can be removed, start by confirming its function and structure: is it load-bearing or non-load-bearing, and does it tie into exterior walls or ceilings for support? You’ll perform a quick structural check to avoid surprises later.
- Identify if there are vertical columns, beams, or headers directly above the wall.
- Confirm whether drywall, studs, or masonry integrate with main structural elements and exterior framing.
- Note any connections to electrical, plumbing, or HVAC that could complicate removal and require wall reinforcement or rerouting.
A precise structural analysis guides decisions. If removal is feasible, plan reinforcement only where needed, not as a blanket approach.
Wall reinforcement considerations, combined with a focused structural analysis, prevent hidden loads from failing after demolition.
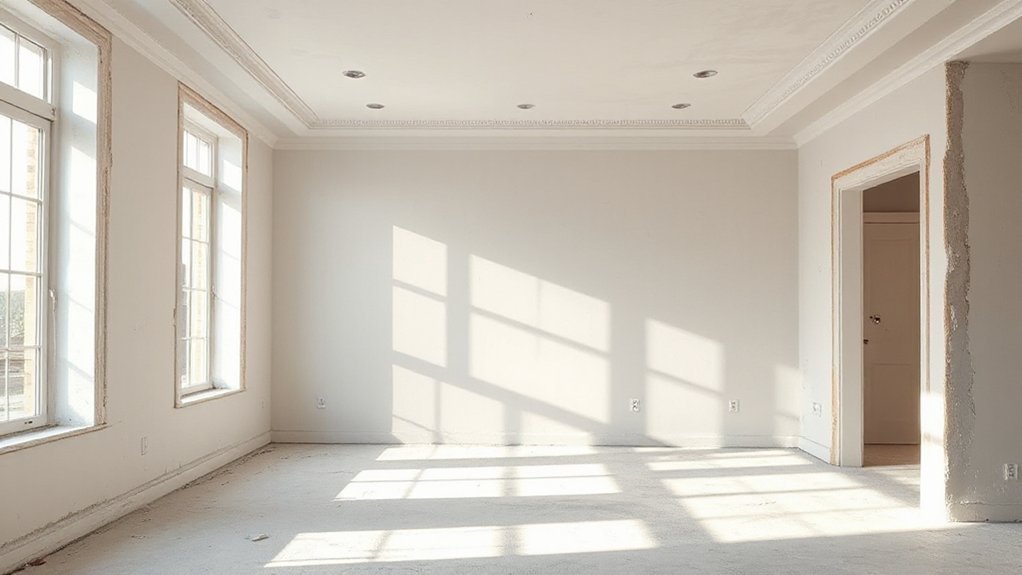
Planning Flow, Light, and Zoning in One Open Space
You’ll map a clear flow that guides movement from entry to key zones without dead spots, ensuring each area supports its function.
Balance natural light and zoning so open space feels cohesive while still defining dining, work, and living areas.
Consider how sightlines, storage, and traffic patterns influence layout decisions, and set criteria for prioritizing zones that maximize usability and comfort.
Planning Flow Clarity
When planning an open-space layout, prioritize clear flow, balanced light, and intuitive zoning from the outset to prevent later rearrangements. You’ll align movement paths with primary functions, minimizing cross-traffic and dead zones. Consider how traffic, seating, and work zones connect without abrupt shifts, and test the route by walking the space with furniture footprints in mind.
- Define focal points and sightlines to maintain visual clarity.
- Map zones by function, ensuring each area has direct access to light and outlets.
- Choose wall textures and paint colors that reinforce flow while supporting subtle zoning cues.
Keep finishes cohesive—wall textures and paint colors should unify zones yet allow distinct areas to read as separate. Revisit plans with a quick scale mock-up before hard changes.
Light and Zoning Balance
How can you balance light and zoning in a single open space without sacrificing flow? You map zones by function, not walls, using furniture, color, and lighting to define areas while keeping sightlines clear.
Prioritize natural lighting to stretch across gradations; place wall openings, glass partitions, or signage to indicate zones without blocking light. Align ceiling treatments and skylights with the open corridor to maintain uniform brightness, avoiding dark corners that interrupt spatial rhythm.
Use graduated finishes—lighter hues near windows, slightly deeper tones inward—to create spatial harmony. Incorporate task lighting at workstations and accent lighting to sculpt depth, ensuring every zone remains visually connected.
Review furniture scale and placement to sustain flow, so circulation remains uninterrupted across the entire space.
Choosing Openings, Beams, and Support: What Works Best
Choosing openings, beams, and supports hinges on your space, loads, and goals: start with a clear plan for what you’re removing and what must stay to maintain structural integrity. You’ll choose based on span, load type, and future use, then confirm with a pro.
Focus on what works best for light and flow, not just appearance. Decor features like decorative arches and sliding doors can define your connections without sacrificing structure.
Consider one of these proven approaches:
1) Load-bearing beam with a supported header for wide openings.
2) Direct structural studs replaced by a steel or laminated timber beam.
3) Non-load-bearing partitions converted into decorative or concealed support elements.
Finalize details early, then test for movement, and seal with clean, minimal finishes.
Finishes That Make the Transition Seamless (Materials and Details)
Smooth shifts come from matching materials, profiles, and edge details so the eye reads a single, continuous space. You’ll select finishes that read as one layer across the former wall and adjacent rooms, avoiding abrupt changes in color, texture, or sheen.
Prefer continuous drywall or plaster where possible, with a single paint base and consistent glaze. For profiles, use decorative moldings that align with door casings and cabinetry, reducing visual breaks while preserving subtle architectural interest.
Implement paint techniques that unify tones—soft-edge blends, light-to-dark gradations, or two-coat saturation—so progressions feel intentional, not hurried. Edge details should be sharp yet forgiving at junctions, and floor progressions must be flush or feathered.
Test samples on all materials, then document exact specifications for consistency.
Sound and Vibration: Keeping the New Space Quiet
You’ll start by selecting quieting techniques for walls, targeting both airborne and impact noise, so sound leaks are minimized at joints and studs.
Implement vibration reduction methods—like resilient channels, mass-loaded vinyl, and decoupled framing—to keep the new space calm even when neighboring areas are active.
We’ll compare performance, installation steps, and practical trade-offs to keep you moving toward a sound-conscious, comfortable finished room.
Quieting Techniques For Walls
Quieting walls starts with a clear plan: identify the exact noise pathways—air leaks, structure, studs, and surfaces—and then address them with targeted techniques. You’ll apply soundproofing techniques and acoustic treatments that minimize transmission and reverberation, creating a calmer, unified space.
- Seal gaps and penetrations: use acoustic sealant around outlets, wires, and joints; install weatherstripping on doors to block leakage.
- Strengthen assemblies: add mass with resilient channels, double drywall, or gypsum board, and decouple studs from adjacent walls where feasible.
- Treat surfaces: install absorptive panels or mineral wool within cavities; finish with a breathable, dense surface layer to dampen impact and airborne sound.
These steps streamline quieting without compromising structure, delivering a ready-for-use, peaceful room.
Vibration Reduction Methods
Vibration reduction hinges on isolating and damping how energy travels through structure and fixtures. You’ll start by evaluating paths: walls, floors, and ceilings that transfer vibration from adjacent rooms or equipment.
Implement vibration isolation where practical, using isolation clips, decoupled studs, and resilient channel systems to break direct contact and reduce transmission. For floors, consider floating assemblies or resilient underlayment beneath finishes to dampen footfall and appliance vibrations.
Treat ceiling junctions with anti-vibration hangers to prevent lofted noise transfer. Soundproofing techniques should pair with structural tweaks: seal gaps, use mass-loaded vinyl on shared surfaces, and add laminated glass or heavy-dense panels where glass is unavoidable.
Validate results with simple room tests, then refine detail gaps and transitions to maintain a quiet, cohesive space.
Budget, Permits, and Timeline: What It Really Takes
Budgeting for an internal wall removal isn’t guesswork; it’s a plan you can trust. You’ll map costs, timelines, and constraints so you know what to expect upfront. A precise approach keeps surprises to a minimum and guides decisions you’ll live with.
- Cost analysis: itemize materials, structural needs, permits, and contingency, then compare quotes to identify value.
- Permit process: confirm required approvals, timelines, and any inspections so work stays compliant.
- Timeline: align demolition, framing, electrical, and finish work with contractor milestones to avoid delays.
Real-World Transformations: Before-and-After Case Studies That Work
Real-world transformations demonstrate what works in practice: you’ll see how real homeowners and designers convert space, restore flow, and boost value through targeted wall removals.
Case studies show clear timelines, precise wall-spot choices, and practical results you can replicate.
In one example, decorative accents define zones after removal, guiding eye movement without clutter.
In another, furniture placement anchors the new open plan, preserving function while maximizing light.
Note how structural checks determine load paths, ensuring safety without sacrificing openness.
HVAC and electrical rerouting are quietly handled, preserving comfort.
You’ll observe staged renovations that minimize disruption, with finishes matched to existing textures for cohesion.
The common thread: measurable gains in usable area, brighter rooms, and better resale appeal.
Frequently Asked Questions
How Long Does It Take to Complete a Wall Removal Project?
A typical wall removal takes 1 to 3 days, depending on scope and conditions. You’ll start with framing assessment, then shut off utilities, protect surfaces, and remove drywall.
You’ll use demolition tools like sledge hammers and reciprocating saws, plus dust control measures. Expect debris cleanup between stages, and finalize with studs, electrical, and insulation checks.
If you encounter hidden plumbing or studs, budget extra time. Plan for permits and inspections to avoid delays.
Can I Remove Load-Bearing Walls Safely Without a Engineer?
Yes, you shouldn’t remove a load-bearing wall safely without a professional. Before any cuts, get a structural permit and a load bearing assessment.
You’ll need plans, temporary supports, and a beam or lintel design vetted by an engineer. Don’t proceed on a guess; consult specialists, schedule inspections, and follow code.
If engineering approves, coordinate framing, bracing, and clear load transfer. Your safe solution starts with permits, assessment, and proper installation.
What Are the Hidden Costs in Open-Space Remodeling?
Open-space remodeling hides costs like structural reinforcement, electrical upgrades, and HVAC repositioning.
Your hidden costs include cost estimation for permits, surprise drywall and finishes, and potential moisture or soundproofing checks.
You’ll want a precise plan with a contingency.
Secure renovation permits early, itemize scope, and obtain fixed-price bids for critical trades.
Expect labor variations and delivery delays.
Track costs against milestones, and verify that your cost estimation covers post-build touch-ups and compliant, safe open space results.
How Will Natural Light Distribution Change After Removal?
Natural light will distribute more evenly after removal, brightening previously dim corners and creating a sense of extended space.
You’ll improve spatial flow, as light shifts through from windows to interior areas, reducing reliance on artificial lighting.
Expect highlights along new sightlines and fewer shadows at midday.
To optimize this, position openings and reflectives thoughtfully, use lighter finishes, and consider skylights or a light shelf where appropriate.
This approach preserves depth while maximizing daylight penetration.
Do I Need a Neighbor Consent for Structural Changes?
Yes, you typically need neighbor approval for structural changes that affect shared boundaries or loads. It depends on local rules, so you must check legal requirements with your building department and, if applicable, your HOA.
You’ll likely need permits, structural engineer notes, and possibly neighbor consent if party walls are involved.
Start early, document impact, and secure all permits to avoid delays or disputes. Stay proactive and precise about timelines and responsibilities.
Conclusion
As you plan, a quiet coincidence helps you see the payoff: your two rooms don’t just merge—they reveal a brighter, more functional flow you already suspected. You’ll confirm feasibility early, design around load paths, and choose finishes that dress the connection as a single space. With permits, a clear timeline, and expert help, the result isn’t chaos but cohesion—light, sightlines, and better everyday living, pulling every detail together into one seamless, practical open home.