If you think a dark, narrow, or north-facing room is hopeless, consider this: the right setup can flood it with light without exhausting space or budget. You’ll get practical, design-forward tweaks—from color to layout to layered lighting—that feel intentional, not gimmicky. There’s more to it than paint and lamps, and a clear path awaits you, step by step, as you see how each choice shifts the mood and perception of size. Let’s start.
Key Takeaways
- Boost natural light by maximizing window exposure with light-colored walls and reflective surfaces to bounce daylight deeper into the room.
- Use layered lighting (ambient, task, accent) with dimmers and cool-to-warm balance to simulate daylight when indoors.
- Opt for low-profile, light-finished furniture and transparent storage to preserve sightlines and reduce visual heaviness.
- Employ mirrors and mirrored panels opposite windows to amplify daylight without crowding the space.
- Choose diffusing window treatments and manage glare to create a bright, evenly lit environment year-round.
Identify the Brightness Blockers in Dark or Narrow Rooms
In dark or narrow rooms, brightness blockers aren’t just obvious shadows—they’re the culprits hiding in plain sight: small gaps around doors and windows, stubborn light leaks from electronics, and the reflections buzzing off glossy surfaces. You’ll spot them by tracing light paths from source to surface, noting every seam, hinge, and meter of glass.
Prioritize natural light by evaluating window placement: align openings with furniture lines, avoid obstructions, and consider transom or side windows to extend daylight without glare.
Address gaps with tight seals, weatherstripping, and blackout-free drapery tracks to keep brightness controlled yet steady. Tidy cables, switch off unused electronics, and choose matte finishes that diffuse rather than reflect.
With deliberate window placement, you invite usable light without chasing shadows.
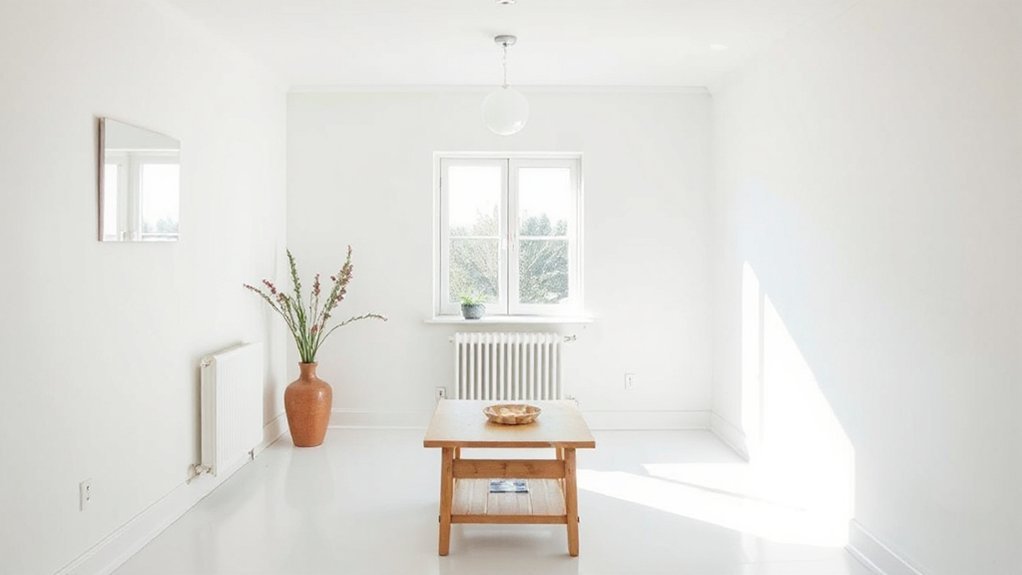
Set a Light-Friendly Color Palette That Opens Spaces
A light-friendly palette starts with choosing whites, creams, and cool neutrals as the base, then dialing in soft accents that extend the sense of space. You’ll want even undertones across walls, ceilings, and major furnishings so color reads as one continuous field, not a patchwork.
Opt for low-saturation blues, greiges, and pale taupes to maintain brightness without coldness. Introduce gentle pops—sage, blush, or pale yellow—in upholstery, cushions, or artwork to create focal points without breaking the flow.
Color harmony comes from a restrained palette that repeats tones across rooms, easing smooth and assuring coherence. Mood enhancement comes through lighting paired with these hues: cool neutrals feel airy, while warm-accented neutrals soften shadows.
Keep trims near-white for crisp definition and perceived height.
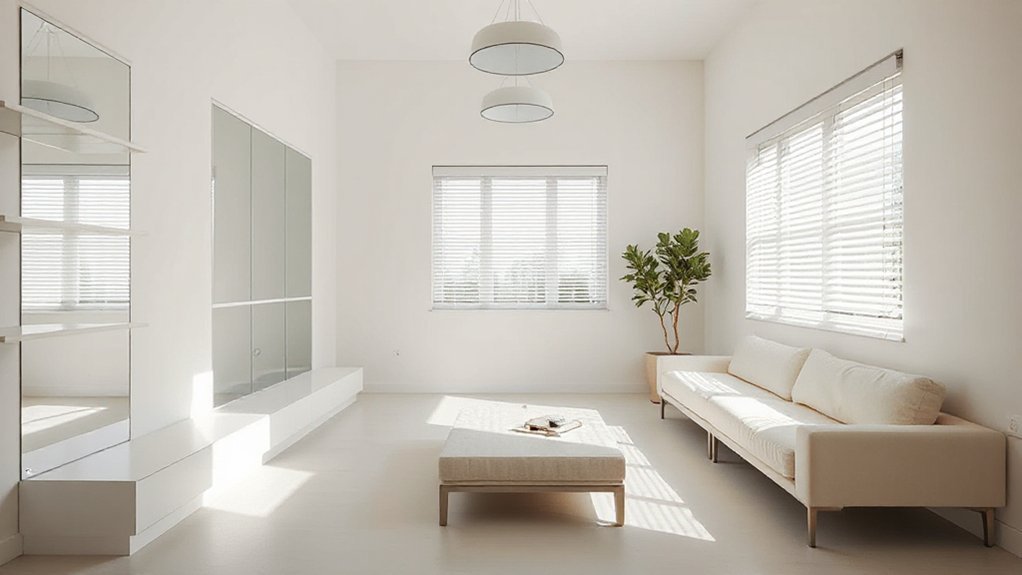
Use Reflective Surfaces to Bounce Light Efficiently
Ever wonder how to make a small, dim room feel brighter without cranking the lights? You can use reflective surfaces to bounce light efficiently, guiding it where you need it most. Place high-gloss finishes and light-colored panels opposite windows to create a brighter core without added fixtures.
Mirrors, glass, and lacquered surfaces reflect both natural and artificial light, expanding perceived space with minimal effort. Consider framed wall panels in airy whites or soft neutrals to soften glare while preserving contrast.
Keep reflections intentional: align mirrors to capture daylight rather than view clutter. For subtle light diffusion, opt for frosted glass or acrylic near task areas, spreading illumination evenly.
Maintain cleanliness; dust dulls reflective quality and undermines the strategy.
Build Lighting Layers: Plan Ambient, Task, and Accent in Sequence
Start by mapping your ambient layer first, using soft, even light to set the room’s mood without harsh hotspots.
Then layer in task lighting with focused beams that follow your workflow zones, keeping brightness adjustable and glare-free.
Finally, add accent lighting to highlight textures and architectural details, ensuring each layer supports the others for a cohesive, usable space.
Plan Ambient Layers
In planning ambient layers, you’ll map out a gentle hierarchy: start with a soft general glow that defines the room’s mood, then layer in task lighting for specific activities, and finally add accents to highlight textures and architectural cues.
Choose luminaires that don’t overpower the space, focusing on diffuse sources and wide beam angles to maintain a seamless wash.
Consider natural window treatments to maximize daylight control without dulling shadows, pairing them with dimmable fixtures to adapt from morning brightness to evening softness.
Plan around ceiling height by staggering fixtures at different planes—recessed, pendant, and wall washers—to avoid flat illumination.
Keep color temperature consistent, favoring warm whites for coziness and depth, and assure transitions feel intentional, not incidental, to maintain a calm, cohesive atmosphere.
Build Task Layers
With your ambient foundation set, focus now on building task lighting that supports specific activities without overpowering the room’s glow. You’ll map tasks to zones: reading nooks, cooking prep, work desks, and dressing mirrors.
Choose directional fixtures that pocket-light where you need it, like adjustable sconces, under-cabinet LEDs, and flexible desk lamps. Prioritize color accuracy and a gentle dimming range to keep shadows soft.
Integrate natural light by aligning tasks away from glare and layering with window treatments that diffuse daylight without sacrificing night visibility. Use contrasting finishes to keep surfaces readable and tactile.
Test brightness at eye level and adjust spacing so every zone remains usable without clutter. Finish with discreet dimmers to fine-tune atmosphere as daylight shifts.
Assess Your Light: How North-Facing Walls Affect Brightness
Natural light in a north-facing room tends to be cooler and steadier, so assess how that consistent brightness shapes your color choices, fabric textures, and task zones.
You’ll notice North facing walls reflect a muted, even glow that softens edges and reduces glare. Choose cool whites or pale taupes with slight blue undertones to preserve clarity without washing out space.
For fabrics, lean into matte finishes and tightly woven weaves that resist color shift from ambient light, while rugs in mid-tones anchor floors.
Task zones benefit from layered lighting—adjustable desk lamps and wall sconces—to fine-tune contrast for reading or detail work.
Use natural light strategically in layouts, avoiding heavy drapes that steal brightness.
Natural light guides your palette, elevating focus and calm.
Layout Strategies That Create Space and Flow
North-facing light sets a calm, steady backdrop, so map your layout to preserve openness without washing out color. You’ll optimize flow by zoning functions along the longest wall, avoiding dead corners, and using sightline breaks that don’t block light.
Prioritize vertical storage and narrow furniture to keep pathways clear, and place primary seating away from direct glare while still benefiting from diffuse daylight. Align rugs, sconces, and mirrors to reflect natural light without creating hotspots.
Incorporate natural ventilation by positioning operable windows and vents to encourage cross-breeze, reducing heat buildup without sacrificing privacy considerations. Keep traffic patterns intuitive with soft passages between living, dining, and work zones.
Use consistent materials and a restrained palette to unify areas while maximizing perceived space.
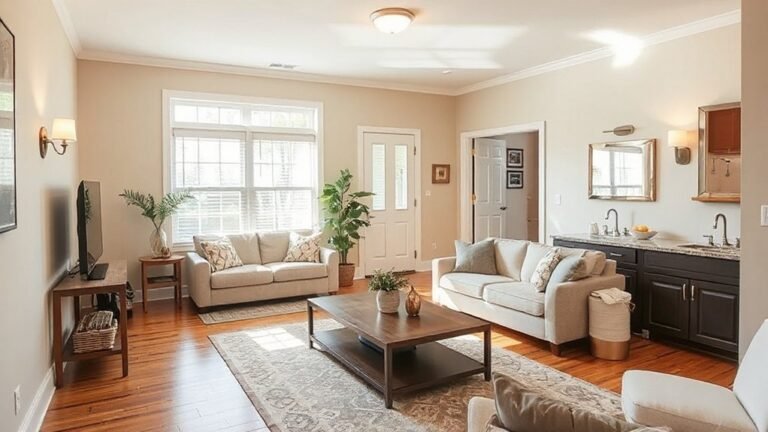
Furniture That Preserves Sightlines and Light
Need to keep sightlines open while you place furniture that doesn’t block daylight. Choose low-profile pieces with slim profiles and light finishes to minimize visual bulk.
Prioritize open-backed shelving and transparent storage to maintain a sense of airiness, and place seating where it doesn’t interrupt window views.
Align sofas and consoles parallel to walls that face windows to maximize light bounce, while avoiding obstructive accents in the center of rooms.
Allow pathways to remain unobstructed, using compact side tables and nesting options that tuck away when not in use.
Think in terms of furniture flow: avoid heavy clusters that create visual barriers.
For sightline preservation, elevate key pieces on short legs and mount essentials on walls whenever possible. This keeps rooms feeling expansive and luminous.
Mirror Placements and Focal Points for Depth
Mirrors are your depth multipliers: place them to bounce light into darker corners and create the illusion of more space. You’ll maximize depth by positioning tall, slender mirrors opposite windows or light sources so daylight doubles back through the room.
Avoid obstructing sightlines; lean toward angles that reflect architectural features, like a hallway mirror to deepen perception without crowding walls. Use mirror placements to create focal point strategies: hang a mirror opposite a striking artwork or a bright splash of color to pull the eye inward, and coordinate frames with your furniture for cohesion.
Consider grouping small mirrors into a geometric tableau to extend depth without heaviness. Guarantee framing is slim, contemporary, and mirrors are securely mounted for clean light amplification throughout the day.
Soft Textures That Avoid Visual Heaviness
Soft textures can soften a dark room without adding visual weight by choosing materials with light, airy surfaces and subtle sheen. You’ll want textures that read as light from a distance, then reward closer inspection with depth.
Textured fabrics in pale neutrals introduce tactile interest without heaviness, especially when you mix matte and slight gloss for a gentle glow. Avoid bulky pile; opt for low‑nap weaves or boucle that catches light subtly.
Incorporate plush rugs in airy tones to ground seating without visually compressing the space. Keep scale balanced: larger patterns in a single piece, smaller textures in accessories.
Pair soft textures with crisp edges and reflective surfaces to amplify brightness, ensuring shadows stay soft rather than stark. Precision in material choices yields a room that feels larger and more inviting.
Smart Tech That Brightens Without Clutter
Smart lighting trends lets you brighten without adding bulk, using sleek fixtures and adaptive controls that disappear into your room’s lines.
You’ll benefit from minimalist tech solutions that prioritize function over form, like modular systems and wireless setups that minimize cords.
With pragmatic choices and an eye for detail, you’ll create a bright, cohesive space that stays uncluttered and aesthetically calm.
Smart Lighting Trends
Automated lighting adapts to your routine, shifting intensity and color temperature to suit tasks, moods, and daylight changes. With Voice control, you command scenes hands-free, keeping countertops clear while tweaking brightness or selecting presets.
Dimmed zones become focal points, highlighting textures in dark niches without bulky fixtures. Look for native energy monitoring and seamless app integration so you can schedule, pause, or redirect light from one device to another.
Prioritize slim profiles, warm-to-cool tunability, and reliable connectivity to maintain a calm, uncluttered aesthetic.
Minimalist Tech Solutions
Start with wall-mounted, slimline luminaires to illuminate corners without intruding on paths. Then add a compact smart hub discreetly behind furniture to control scenes without buzzing cables.
Opt for minimalist lighting fixtures with matte finishes and hidden drivers to keep surfaces clean and calm.
Use sensors that trigger gradual, daylight-mimicking ramps, avoiding harsh shifts that strain eyes in north-facing rooms.
Place compact speakers or soundbars near seating for ambience without visual noise.
Finally, guarantee cable management is invisible: clips, conduits, and cable sleeves unify tech into one cohesive glow.
Seasonal Tweaks to Keep Rooms Luminous Year-Round
As the year turns, you can keep your rooms luminous by adjusting light sources with the seasons: spring and summer call for cooler, higher-intensity daylight hues, while autumn and winter reward warmer tones and layered layers of brightness.
To implement Seasonal adjustments, prioritize scalable brightness with dimmable LEDs and task lamps that migrate with daylight hours. Position fixtures to bounce light off pale walls and reflective surfaces, avoiding harsh glare.
Use Window treatments that smartly modulate sun gain: light, breezy blinds for summer; heavy drapes or layered shades for gray days.
Rotate accent lighting quarterly to reinforce color temperature shifts, pairing cool white task lights with warm ambience.
Keep color palettes lightweight and cohesive so seasonal tones remain integrated and visually balanced.
Practical Before-and-After Checklist You Can Implement Today
You’ll start with quick before-and-after steps to map what changes first, like swapping heavy drapes for sheer fabrics and framing key LED tasks for your workflow.
Then you’ll try daylight-boosting tactics today, such as opening blinds at peak sun and placing mirrors to bounce natural light into dim corners.
Keep it tight: note a single, concrete adjustment per room and measure the impact, so your space feels brighter with intentional, aesthetic polish.
Quick Before-and-After Steps
To start quickly, here’s a practical, ready-to-implement quick-before-and-after checklist for dark rooms:
Identify your lighting goals, then swap out harsh bulbs for warm, dimmable options and add a soft, indirect light source to reduce contrast.
Quick fix: rearrange fixtures so light hugs walls and ceilings, not just task surfaces.
Before: ceiling glare and stark shadows.
After: layered layers—ambient, task, and accent—create depth.
Swap in LED strips along shelves or under cabinets for subtle glow, so color remains true and color contrast feels softer.
Use window treatments that diffuse daylight when desired, preventing hot spots while preserving mood.
Finish with a small, sculptural lamp for focal interest, ensuring balance between form and function.
Daylight-Boosting Tactics Today
Even better daylight starts with small, deliberate changes you can implement today. You’ll map glare-free paths, highlight reflective surfaces, and align furniture to maximize line-of-sight to the window. Place mirrors opposite windows to bounce light deeper, and choose high-reflectance paints—matte for walls, gleaming for trims.
Remove heavy drapes; swap to light, sheer window treatments that diffuse without dulling. Install daylight-driven layout: a low console beside the window to catch reflections, a pale rug to anchor airiness, and glass-front storage to avoid visual clutter.
Emphasize Natural ventilation by timing openings with outdoor conditions and cross-ventilating through adjacent rooms. Test a two-week routine of sun-spotting, adjusting blinds and cushions to sustain a bright mood without glare.
Frequently Asked Questions
How Can I Identify Hidden Brightness Blockers Quickly?
Identify brightness blockers quickly by surveying your space from a visitor’s eye level. Then walk the room with a neutral mood light to spot shadows.
Check window treatments for heavy fabrics, obstructed panes, and misaligned blinds.
Evaluate light reflected off walls and surfaces; add light reflective surfaces like pale paint, mirrors, and glass.
Note furniture clutter blocking doors or radiators.
Tweak layouts, then test with the same light at several times of day.
Which Color Temperatures Brighten North-Facing Rooms Effectively?
You should use cool to neutral color temperatures, around 4000–4500K, for a north facing room to brighten it effectively. This color temperature supports daylight enhancement and keeps room brightness from feeling gray.
Pair with daylight lamps and reflective surfaces to maximize effect. Avoid warm tones that wash out the space.
You’ll notice steadier, more accurate color perception, crisper shadows, and a more inviting atmosphere with practical, aesthetic-focused lighting that stays true to the scene.
What Is the Best Order for Lighting Layers in Tight Spaces?
The best order is to start with ambient lighting, then add task lighting, finishing with accent lighting.
Use layering techniques to build depth: place soft ceiling or wall washes for even glow, then task lamps at desks or counters, and finally accent lighting to highlight art or architectural details.
Keep dimmers handy and balance color temps. This approach preserves function while guiding mood, letting you adjust brightness without sacrificing design cohesion.
How Can Furniture Placement Maximize Daylight Without Crowding?
Softly whisper to yourself that you can invite brightness without crowding. You arrange furniture to channel daylight deeper: place reflective surfaces near windows, keep sightlines open, and group seating to avoid blocking light.
You maximize natural light by lifting bulky pieces away from windows, using low-profile designs, and aligning rugs to extend the glow.
Furniture arrangement prioritizes scale and flow, so you don’t create shadows. You’ll achieve airy, aesthetic rooms that feel brighter and calmer.
Which Affordable Mirrors Boost Perceived Room Height and Light?
You should choose affordable mirrors that maximize perceived height and light by strategic mirror placement and using reflective surfaces.
Place tall, slim mirrors opposite windows to bounce daylight deeper into the room, and hang a large mirror vertically to visually elongate walls.
Opt for framed options that complement your palette, and lean a decorative, reflective surface above eye level to amplify height.
Keep surfaces clean and free of clutter for the brightest, most cohesive effect.
Conclusion
In these tweaks, you’ll turn dim into delightful without overhauling the whole room. Start small: swap in brighter neutrals, add a mirror opposite a window, and layer lights for mood and function. Keep surfaces glossy or lightly reflective and introduce soft textures to lift heaviness. Embrace smart controls for effortless brightness, and seasonally tweak finishes and textiles to stay luminous. If you miss a focal point, imagine a Renaissance fresco—color, light, balance restored, pronto. Dust off your clearest, most practical instincts. Anachronism: dial-up speed.