Last month you swapped the cabinet pulls on a kitchen you love, and suddenly the whole room felt calmer. Small tweaks like updated hardware, layered textures, and warm neutrals can do the same for any older home. You’ll see how quick choices—lighting, affordable floors, vintage accents—build character without a full renovation. There’s a practical path here that keeps charm intact while adding depth; you’ll want to start, but first, consider which area will tell the clearest story.
Key Takeaways
- Refresh hardware and fixtures with cohesive finishes (e.g., matte black or polished brass) to instantly modernize cabinetry, doors, and lighting accents.
- Layer lighting with task and ambient options, using dimmers and warm LEDs to create warmth and depth in aged spaces.
- Update with budget-friendly flooring options (peel-and-stick vinyl or floating laminate) to transform floors quickly and affordably.
- Use warm, timeless color palettes with subtle texture and tonal layering to unify walls, ceilings, and trim across rooms.
- Mix vintage pieces with modern silhouettes and natural textures to restore character while keeping spaces fresh and cohesive.
Choose Warm, Timeless Paint Palettes
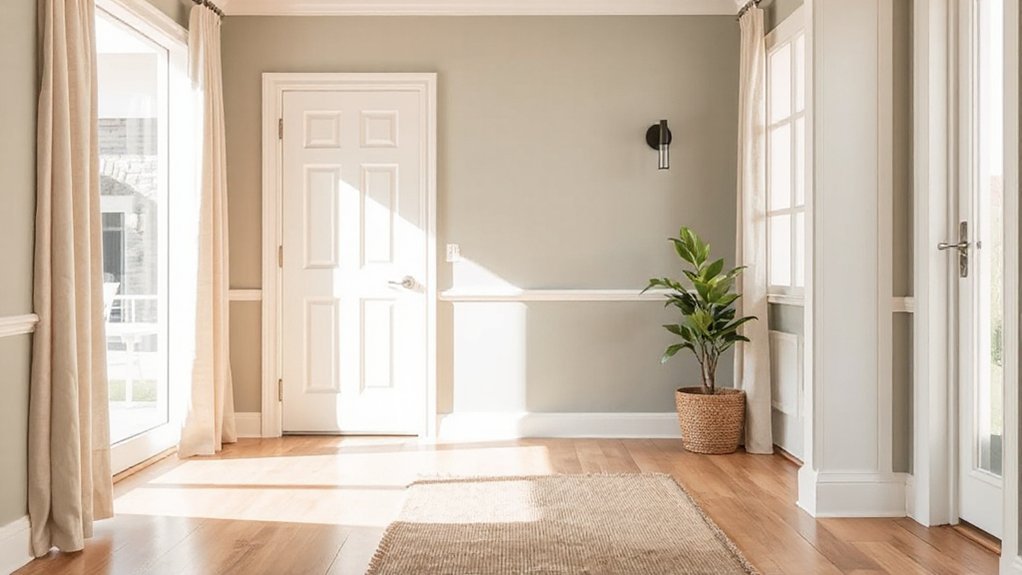
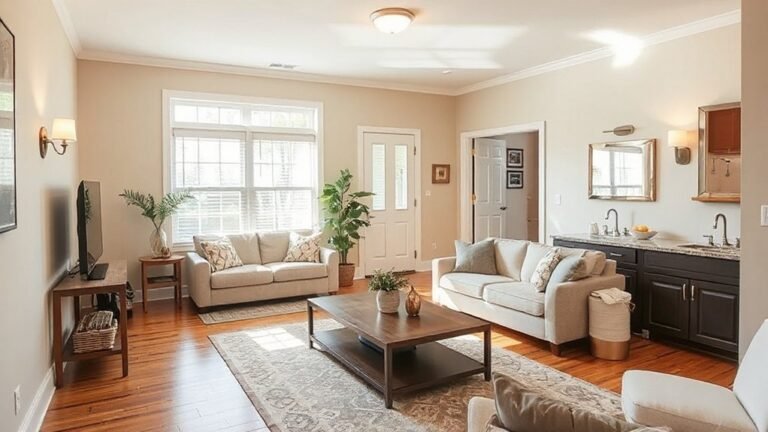
Warm, timeless palettes act as a reliable foundation for any small renovation. You choose warm neutrals or muted earth tones to create harmony across rooms, then build color with purposeful accents. Start with a base palette that spreads evenly from walls to ceilings, ensuring color harmony from entry to detail.
Keep surfaces cohesive: matte walls with satin trim can read as one continuous field, expanding the feel of small spaces. Use paint techniques that enhance depth—light edging, soft shading, or a dry brush on architectural details—to add subtle texture without clutter.
Test swatches in natural light and at different times of the day to confirm balance. Finally, document your palette and finish choices for future updates and touch-ups.
Refresh Hardware Without a Full Renovation
If you’ve laid a warm, timeless base and kept surfaces cohesive, invigorating hardware is a smart, low-commitment move that can reshape the feel of a room. A hardware update clears visual clutter and highlights your fixtures without a full renovation.
Follow these practical steps:
- Match finishes: swap brass for matte black, or brushed nickel for chrome to unify style.
- Prioritize scale: choose pulls and knobs proportional to drawer fronts to avoid overwhelm.
- Check installation: ensure screws align with existing holes to save time and avoid new drilling.
As you swap, you’ll notice improved tactile quality and grip, plus an updated profile that refreshes cabinets, doors, and hardware aesthetic—without tearing out walls or cabinets. Fixture replacement becomes a focused, tasteful enhancement.
Upgrade Lighting: Under-Cabinet and Ambient Mix
Under-cabinet lighting sharpens tasks and shapes the room’s mood without major upheaval. You’ll install slim LEDs along cabinet bases to banish shadows where you prep meals and clean countertops.
Pair task lighting with soft ambient sources to balance glare and create a cohesive glow. Use dimmable fixtures to adapt from daytime prep to evening dining, preserving energy and mood.
Choose a neutral color temperature—around 2700–3000K—for warmth without yellow cast, and guarantee even spacing to avoid hot spots.
Smart lighting lets you cue scenes for cooking, cleanup, and entertaining, so you control intensity with a tap or voice.
This mix delivers mood enhancement and practical appeal, elevating vintage kitchens without a full remodel.
Budget-Friendly Flooring Tricks That Look Great
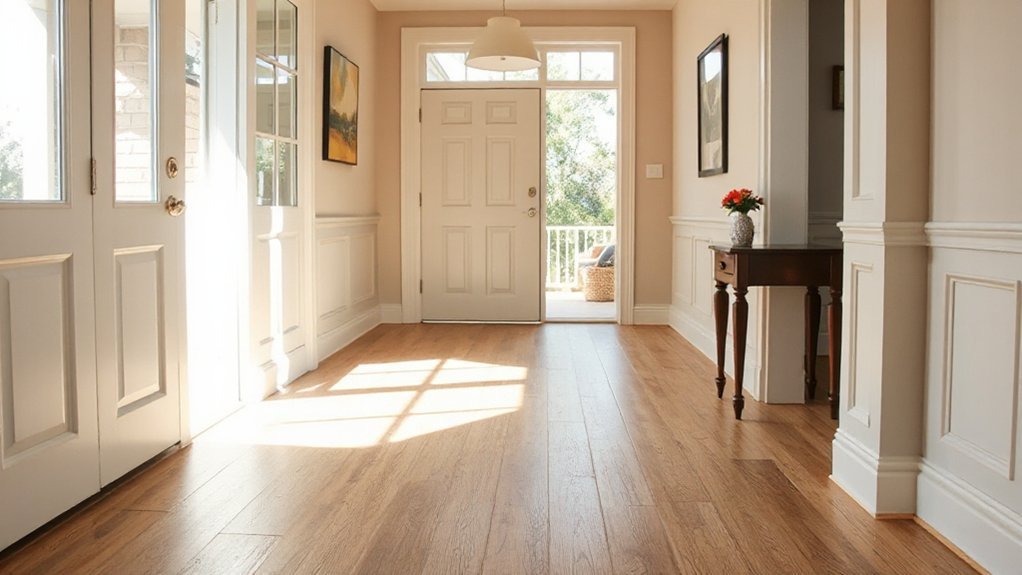
You can upgrade on a budget with quick-to-install flooring tricks that still make a big impact. Consider affordable options and simple techniques that create a strong visual footprint without overhauling the room.
You’ll see how smart choices in texture, direction, and color bring a polished look with minimal effort.
Budget-Friendly Floor Upgrades
From budget-friendly floor upgrades to big-room impact, smart choices here save you money without sacrificing style. You’ll spot easy, durable improvements that respect budget constraints and boost daily appeal.
- Peel-and-stick vinyl planks mimic wood at a fraction of the cost, with surprising flooring durability for high-traffic rooms.
- Floating laminate layers install over existing subfloors, cutting labor time while delivering a refreshed look.
- Carpet tiles in mixed textures create focal zones, simplify repairs, and reduce waste when replacing small sections.
Choose neutral tones to maximize light and space, and seal edges to prevent moisture creep.
Prioritize durable finishes and proven installations that stay stylish long-term, not fleeting trends.
Quick-To-Install Flooring Tricks
If you want even less downtime, peel and stick tiles offer instant transformation with minimal tools and mess; pick a pattern that suits your room’s vibe and press firmly to bond. For high-traffic areas, pick thicker options and seal edges to prevent wear.
Finish by sweeping regularly and using rugs to define zones, preserving the updated feel without heavy renovation.
Visual Impact With Flooring
Flooring choices do more than cover the floor—they set the room’s mood. You can create a striking impact without breaking the bank by focusing on texture contrasts and color coordination.
Choose flooring textures that catch the eye from different angles—matte for walls, satin for light, and a subtle grain for durability. Use color coordination to unify spaces: pair warm oak with cool grays, or driftwood tones with crisp whites. The result is a cohesive flow that feels larger and richer.
- Mix subtle textures to add depth without clutter
- Align floor color with dominant wall hues for harmony
- Highlight focal areas with a border or rug-inspired connection
Mix Vintage Finds to Restore Character
Start with a bold focal piece, then weave in smaller antiques to tell a cohesive, lived-in story.
Vintage Finds Fusion
Ever wonder how to breathe new life into a room without buying new stuff? You can fuse vintage finds to craft a fresh, layered vibe. Think of a single focal piece plus supporting accents that echo its era. The goal is Vintage charm with eclectic decor, not museum reproduction.
Try these moves:
1) Mix finishes and patinas for depth, not matchy-matchy symmetry.
2) Pair a bold antique with a modern silhouette to keep contrast lively.
3) Let textiles tell the story—grain, weave, and color unify disparate pieces.
Proceed with restraint: curate a tight, intentional lineup, then swap pieces seasonally. This approach keeps character intact, while letting old items read as intentional design choices rather than clutter. You’ll enjoy a richer, more cohesive room without erasing its history.
Character Through Mixes
To restore character, blend vintage finds with newer pieces in ways that highlight history without shouting it. You curate a few standout Architectural details—like a carved doorway, brass hardware, or encaustic tiles—and let them anchor the room.
Mix textures: worn leather with matte plaster, aged wood with sleek metal. Avoid overloading surfaces; restraint preserves impact and signals historic preservation without nostalgia overload.
Choose pieces that echo a period but function today: a tufted sofa with modern lamps, a kitchen table against a contemporary rug. Repurpose accents rather than replace them outright, restoring patina rather than masking it.
Label a subtle moment of history with a present-day upgrade, then step back. The result feels intentional, cohesive, and truly timeless.
Budget Kitchen Makeovers: Small Changes, Big Impact
Small changes in your kitchen can yield big results without breaking the bank. You’ll tighten up function and feel with thoughtful swaps that don’t derail your budget. Try these quick wins:
- Refresh surfaces with eco friendly materials, like reclaimed wood or low-VOC paints, to lift the vibe without toxic smells.
- Install smart technology integrations, such as programmable lighting, motion-sensor taps, and energy-monitoring outlets, for efficiency and control.
- Optimize storage with adjustable organizers and magnetic strips to reclaim drawer space and reduce clutter.
Pair style with practicality by choosing durable finishes and easy-to-clean textures. Focus on cash-friendly changes that deliver daily impact: smarter lighting, cleaner air, and a calmer, more connected cooking corner.
Your kitchen becomes noticeably fresher, faster, and more efficient.
Affordable Bath Refreshes That Feel Luxurious
Ready to upgrade without breaking the bank, you can blend Luxe Bath Upgrades with Budget Bliss Renovations for a spa-like feel. Think cost-efficient picks that boost polish—new fixtures, smart lighting, and thoughtful accents.
Let’s explore practical, precise ways to mix luxe vibes with smart spending.
Luxe Bath Upgrades
Want a bathroom that feels spa-like without breaking the bank? You can achieve a luxe vibe with smart upgrades that don’t blow your budget. Focus on texture, light, and fixtures to pull the room together.
1) Replace dated hardware with matte black or polished brass for a high-contrast, refined look.
2) Upgrade lighting to layered task and ambient options—think dimmers and warm LEDs.
3) Introduce a spa inspired upgrade: a rainfall showerhead, a chic vanity mirror, and plush towels.
Practical choices beat impulse buys: install a frameless glass shower door, add a pebble or vinyl tile mat, and refresh caulk with bright white.
The result feels luxury bathroom level without the price tag.
Budget Bliss Renovations
Ever wonder how to get a spa-like bathroom without overspending? Budget Bliss Renovations deliver luxe feel with smart choices that respect your budget. You’ll start with timeless basics: fresh paint, updated fixtures, and a clean, cohesive palette.
Prioritize energy efficiency: low-flow toilets, LED bulbs, and efficient showerheads save long-term costs without sacrificing comfort. Consider affordable yet impactful updates, like a frameless mirror, ceramic tile accents, or a sleek vanity with hidden storage.
Historical preservation matters: preserve character by retaining original hardware or incorporating period-inspired hardware rather than wholesale replacements. Use DIY-friendly touches—caulk, grout, and sealant—to reduce moisture issues.
Finally, plan a focal point, such as a statement tile band, to feel luxurious without overspending.
Texture and Color Layering for Depth in Old Homes
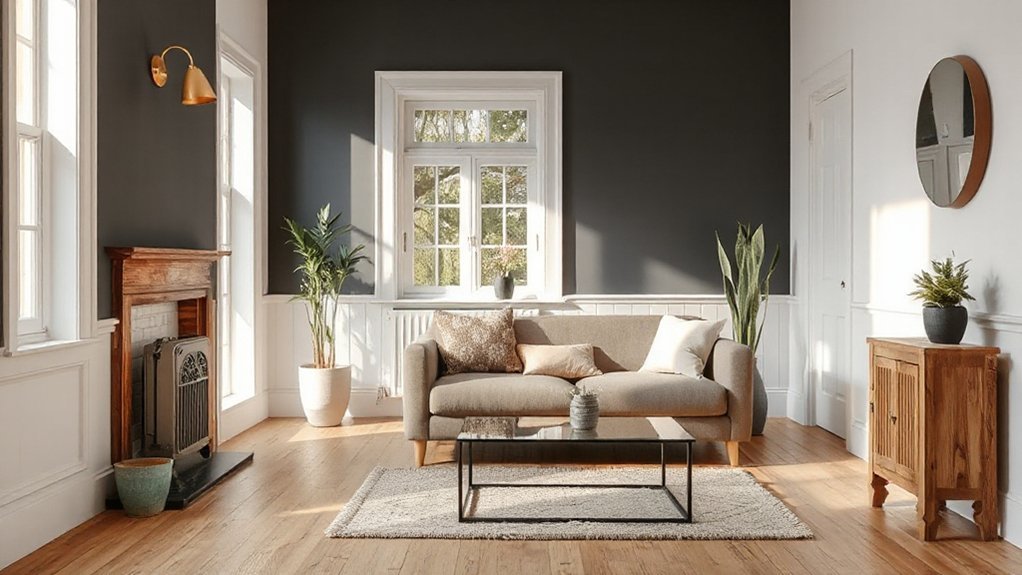
Textures and color layers are your secret weapons for adding depth to an old home, because tactile contrasts and thoughtful tones can transform flat walls and dated surfaces into inviting, dimensional spaces.
Surface layering and color blending work best when you pair a base with a midtone and an accent, so rooms read as dimensional rather than flat.
- Choose a matte base on walls, then apply a slightly glossier midtone in key areas to lift architecture.
- Introduce an accent hue in trim or cabinetry, repeating it subtly across rooms to guide the eye.
- Layer texture with soft fabrics and tactile finishes that echo your color palette for cohesive depth.
Greenery and Natural Elements to Tie Old and New
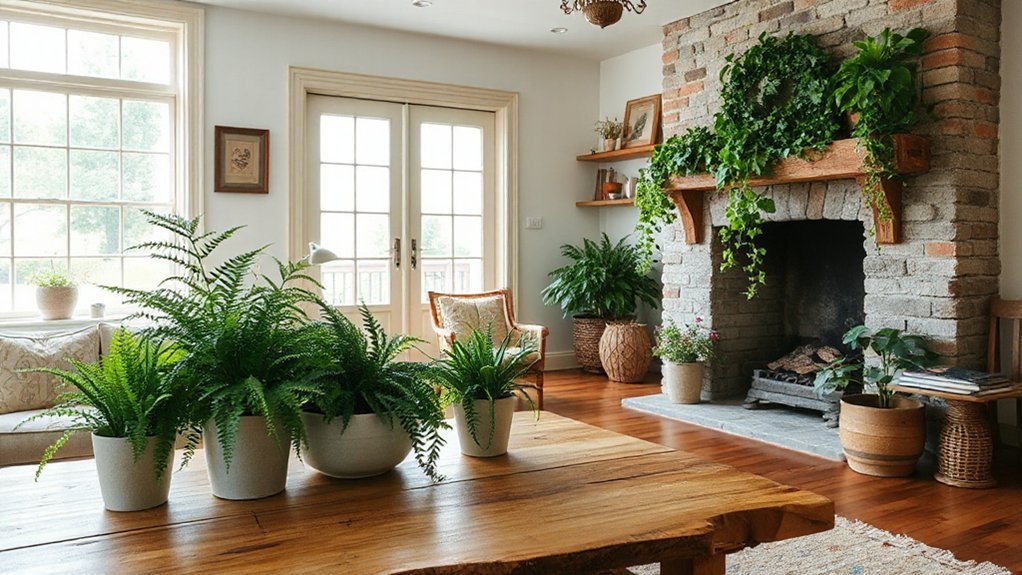
Greenery and natural elements quietly bridge old and new by bringing living texture and seasonal rhythm into the space. You’ll weave warmth with plants that thrive in your light, avoiding gimmicks or overstuffed corners.
Start with a few well-placed focal pieces: a vertical garden or a compact indoor tree to anchor a room, and low-maintenance options like snake plants or pothos to keep care simple.
Introduce motion and sound through a discreet indoor waterfall feature, which adds humidity and a soothing soundtrack without overpowering the design.
Use botanical wall art to echo actual plant life, tying color and form across walls without crowding shelves.
Choose materials that harmonize with vintage finishes, ensuring the greenery feels intentional, not gimmicky, and ages gracefully with your home.
Your 7-Step Quick-Start Makeover Plan
Kick off your makeover with a clear, doable plan: a seven-step, quick-start sequence that keeps momentum without overload. You’ll finish faster and stay focused, especially on the Home exterior and any needed structural repairs.
Here’s a lean plan you can follow:
- Assess priorities: note necessary repairs and the feel you want.
- Budget guardrails: allocate for immediate fixes and smart upgrades.
- Quick fixes first: address safety, leaks, and weak spots.
- Draft a simple timeline: map major tasks to weekends.
- Gather essential tools and materials to avoid delays.
- Tackle exterior details: paint touch-ups, trim, and curb appeal.
- Review results and adjust: confirm stability, then refine aesthetics.
Frequently Asked Questions
How Can I Prioritize Renovations for Maximum Mood Impact?
Start by prioritizing mood impact: identify rooms where you spend the most time, then map improvements to daylight, color, and acoustics.
Use color psychology to pick calming hues for bedrooms and energizing tones for workspaces.
Plan lighting enhancements first—layer ambient, task, and accent lighting—to transform feel without full replacements.
Budget small, test swatches, and adjust.
Keep a running list, rank by impact, and tackle high-traffic areas before cosmetic tweaks.
Which Small Changes Boost Resale Value Most?
You should focus on small changes that boost resale value most: upgrade kitchens and baths with efficient fixtures, refreshed cabinets, and timeless finishes.
Preserve historic charm while adding modern upgrades like smart thermostats and energy-efficient lighting.
Prioritize quality over quantity, and keep spaces cohesive to appeal to buyers seeking low-maintenance charm.
Quick wins include curb appeal tweaks and a clean, neutral palette.
These moves blend Historic charm with Modern upgrades for solid resale impact.
Can I Update an Old Home’s Energy Efficiency Cheaply?
You can, and you should, patch old drafts with cheap fixes that pay off. Juxtaposition: vintage charm meets modern upgrades, quietly boosting efficiency without wiping its soul.
Seal gaps, add LED lighting, swap weathered doors, and upgrade windows where feasible. Insulation, smart thermostats, and efficient appliances cut costs fast.
You’ll notice warmer rooms and lower bills, all while keeping character intact.
Practical, precise steps: air seals, energy star choices, and thoughtful layering of comfort.
What Are Budget-Friendly DIY Risks to Avoid?
Yes—budget-friendly DIY risks to avoid include DIY pitfalls and overlooking safety precautions.
You should plan, measure twice, and don’t rush electrical or plumbing work.
Wear proper PPE, shut off power, and test for gas leaks.
Avoid skipping permits, inspections, or venting requirements.
Expect hidden costs and weather-related setbacks.
Read manufacturer instructions, use rated materials, and don’t mix incompatible chemicals.
If in doubt, hire a pro; prioritize safety precautions and quality over speed.
How Long Do These Mini-Renos Typically Take?
Typically, these mini-renos take days to a few weeks, depending on scope and permits. You’ll move faster if you plan upfront, source materials efficiently, and schedule trades thoughtfully.
You’ll balance historic preservation with modern aesthetics by prioritizing structural fixes first, then cosmetic updates.
Expect 1–2 weeks for prep and demolition, 1–2 weeks for finishes, and a few days for touch-ups.
You’ll finish sooner if you batch tasks and communicate clearly with contractors.
Conclusion
You’ll feel the shift, like a well-loved book finding a sharper spine. As you layer warm hues, swap hardware, and let light wander softly, your spaces echo with timeless charm. Think of it as a quiet renovation, where each detail nods to the past while inviting the present. You’re crafting rooms that age gracefully, with texture, greenery, and subtle luxury. In this gentler rebirth, you glimpse the future through familiar doors, a classic home renewed.