Your home will sell in minutes if you get this right—okay, maybe not minutes, but the impact is real. You’ll want a cohesive flow, neutral palettes, and layered lighting that highlights upgrades without glare. Think tight furniture placement, tidy landscaping, and inviting entryways that cue buyers into a seamless living story. Ready to outline the exact moves that turn photos into momentum? Let’s start with the essentials you’ll implement first.
Key Takeaways
- Highlight curb appeal and outdoor staging to create an instant, positive first impression that draws buyers inside.
- Use cohesive interior palettes with durable, low-VOC paints and consistent undertones for seamless flow.
- Optimize room layout with low-profile furniture, clear pathways, and multipurpose pieces to maximize perceived space.
- Layer lighting (ambient, task, accent) with warm tones to reveal features and create a welcoming mood.
- Stage with purpose: declutter, align lighting, and ensure cohesive finishes across kitchens, baths, and storage.
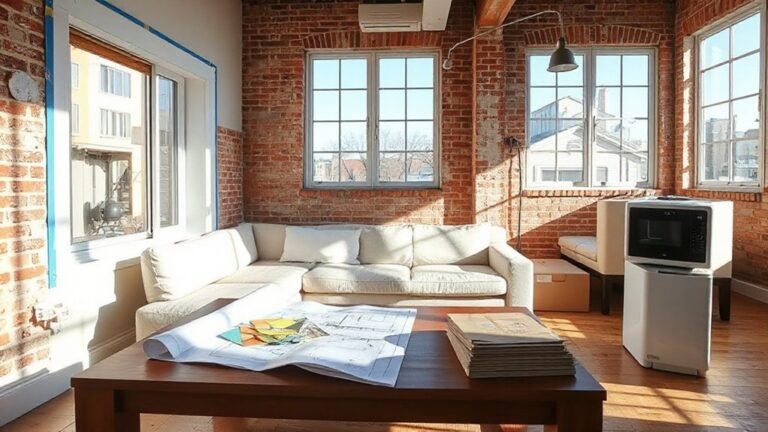
What Buyers Notice First When Touring a Renovated Home
When buyers first tour a renovated home, the entryway and curb appeal set the tone, so you should take care to present a clean, compelling first impression. You win buyers by a quick, cohesive narrative: a welcoming foyer, the scent of fresh paint, and uncluttered sightlines.
Prioritize durable finishes that photograph well and resist wear under showings. Use vintage charm in small doses—think a restored brass knob, a retro mirror, or a subtle heirloom rug—paired with modern minimalism in lines, hardware, and furniture silhouettes.
Keep color, texture, and lighting balanced to guide the eye forward. Highlight updated systems with accessible, organized spaces, and guarantee functionality mirrors style to avoid any buyer doubts or questions.
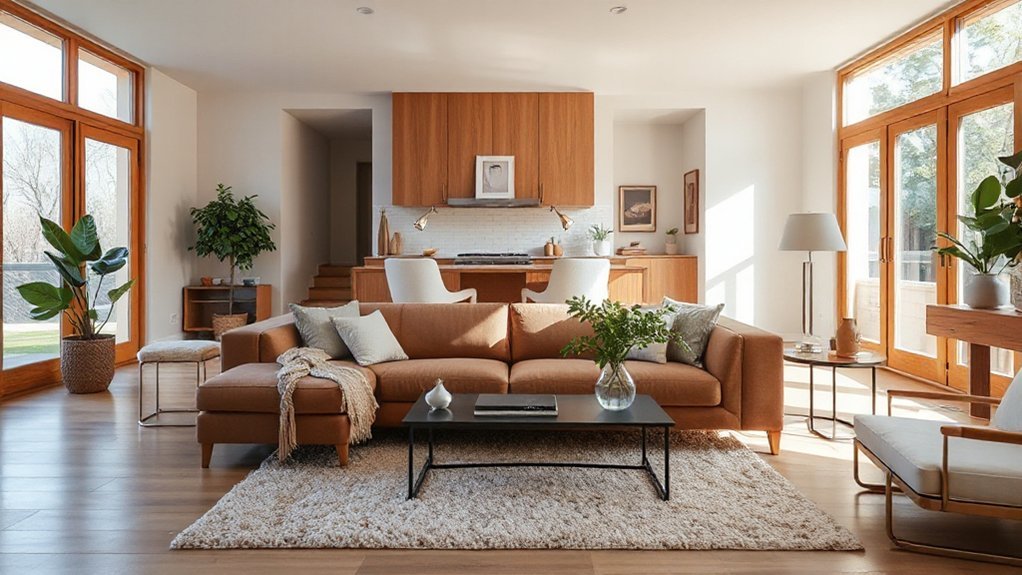
Timeless Color Palettes That Never Go Out of Style
Timeless color palettes anchor a renovated home in buyers’ minds, helping every room feel cohesive and inviting without shouting for attention. You choose shades rooted in color psychology to evoke calm, warmth, and balance, not gimmicks.
Start with a versatile base—soft whites, warm beiges, or cool greiges—that pair with natural textures and architectural details. Accent with deeper hues on trim, doors, or a single feature wall to add depth without overpowering.
Prioritize paint durability by selecting high-quality, washable finishes in low- to zero-VOC formulations for safer air quality and easier upkeep. Test swatches in multiple lighting moments to confirm consistency.
Maintain flow by coordinating undertones across spaces, ensuring doorways and passages feel seamless rather than jarring. End result: timeless, resale-friendly spaces that feel thoughtfully curated.
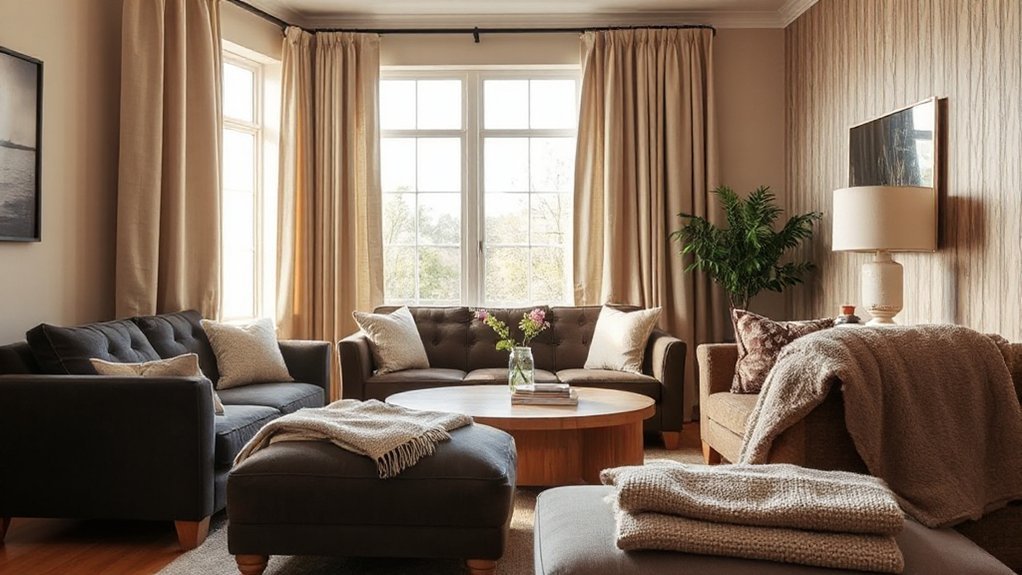
Master Furniture Placement to Maximize Space
Strategically place furniture to expand perceived space and flow. In small rooms, opt for low-profile pieces and avoid oversized upholstery that blocks sightlines.
Prioritize a coherent furniture arrangement: place the sofa away from doors, anchor with a rug, and use parallel or perpendicular layouts that create clear pathways.
Choose multipurpose items—storage ottomans, slim consoles—that maintain openness while adding function.
Lean toward rounded edges and legged foundations to improve airiness and light reflection.
Maximize space optimization by grouping seating into zones with clear sightlines to focal points like a fireplace or window nook.
Mirror the room’s proportions—taller ceilings deserve vertically oriented art or slim shelving.
Limit clutter, remove rarely used furniture, and make certain at least 18 inches of circulation around each piece for comfortable traffic.
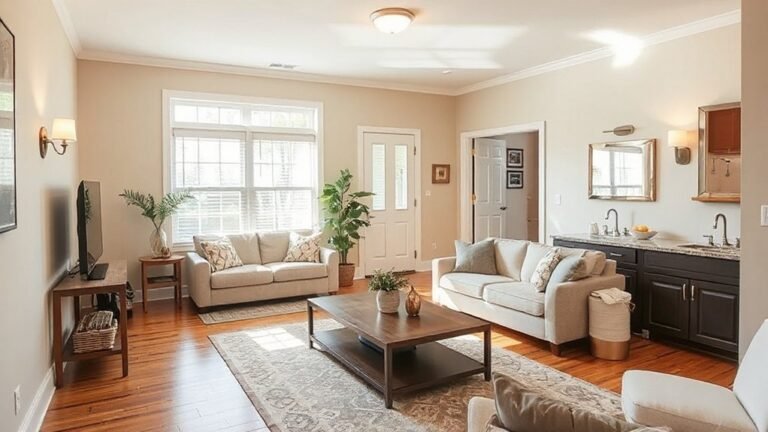
Creating Flow Between Rooms for Seamless Living
You’ll create flow by aligning color, sightlines, and light across spaces, so each room reads as part of a single journey.
Prioritize uninterrupted sightlines, use cohesive hues, and stage lighting that guides movement from one area to the next.
Keep pathways clear and progressions intentional with furniture placement that reinforces a smooth, intuitive path.
Flow Through Color
To create flow through color, start with a unifying base across adjoining spaces and then introduce small, coordinated accents that echo from room to room. Choose a restrained palette: a soft neutral for walls, with one or two shared accent tones carried through trim, textiles, and cabinetry.
Tie rooms together by repeating a single color in art, rugs, and hardware finishes. Color psychology matters: cooler tones recede to enlarge space; warmer hues feel inviting for gathering zones.
Keep paint finishes consistent where possible—matte or eggshell on walls; semi-gloss on doors and trim—to create visual cohesion. Use subtle variations of the base color to define zones without interrupting flow.
Test samples side by side at different times of day, then finalize with a cohesive, sale-ready plan.
Sightlines And Light
Opening sightlines and light ties the flow you built with color to real-life living. You shape through architectural features where open sightlines connect rooms, guiding movement and attention without shouting.
Prioritize consistent vertical and horizontal lines to extend sight beyond walls, making spaces feel larger and calmer. Use window treatments to control brightness without breaking the rhythm: choose light-filtering shades or airy drapes that soften glare while preserving views.
Align treatments with architectural features—frame windows similarly, repeat fabric tones, and mirror nearby finishes for cohesion. Place lighting at eye level along corridors to reinforce flow after dusk.
Keep apertures free of visual clutter, ensuring transitions feel seamless. Test flow by walking the route your buyers will take, adjusting glare, contrast, and progressions until each room leads naturally to the next.
Pathway Continuity Tips
Pathway continuity starts with a clear route through the home. You align transitions by grouping rooms with shared functions and visual cues, so guests move naturally from kitchen to dining to living areas without déjà vu.
Use consistent floor materials or reliable rugs to anchor sightlines, then lean on color repeats or trim details to connect spaces subtly.
Plan door heights, hardware finishes, and lighting temperatures for unified mood—avoid jarring shifts that break flow.
Incorporate garden aesthetics as a soft exterior cue that foreshadows indoor paths, and extend that logic with outdoor lighting to guide entry points at dusk.
Finally, guarantee furniture positioning preserves walkable corridors, prioritizing sightlines that spotlight focal artwork or a fireplace as a natural stopping point.
Lighting Tricks That Make Rooms Feel Larger and Brighter
Lighting is your first ally when staging a freshly renovated home for sale: bright, well-placed light sources can visually expand rooms and highlight upgrades without gimmicks.
To maximize impact, layer ambient, task, and accent lighting, and avoid harsh hotspots.
Choose fixtures with color temperatures around 2700–3000K for a warm, inviting ambient glow that feels premium yet approachable.
Rely on natural illumination where possible: position seating to face windows, keep treatments light, and use sheer drapes to diffuse daylight.
Dimmer switches give you flexibility for showings, while wall sconces and under-cabinet LEDs add depth without clutter.
Mirror strategically to reflect light, not bounce it awkwardly.
Maintain clean fixtures, uncluttered cords, and consistent finishes for a cohesive, bright impression.
Texture and Finish Ideas That Feel High-End on a Budget
Texture and finish choices can elevate a renovated space without blowing the budget. You should aim for deliberate textural contrast across surfaces to add depth without costly upgrades.
Start with walls: pair a matte paint in a calming tone with a glossed trim to create subtle contrast. Add finish layering by mixing natural materials—slate, oak veneer, linen textiles—and keep metals warm (brushed brass or antique bronze) for cohesion.
Introduce tactile features like a woven rug, raw edge shelving, or a concrete-look countertop with a protective sealer. Use lighting that enhances texture—raked ceiling panels or vertically slatted screens catch light and cast interest.
Keep lines simple; avoid busy patterns that distract buyers. Test combos in a small area before committing to the whole room.
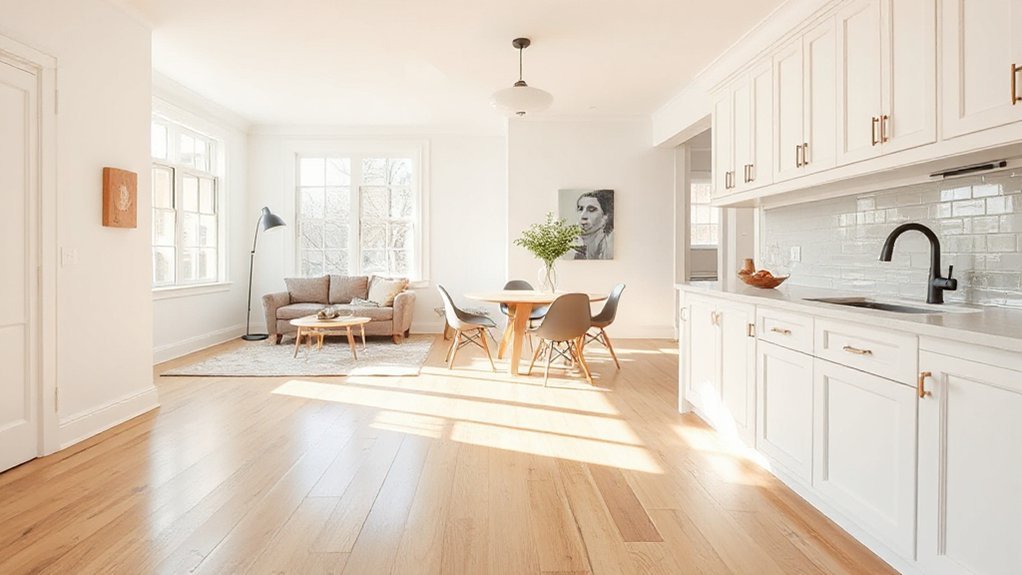
The Essential Rooms to Stage for Maximum Buyer Impact
To maximize buyer impact, prioritize the kitchen, primary bathroom, and living areas first, because these spaces shape most buyers’ impressions and offer the strongest return on staging. You should map a focused sequence: open, airy kitchen; spa-like primary bath; inviting living rooms.
Use neutral palettes with bold focal points to guide flow without clutter. In the kitchen, highlight clean lines, functional zones, and subtle Kitchen accents that feel premium yet attainable.
Move memories to secondary rooms with coordinated accessories, avoiding over-styling.
For Outdoor decor, create welcoming progressions from interior to exterior by aligning textures and colors with interior tones; keep furniture compact and purposeful.
Maintain crisp lighting, decluttered surfaces, and purposeful art to support your story without distracting from the home’s fundamentals.
Small Details That Boost Perceived Value
Small details matter, and you’ll see value rise when you optimize subtle finish touches and how lighting signals quality. Tweak finishes—hardware, trim, grout—with coordinated tones, and use lighting to create perceived space and warmth.
Start with a quick audit: fix gaps, align fixtures, and layer light sources to highlight craftsmanship and comfort.
Subtle Finish Details
Prioritize minimal decor to keep spaces feel calm and spacious; fewer, well-chosen pieces read as intentional design rather than clutter.
Focus on hidden storage solutions that streamline surfaces: under-bed drawers, slim wall organizers, and built-in benches with concealed compartments.
Upgrade door and cabinet hardware to brushed nickel or matte black for a cohesive, modern vibe.
Choose consistent trim, caulk gaps, and touch-up paint to create clean lines.
Use durable, low-maintenance finishes in kitchens and baths, and guarantee lighting shadows are minimized.
These measured details convey quality, practicality, and updated style to prospective buyers.
Lighting as Perceived Value
Lighting isn’t just illumination—it signals value. You’ll boost perceived value by focusing on warm, consistent exposure that highlights architectural details without glare.
Choose layered lighting: primary fixtures for brightness, task lights where needed, and ambient accents to sculpt mood. Opt for dimmable LEDs with a color temperature around 2700–3000K to feel inviting yet modern.
Highlight key spaces—kitchens, baths, and entry—via strategic direction and washes that reveal finish quality, not shadows.
Integrate Smart technology for convenience: programmable scenes, occupancy sensors, and app control that buyers associate with low effort.
Emphasize Eco friendly upgrades, like energy-efficient retrofits and recycled materials, to convey durability and responsibility.
Keep wires tidy, switches uniform, and fixtures cohesive to reinforce a polished, move-in ready impression.
Timeline for Staging: Refresh Steps for Photo Day
To prepare for photo day, lock in a clear, time-bound plan: assign tasks, confirm vendors, and finalize a refreshed look that appeals to buyers. You’ll stage with purpose, aligning lighting, furniture placement, and color flow to photograph well. Keep outdoor landscaping in mind for curb appeal and storage solutions that look tidy in shots.
1) Create a 90-minute window for outdoor tweaks, lawn clean-up, and plant edging to frame the front shot.
2) Allocate 60 minutes indoors for furniture tweaks, rug placement, and mirror angles that amplify space.
3) Schedule a 30-minute final walkthrough to confirm clutter-free surfaces, crisp lines, and color harmony.
Common Staging Mistakes That Kill Momentum
Even after a solid photo-day plan, small missteps can spoil momentum fast. You’ll derail interest by overhauling staging too late, or leaving dated details visible in frame.
Resist cluttered surfaces; a single focal table should feel intentional, not overflowing. Avoid mismatched finishes that shout “try hard” instead of polish.
Don’t neglect outdoor landscaping in the final shot—trim, edge, and emphasize curb appeal to support interior value.
Don’t rely on generic decor; curate spaces to highlight flow and function, not personality.
Watch for kitchen appliances glaringly out of scale or mismatched tones; they should look integrated, not afterthoughts.
Finally, skip overpricing-driven staging fads; stick to timeless balance, clean lines, and neutral textures that let buyers envision living there.
Momentum stays if clarity and cohesion lead.
From Showings to Offers: A Practical Buyer-Impression Checklist
You’ll make a clear first impression by tightening entryway and sightlines to invite immediate engagement. Focus on pathways to purchase by arranging rooms to guide buyers through a logical flow, highlighting value without pressure.
Attend to subtle staging details—lighting, textures, and scent—that reinforce confidence and ease during showings.
Clear First Impressions
First impressions matter, so start at the curb and walk through with a buyer’s eye: a clean, organized exterior, a welcoming front door, and a calm, debris-free entry set the tone for everything inside. You want instant confidence that the home is cared for and move-in ready.
- Visuals first: tidy outdoor landscaping frames curb appeal, guiding buyers toward the entry with purpose.
- Entry drill-down: a pristine, functional foyer signals smooth passages from outside to inside, reducing hesitation.
- Room-to-room reliability: consistent finishes and purposeful staging reinforce credibility, especially near the kitchen upgrades and adjacent living spaces.
Focus areas: optimize outdoor landscaping to spark interest and highlight kitchen upgrades as focal moments beyond the entry.
Pathways To Purchase
Highlight Outdoor landscaping as curb appeal leverage, noting low-maintenance entries that endure scrutiny. In kitchens, spotlight practical upgrades: clean lines, newer appliances, and efficient layouts that translate to real-world use.
Offer a clear comparison path for renovations, price bands, and neighborhoods, so buyers feel they’re choosing value, not guessing.
Provide a simple, visual checklist they can reference on-site: room-by-room impressions, functional benchmarks, and emotional triggers.
End with a confident, offer-ready narrative: what’s included, what stays, and why this home meets their goals.
Staging Subtle Details
- Highlight rooms with deliberate layering of artificial accents—candles, ceramics, and textiles that feel cohesive without shouting.
- Use bold accents sparingly to anchor focal points, like a chair, rug, or artwork, ensuring contrast enhances architectural features.
- Create clean sightlines by trimming clutter, aligning surfaces, and reflecting light with tasteful mirrors.
Each choice should be purposeful, testable, and easy to reverse if needed. Track buyer reactions from showings to offers, then refine quickly to keep momentum and maximize appeal.
Frequently Asked Questions
How Long Does Staged Home Photography Typically Take to Schedule?
Typically, staged home photography can be scheduled within 1–3 days, depending on photographer availability and your property’s prep time. You’ll want to lock in a slot that leaves you a day for final touches.
Focus on Property lighting to brighten key rooms and camera angles that flatter spaces. Coordinating a daytime shoot often yields the best light.
If you’re flexible, you’ll snag morning slots when calendars fill fastest.
Should Staging Vary by Neighborhood or Market Segment?
Yes, staging should vary by neighborhood dynamics and market segmentation. You tailor curb appeal, decor, and staging intensity to local buyer preferences and price bands.
In higher-end blocks, emphasize quality finishes and timeless styling. In emerging areas, highlight value and practicality.
Align photography and flow with local rhythms, school zones, and amenities. Adjust furniture scale and color palettes to the target segment, ensuring the story matches what buyers in those neighborhoods expect.
Do Wall Colors Affect Buyer Perception of Room Sizes?
Yes, wall colors affect buyer perception of room sizes. Color psychology shapes how you skim space, while visual perception tricks the eye.
Use light, cool neutrals to expand rooms; reserve bold accents for focal portals to avoid shrinking ceilings. You’ll clip clutter, curate contrast, and keep consistent undertones.
Pair color palettes with lighting and furniture scale, and test in daylight. This trend-aware tactic translates to bigger perceived space, faster offers.
Is It Worth Renting High-End Furniture for a One-Time Shoot?
Yes, it’s worth it if the shoot targets luxury buyers and you can justify the rental costs. You’ll elevate room visuals with luxury furniture, creating aspirational spots that photos can sell.
Track rental costs against planned listing momentum, and insist on high-quality pieces that photograph well. Negotiate delivery/setup to keep logistics tight.
If the budget strains, mix in one standout statement piece and balance with accessible items to maximize impact without overspending.
How Often Should Staging Be Refreshed Before Sale Announcements?
You should refresh staging every 2–4 weeks while you’re marketing, aligning with seasonal updates and buyer rhythms.
Track performance, swap out dated accessories, and refresh furniture placement to emphasize flow and room purpose.
Before each new batch of sale announcements, do a quick sweep for clean lines, updated decor, and bright lighting.
If a room feels stale, rotate a key focal piece and add fresh textiles to keep your home feeling current and inviting.
Conclusion
Staging your renovated space isn’t about perfection; it’s about clarity, flow, and certainty that buyers can live there. You’ll showcase each upgrade with neutral palettes, purposeful furniture, and layered lighting that feels high-end—not staged. Declutter, tidy curb appeal, and highlight who benefits most: daily life in every room. Time your refresh for photo day, avoid common missteps, and trust a cohesive narrative. As the old adage goes, “you never get a second chance to make a first impression.”