A stress-free kitchen remodel starts with clear milestones, a solid budget with a healthy contingency, and decisive priorities. You’ll map a realistic timeline, lock in reliable trades, and choose durable, eco-friendly materials that fit your style. Plan for glitches, set decision criteria, and keep communication tight to prevent surprises. Ready to structure your plan so the project stays on track, on budget, and already prepared for the next trade—without the chaos that usually follows?
Key Takeaways
- Establish a clear milestones and decision framework with owners, deadlines, and sign-offs to prevent scope creep and delays.
- Build a realistic budget with hard/soft costs, a 10–15% contingency, and monthly variance reviews to control costs.
- Prioritize must-haves vs. nice-to-haves using a decision grid, mapping items to budget bands to avoid unnecessary upgrades.
- Design an efficient workflow layout (work triangle, zones, lighting) to minimize steps and boost usability and safety.
- Coordinate trades early, lock in materials/colors, and set explicit delivery windows to reduce backlogs and site disruptions.
Define a Stress-Free Kitchen Remodel: Milestones, Budget Guardrails, and Decision Criteria
To plan a stress-free kitchen remodel, start by defining clear milestones, budget guardrails, and decision criteria. You map the project into phases, set completion dates, and assign owners for each task so accountability stays sharp.
Establish nonnegotiables early: what defines “done,” how you’ll handle changes, and acceptable tradeoffs if delays appear.
Clarify essential functions first: lighting and power needs, traffic flow, and storage logic.
Specify Kitchen lighting goals—task, ambient, and accent layers—and align appliance placement with work zones, ensuring efficient movement and safe clearance.
Create decision criteria that prioritize durability, ease of maintenance, and warranty terms.
Document approvals, review points, and sign-offs.
With these guardrails, you keep momentum and minimize backtracking.
Set a Realistic Budget for a Stress-Free Remodel
Create a line item budget that separates hard costs (materials, labor) from soft costs (permits, design fees). Track every estimate in a single sheet, and add a contingency of 10–15% for surprises.
Decide early where you’ll splurge on Kitchen decor and where you’ll save on appliances. Prioritize appliance upgrades that improve efficiency and usability, balancing upfront price with long‑term savings.
Avoid scope creep by documenting changes and confirming approvals before any work begins. Review monthly against actuals, adjust as needed, and keep the project within your financial boundaries.
Prioritize Must-Haves vs Nice-To-Haves for a Calm Project
When planning, separate must-haves from nice-to-haves to keep the project calm and focused. You’ll gain clarity by listing essentials first, then evaluating what can be deferred.
Establish pragmatic priorities: core appliances, durable countertops, reliable storage, and lighting that supports daily use. Treat upgrades as goals, not entitlements, to prevent scope creep.
Consider budget considerations early, mapping each item to budget bands and potential trade-offs. For example, pair high-usage components with mid-range finishes if needed.
Material selection should align with durability, maintenance, and resale value, not trends alone.
Create a decision grid: must-haves, nice-to-haves, and optional add-ons. Revisit this list weekly, revising only after new information or constraints arise.
Stay decisive, communicate choices, and maintain momentum toward a calm, controlled remodel.
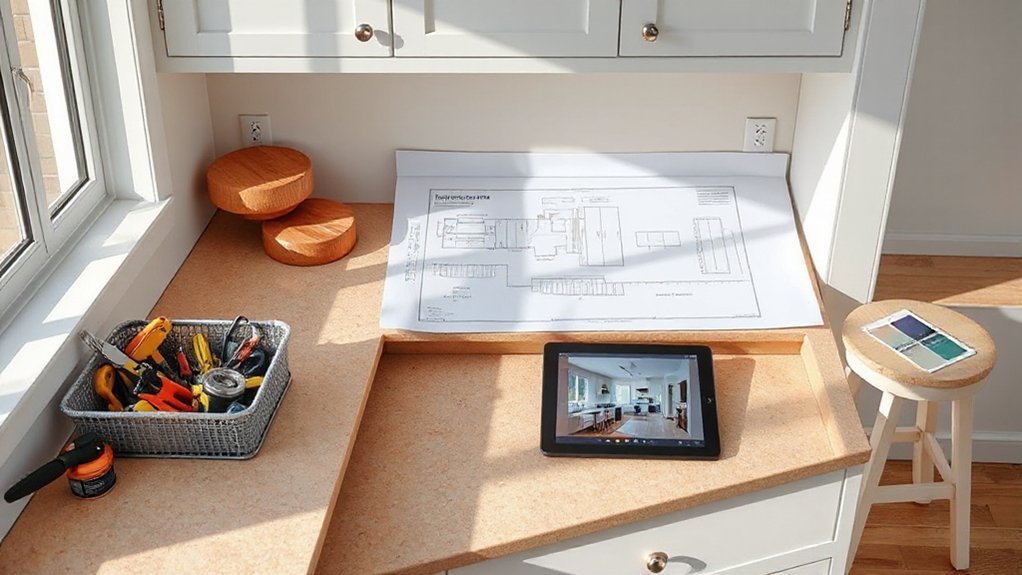
Create a Practical Milestone Timeline for Your Remodel
You’ll map clear milestones that reflect your must-haves and budget, then lock in realistic timelines for each phase.
Use milestone mapping to foresee dependencies and prevent delays before they happen, keeping your project on track.
Apply timeline tightening tactics to set firm deadlines, assign owners, and build in buffers for inevitable hiccups.
Milestone Mapping Milestones
A practical milestone timeline keeps your remodel on track and protects your budget. You map phases from demo to finish, assigning dates, decision deadlines, and owners for every task.
Begin with design approval, then permitting, procurement, and trades coordination, so responsibilities don’t collide. Build in buffers for delivery delays and inspection windows, but keep the plan lean to avoid paralysis.
Establish milestone gates that trigger cost reviews, scope freezes, and sign-offs before moving forward. Include creative lighting and eco-friendly materials choices as early decision points to prevent rework.
Track progress with a simple dashboard: percent complete, upcoming tasks, and risk flags. Review weekly, reallocate resources, and preserve your momentum.
The result is predictable costs, fewer surprises, and a smoother path to completion.
Timeline Tightening Tactics
To tighten your milestone timeline, start by slicing the project into clearly defined phases with concrete deadlines and owners. Define entry and completion criteria for each phase, then assign decision rights to a single responsible person.
Build a calendar that aligns procurement, permitting, and installation tasks, with buffers for inevitable delays. Track progress weekly using a simple dashboard and adjust owners as needed to keep momentum.
Prioritize ingredient sourcing early to avoid bottlenecks in cabinets, countertops, and appliances, and secure commitments from vendors with explicit delivery windows.
For color coordination, lock a palette at the outset and confirm finishes before order placement.
Maintain tight communication, document changes, and recalibrate milestones as scope evolves. Your timeline should read as a roadmap, not a wish list.
Plan Your Trades: Who to Hire and When to Bring Them In
Start by listing the core trades you’ll need—cabinetry, electrical, plumbing, flooring, and painting—and map out when each one should begin to keep the project flowing. You’ll coordinate timing to avoid backlogs and guarantee crews aren’t idle.
Focus on trade negotiations early, but don’t rush the process; clarify scope, milestones, and payment terms in writing.
For contractor selection, shortlist licensed pros with solid references and recent kitchens, then interview to gauge communication, reliability, and problem-solving.
Ask for a detailed schedule, phased milestones, and a contingency plan.
Lock in a primary contractor who can align subtrades and manage permit timelines.
Establish expectations up front about cleanup, site protection, and daily prep.
Finally, document decisions and signatures to prevent miscommunication later.
Choose Durable Materials and Finishes for Kitchen Longevity
Choose durable surfaces and finishes that stand up to daily use and spills, then pair them with a simple maintenance routine to keep them looking new. You’ll want materials that resist scratches, heat, and stains while still fitting your style, budget, and footprint.
Start with low-mussel (low-maintenance) maintenance tips that you can implement today to extend longevity and cut future upkeep.
Durable Surface Choices
Durable surfaces are the backbone of a long-lasting kitchen, so pick materials that handle heat, knives, and daily wear without fuss. You’ll prioritise seam integrity, stain resistance, and easy repairability, because downtime is costly.
Choose quartz or engineered stone for countertop rigidity without porous concerns, and pair with thermoformed laminates or solid-surface options that resist scuffs.
For flooring, slabs and porcelain tiles with rated slip resistance prevent accidents, while polyurethane or epoxy coatings on concrete deliver tough, cleanable bases.
Cabinets should use high-density substrates and UV-resistant finishes to avoid warping.
Consider Eco friendly materials where possible, and plan for Smart appliance integration to minimize countertop clutter.
Balance aesthetics with performance, ensuring maintenance stays straightforward and long-term value remains intact.
Low-Mussel Maintenance Tips
When you pick durable materials and finishes, your kitchen stays low-maintenance and long-lasting. You’ll reduce upkeep while enhancing resilience against everyday wear. Choose surfaces that resist stains, heat, and moisture and seal timber or stone properly for longevity.
Prioritize finishes that are easy to wipe, don’t show fingerprints, and pair with eco-friendly upgrades. Integrate products that support vintage aesthetics without sacrificing performance.
- Select sealed, nonporous countertops and solid-core cabinets for lasting color and texture
- Opt for low-maintenance hardware and durable, water-resistant flooring
- Favor sustainable, long-wearing finishes that complement retro styles
This approach keeps upkeep minimal, supports eco goals, and preserves character without frequent replacements.
Design an Efficient Layout and Workflow for Your Kitchen
To design an efficient kitchen layout, start by mapping how you’ll move through the space: prep, cooking, cleaning, and storage should flow logically with minimal backtracking.
Prioritize a functional work triangle, but customize it to your habits—avoid crowded aisles and dead ends.
Define zones for prep, cooking, cleanup, and storage, then align appliances and counters to minimize steps.
Choose color schemes that keep the space bright and cohesive, aiding focus and efficiency.
Place primary appliances within easy reach: fridge near prep, sink adjacent to prep and disposal, and range with clear venting and ample counter space.
Guarantee ample lighting at each zone and accessible power outlets for small tools.
Plan for ample counter space for staging, measuring, and organizing, so workflows stay smooth from morning coffee to weeknight dinners.
Anticipate Glitches and Build Contingencies Into Your Plan
Even the best plans encounter hiccups, so you should map out contingencies early. You’ll anticipate glitches by building buffers, identifying critical paths, and securing flexible suppliers. Prepare for unexpected delays by scheduling extra lead times and staging materials when possible. Establish clear communication strategies to keep everyone aligned and informed, reducing friction when changes occur.
- Build in time buffers for each milestone and supplier.
- Create a single, accountable point of contact for decisions and updates.
- Document changes promptly and share revised timelines with all parties.
If a snag arises, reassess priorities quickly, reallocate resources, and adjust the plan cohesively. By front-loading risk management, you protect progress and maintain momentum without sacrificing quality or budget.
Frequently Asked Questions
How Long Does a Stress-Free Kitchen Remodel Typically Take?
A stress-free kitchen remodel typically takes about 6 to 12 weeks, depending on scope. You’ll measure twice, plan once, and stick to a clear schedule.
You should lock in your Kitchen layout early and finalize Material selection before ordering.
Expect a few unavoidable delays, but you stay proactive by coordinating trades and checking progress weekly.
You’ll minimize downtime by using a temporary workspace, and you’ll adjust the plan if essentials arrive late.
Stay focused, communicate, and wrap on time.
Can I Renovate on a Pass/Fail Budget Without Surprises?
A surprising 60% of homeowners report budget creep, so you can’t count on a pass/fail budget. You’ll want real-time cost tracking, transparent contingencies, and clear scope boundaries.
You can renovate on a pass/fail budget only if you build in budget flexibility for unexpected fixes and design pivots. Stay proactive: document decisions, total quotes, and trade-offs.
Expect renovation surprises, then respond quickly to keep the project on track and within your means.
What if Permits Delay My Project Beyond the Timeline?
If permits delay your project, you proactively manage it by tracking the permit process daily and communicating clear timelines with your contractor.
You’ll stay ahead by building a buffer in your schedule and coordinating inspections as soon as approvals arrive.
When selecting a contractor, document milestones, guarantee you have contingency plans, and require transparent updates.
Maintain momentum by scheduling work that can proceed pending permits, keeping all parties aligned, and clarifying responsibilities to avoid stalls.
How Do I Limit Disruption for Daily Cooking During Remodel?
You can limit disruption by creating temporary cooking solutions and sticking to a tight, organized routine. Set up a dedicated prep zone, a portable stove or hot plate, a mini-fridge, and a microwave in a nearby room.
Use daily kitchen organization tips like labeling shelves and batching meals. Keep essential pots, pans, and utensils accessible, and streamline cleanup.
Communicate changes with everyone in the house to stay ahead and minimize interruptions.
Should I Hire a Project Manager for Small Kitchen Updates?
Yes, you should consider hiring a project manager for small kitchen updates. A PM helps coordinate schedules, handles change orders, and keeps costs in check.
Focus on cost estimation early and define milestones to avoid scope creep.
For contractor selection, compare bids, verify licenses, and check past work.
A proactive PM saves you time, reduces disruption, and guarantees the project stays on budget while you continue daily cooking.
Conclusion
You’re in the driver’s seat, steering every decision with clear milestones and a realistic budget. Stay focused on must-haves, lock in reliable trades early, and choose durable, eco-friendly materials that stand up to daily use. Build a practical timeline with buffers, and design for seamless workflow. Anticipate glitches and reallocate as needed. Think of your plan as a sturdy compass—pointing you toward a calm, stress-free remodel and a kitchen you’ll love for years.