
You’ve likely felt it: a doorway barrier, a sofa that doesn’t fit, and yet the space somehow still feels crowded. In compact homes, smart layout tweaks can turn limited square footage into fluid, functional zones. You’ll get multi-use areas, hidden storage, and furniture that breathes with you, all while guiding natural light and clean sightlines. Ready to see practical tweaks you can implement—without compromising comfort or style? Let’s start.
Key Takeaways
- Design clear flow by aligning primary zones with door swings and creating sightlines that remain unobstructed for a spacious feel.
- Use multi-functional, modular furniture with hidden storage to maximize flexibility without clutter.
- Prioritize light materials, cohesive color, and reflective surfaces to visually expand small spaces.
- Integrate hidden storage throughout built-ins, beds, sofas, and benches to reclaim visible floor area.
- Optimize site traffic and maintenance with efficient layouts (kitchen work triangle, compact fixtures, and accessible plumbing).
Foundational Layout Principles That Make Small Rooms Feel Bigger
Small rooms feel bigger when you prioritize flow and sightlines. You optimize the core layout by placing primary seating and work zones where they don’t interrupt movement paths, ensuring clear sightlines to doors and windows.
Prioritize furniture scaling so pieces read as proportional to the space; avoid oversized sofas or bulky cabinets that trap sightlines. Choose low-profile, well-arched silhouettes and compact storage that breathe.
Implement acoustic zoning to minimize sound spill between zones without visual clutter—soft textiles, rugs, and strategic paneling dampen noise and cue separation.
Align traffic patterns with door swings and grid-like spacing to create perceptual air. Keep verticals minimal and repeat a restrained material palette to reinforce coherence.
This disciplined approach yields rooms that feel legible, balanced, and surprisingly expansive.
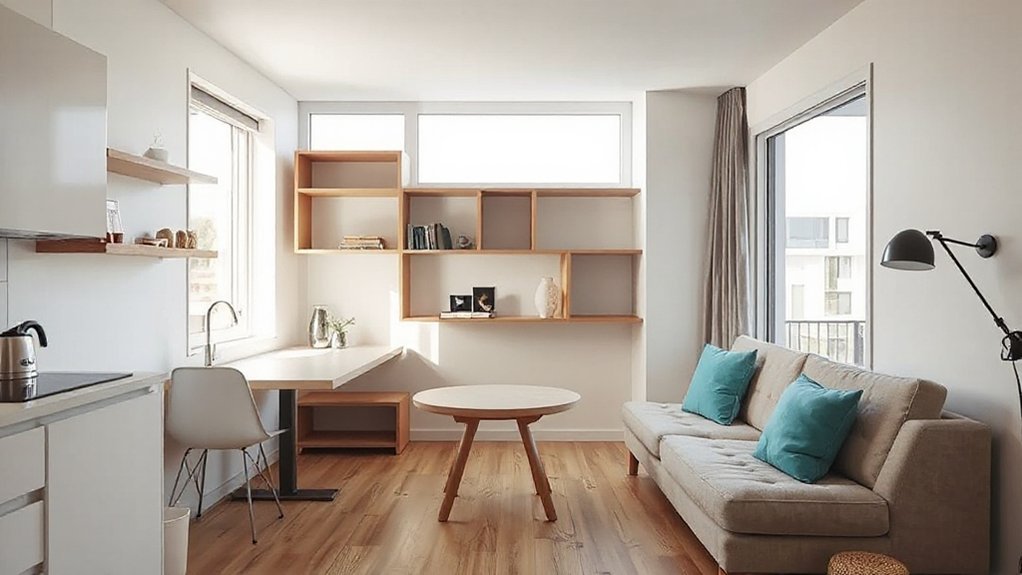
Create Multi-Purpose Zones Without Clutter
You’ll start by designating clear zones that serve multiple functions without clutter, using furniture and layout tricks to maximize efficiency.
Prioritize hidden storage, modular pieces, and zones that adapt with your routine to keep surfaces clean and purposeful.
We’ll discuss practical strategies for balancing flexibility with restraint to maintain a coherent, design-forward flow.
Multi-Use Zones
Use room dividers that don’t feel permanent—slatted screens, folding screens, or low bookcases—so light and sightlines remain uninterrupted. Area zoning works best when each area has a defined purpose and a visual cue, like rug size or chair arrangement, that signals its function.
Prioritize storage built into seating or beneath platforms to prevent items from drifting into adjacent zones. Keep technology and charging points accessible yet discreet.
Consistent margins, tactile materials, and a deliberate color cadence unify shifts between zones.
Clutter-Conscious Design
Ever wonder how to create multi-purpose zones that feel open rather than cluttered? You prioritize clear sightlines, choose furniture with hidden storage, and assign dedicated but flexible functions.
Start with a modular layout: zone the room using low-profile screens, rugs, or shelving that don’t trap light. Incorporate built-ins to reclaim surface area, keeping walls uncluttered and surfaces only lightly touched with essentials.
Opt for multi-functional pieces—sofas with storage, coffee tables with lift tops, wall desks that fold away. Use personalized decor selectively, rotating accents to signal shifts without gathering dust.
Prioritize acoustic design by treating key surfaces and selecting rugs or fabric panels that dampen noise, preserving calm in busy zones.
End each area with a predictable, simple silhouette to maintain spaciousness and flow.
Hidden Storage Tricks That Free Up Living Space
Hidden storage tricks can reclaim significant square footage without compromising style. You’ll map every inch, prioritizing built-in pockets over freestanding bins.
Hidden compartments in beds, sofas, and benches tuck seasonal gear or quilts out of sight, yet stay instantly accessible. Use storage accessories that mesh with your design—soft-close lids, labeled bins, and modular organizers—so you don’t lose the tactile certainty of finding what you need.
Wall-mounted desks with recessed housings transform corners into work nooks without stealing floor space. Understairs and above-wardrobe nooks extend vertical potential, while hollow ottomans double as seating and discreet bins.
Choose materials and finishes that blend with yours, ensuring function amplifies, not competes with, the room’s visual balance.
Flexible Furniture That Adapts to Your Small-Space Needs
When space is tight, choose flexible furniture that redefines room layouts on the fly. You gain efficiency by selecting pieces that multitask—think seating that converts to a workspace, or a coffee table that doubles as a dining surface.
Prioritize clean lines, durable hinges, and modular components to sustain storage optimization without visual clutter. Precision in scale matters: furniture that fits your corridor widths and ceiling height prevents awkward gaps.
Design-forward choices should emphasize lightweight frames and hidden connectors for quick reconfiguration, maintaining flow and comfort. Remember, flexibility isn’t chaos—each item earns its place through look, feel, and function.
- Modular sofa modules that reconfigure for guests or daily routines
- Nesting tables and lift-top storage with hidden compartments
- Fold-away desks integrated into compact desks-and-dining combos
- Convertible ottomans that reveal storage and seating options
Light and Flow: Maximize Natural Light in Small Homes
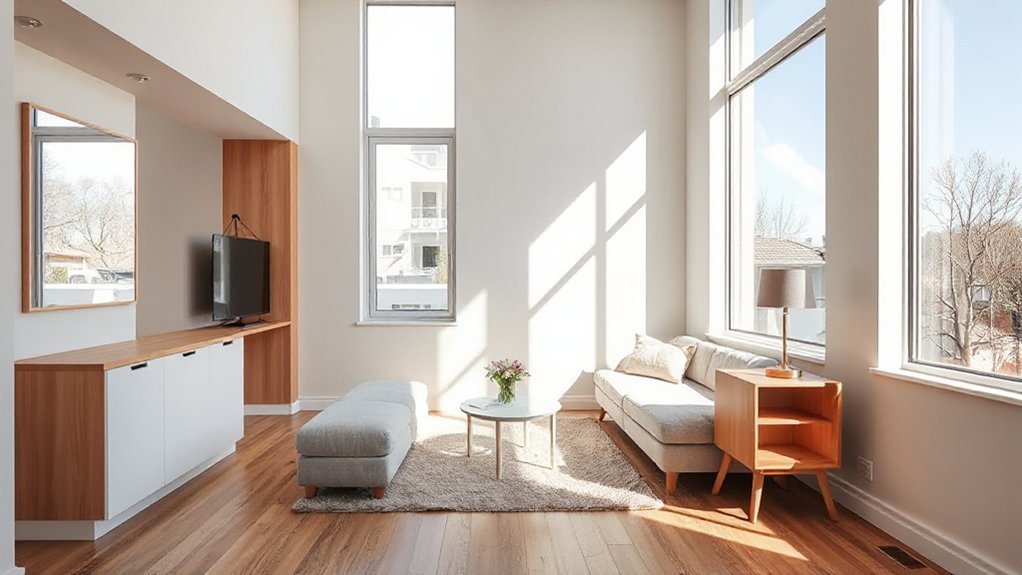
Natural light should guide your layout decisions, not merely decorate them. You optimize flow by positioning key zones where daylight arrives earliest, reducing need for artificial lighting during the day.
Prioritize furniture placement that keeps sightlines open from windows to living spaces, avoiding bulky silhouettes that trap shadows. Choose low-profile seating and transparent bases to preserve light diffusion and maintain a sense of airiness.
Use window treatments that modulate brightness without dulling space—sheer curtains for diffused glow, side-mounted panels for quick glare control, and motorized shades for timed shifts.
Align mirror placement opposite windows to bounce daylight deeper into rooms, and keep interior finishes light and cool to reflect light.
Precision in scale and placement yields brighter, more expansive small homes.
Vertical Solutions: Shelving, Lofts, and Tall, Narrow Storage
Vertical space is your frontier—design shelves, lofts, and slender storage that pull function up without crowding floor area. Prioritize lofted living solutions that maximize usable height.
Engineer narrow shelves with sturdy joints and clean lines to support daily needs. You’ll optimize vertical space by pairing precise dimensions with purpose-driven modules that feel deliberate, not cramped.
Vertical Space Optimization
In tight spaces, maximizing vertical space is a game changer: shelves, lofts, and tall, narrow storage systems let you reclaim floor area without sacrificing accessibility.
- Install modular shelving that adapts to awkward nooks, so decorative accents stay visible without crowding.
- Use a compact loft bed with integrated drawers to free floor space for work zones and acoustic treatments.
- Implement tall, slender wardrobes with door-mounted organizers to minimize footprint while maximizing storage density.
- Pair wall-mounted desks with floating shelves above for instant task zones and improved rhythm in your layout.
Vertical optimization demands precise measurements, sturdy anchors, and clean lines.
Favor hidden hardware and seamless finishes to maintain a calm, design-forward aesthetic.
Lofted Living Solutions
Lofted living centers on smart, space-saving solutions that keep your floor area open without sacrificing storage or style. You leverage vertical space with purpose: mezzanines that add usable rooms, integrated shelving that trails along columns, and tall, narrow storage that tunes depth without widening footprints.
Prioritize structure that supports multiuse zones—sleep, work, and gear—without crowding sightlines. Choose materials and finishes that reinforce energy efficiency, like sealed, durable surfaces and reflective ceilings to amplify light.
Acoustic privacy matters: position lofts to create buffer zones, use dense panels and soft textures around entertainment or study nooks, and install decoupled mounts to diminish sound transfer.
Plan accessibility first: stairs or ladders should feel secure, with landings that double as display or seating, seamlessly integrated into your design.
Narrow Shelf Engineering
- Align shelves with standard studs and use shallow depth for high-density, easy-to-reach storage.
- Implement adjustable rails to adapt to changing items without reconfiguring cores.
- Integrate loft interfaces so sleeping zones share vertical space without encroachment.
- Finish edges in matte neutrals to preserve a sleek, modern aesthetic.
This is narrow shelf engineering in practice: efficient, scalable, design-forward, and functionally precise.
Smart Traffic Patterns to Eliminate Crawling Clutter
Smart traffic patterns are the backbone of a clean crawl experience: by orchestrating how bots move through pages, you minimize requests, reduce clutter, and speed up indexing. You optimize route logic, minimize redirects, and segment content with consistent priorities.
Start with a predictable cadence: prioritize critical pages, then tier secondary content to avoid back-and-forth crawls. Monitor crawl depth and adjust depth limits to prevent wasted scans.
Map traffic flow across site sections to reveal clutter zones where bots stall or retry. Use canonicalization and clean internal linking to guide traversal, rather than forcing random access.
Regularly audit logs to detect redundancy, prune stale paths, and reinforce lean navigation. The result is faster indexing, lower server load, and a smoother user-focused crawl experience.
Kitchen and Bath Layout Tweaks for Tiny Homes
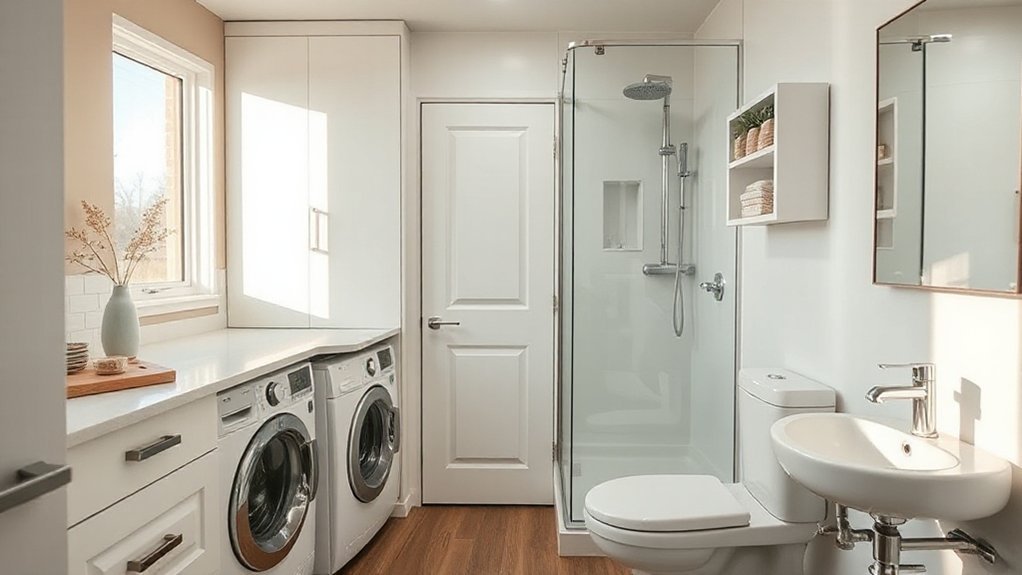
Tiny homes demand clever zoning and compact workflows, so kitchen and bath layouts should maximize every inch while preserving ease of use. You’ll prioritize tight, functional zones that cut motion and boost reliability, with a focus on Appliance placement and Plumbing efficiency to prevent bottlenecks.
- Align the sink, stove, and fridge on a single work triangle, minimizing steps and debris transfer.
- Integrate a compact dishwasher and under-sink storage to keep counters clear.
- Use wall-mounted fixtures and shallow cabinets to reclaim floor space without sacrificing utility.
- Plan plumbing runs in parallel loops with accessible cleanouts for quick maintenance and reduced leak risk.
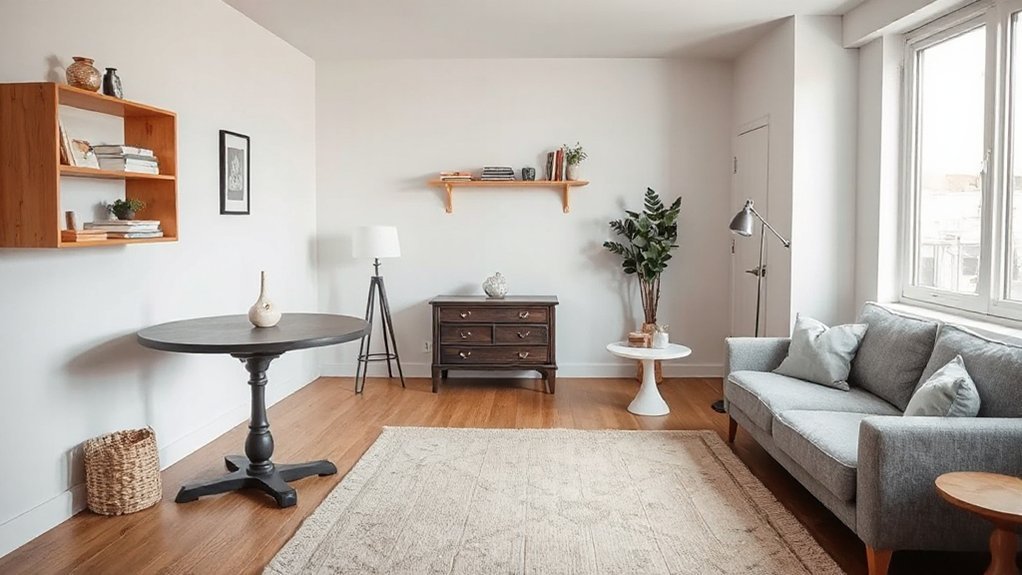
Color and Material Choices That Make Spaces Read as Larger
Light reflects space by leaning toward light, neutral, and high-gloss or matte finishes that bounce daylight across walls.
Choose materials with the same tonal value to minimize seams and visually extend the room; lighter floors and ceilings reinforce the effect.
Keep textures restrained and consistent to read as larger, without competing patterns or abrupt color breaks.
Light Reflects Space
Natural light bounces off surfaces to visually expand a room, so choose finishes that reflect rather than absorb. You’ll maximize perceived space by pairing bright, neutral backdrops with deliberate highlights. Focus on how Lighting fixtures and Color palettes interact to trap or release light, shaping depth and airiness.
- Select glossy or satin coatings on walls and ceilings to multiply reflected light without glare.
- Use cool, pale neutrals as base tones, then introduce warm accents to avoid flatness.
- Choose lighting fixtures with reflective shades or polished metals to boost ambient brightness.
- Plan mirrors or glass elements strategically to extend sightlines without crowding the space.
Materials That Read Larger
Materials don’t just cover walls; they shape perception. You’ll read larger spaces by choosing material textures that reflect light evenly and avoid busy patterns that halve perceived scale. Opt for continuous surfaces or subtly joined panels in pale, cool color palettes to minimize visual breaks.
Matte or satin finishes tend to read as expansive, while high-gloss accents should be sparing, used to heighten brightness rather than dominate. For floors, unify material across zones to reduce perceptual seams; a single wood or porcelain plank width enhances flow.
When selecting countertops and cabinetry, maintain restrained contrasts, so edges stay barely perceptible. Consider texture variation within a cohesive color palette to add depth without visual clutter, keeping sightlines clear and rooms feeling airier.
Materials matter.
Real-World Micro-House Examples: Before and After
Real-world micro-houses demonstrate how small footprints translate into big livability, with compact layouts that maximize every inch. You’ll notice before-and-after cases reveal how smart choices in furniture, storage, and circulation release perceived space, not just actual square footage.
Each example highlights practical tactics you can apply, from furniture that tucks away to walls that flex between zones. Key improvements often pair outdoor landscaping with interior flow, boosting connection to the outdoors while preserving efficiency.
Smart home technology underpins predictable usability, automating lighting, climate, and security without clutter. The outcomes emphasize durable, scalable adjustments you can replicate in any compact setting.
- Before vs. after floorplan changes show measurable space gain
- Storage solutions optimized for everyday routines
- Outdoor landscaping integration that enhances room feel
- Smart tech upgrades that simplify living without intrusion
Quick-Start Checklist to Implement Your Layout Tweaks
Start with a quick, practical checklist you can use today: map your current layout, identify the tightest zones, and choose one tweak to test this week.
Begin by sketching a simple floor plan and marking traffic paths, door swings, and alcoves.
Next, evaluate furniture arrangement to free clear lines of sight and maximize usable surface area without crowding.
Prioritize one low-risk change—perhaps shifting a sofa, swapping a coffee table for a pedestal, or rearranging seating for dialogue.
Assess privacy solutions by defining zones for work, sleep, and relaxation, using screens, curtains, or vertical storage to minimize visual clutter.
Set a measurable target, document results, and iterate weekly.
Document lessons learned and maintain momentum for smarter, more livable spaces.
Frequently Asked Questions
How Do I Measure for Optimal Furniture Scale in Tiny Rooms?
To measure for ideal furniture scale in tiny rooms, start with a clear unit of measure and a basic grid.
Use furniture proportions as your guide: pick pieces that are 0.4–0.6 times the room’s smallest dimension to avoid crowding.
Test with painter’s tape, then adjust.
Prioritize space optimization by selecting modular, low-profile items and leaving at least 18 inches between seating and walls.
Check sightlines, guarantee comfortable reach, and refine until proportions feel balanced.
Can Small Layouts Affect Energy Efficiency and Comfort?
Yes—small layouts can affect energy efficiency and comfort. You’ll tighten this by prioritizing lighting optimization and strategic thermal zoning, so you illuminate where needed and limit waste.
You’ll cluster heat with smart zoning, use compact, well-insulated fixtures, and deploy passive cooling where possible.
You’ll balance natural light with shading, guarantee airtight joints, and maintain comfortable air flow.
You’ll test, adjust, and document results to sustain steady comfort and lower bills.
What Budget Range Realistically Fits These Tweaks?
You can realistically fit these tweaks within a moderate budget, roughly $1,000 to $5,000 depending on room size and materials.
You’ll invest in smart furniture arrangement, modular pieces, and efficient storage solutions to maximize every inch. Prioritize multifunctional furniture, anchor walls for circulation, and choose durable finishes.
Consider secondhand or showroom discounts to lower costs.
Plan a phased approach: start with essential storage solutions, then refine with strategic furniture arrangement for daily livability.
Do These Tweaks Impact Resale Value or Durability?
Like a well-tuned instrument, you’ll notice subtle tweaks under pressure. Yes, these changes can affect resale impact and durability.
If you choose modular, high-quality materials and maintain clean join lines, resale value generally holds steadier.
Durability concerns arise with frequent reconfigurations or lightweight fixtures; prioritize solid framing, protected finishes, and proper ventilation.
You’ll mitigate risk by documenting specs, warranties, and installation details, ensuring lasting performance and reassuring buyers about long-term value.
How Long Before I’Ll Notice Livability Improvements?
You’ll notice livability improvements within days to a couple of weeks as you test furniture arrangement and recalibrate traffic flow.
With space optimization, you’ll feel rooms feel larger and functions clearer after you’ve mapped zones and minimized clutter.
Expect quicker shift times between activities and easier cleanup.
Reassess twice a week for the first month, fine-tuning placements as you go.
This practical, precision approach keeps momentum, ensuring ongoing improvements without overwhelming your daily routine.
Conclusion
You’ve learned practical tweaks that quietly transform tiny spaces into livable ones. Embrace flexible zones, hidden storage, and multi-purpose furniture to reclaim floor area without sacrificing function. Prioritize light, thoughtful traffic flows, and clean lines to avoid visual clutter, while subtle material choices keep rooms feeling calm and taller. If you slip in efficient layouts and smart finishes, you’ll avoid overreaching trends and gently invite comfort—precisely where you’d want it, without shouting for attention.


