
Maximise a compact UK bathroom by embracing wall-hung fixtures, smart zoning, and corner layouts. Start with a shower-first, wet-zone approach and use wall-hung basins and toilets to free floor space. Use quadrant or corner showers with sliding doors to avoid swing clearance issues, and pair them with slim vanities or open shelving to keep sightlines open. Plan corridors-free layouts with built-in niches and vertical storage to reduce clutter. If you keep exploring, you’ll discover more practical setup tips.
Plan Your Compact UK Bathroom: Define Goals and Constraints
Before you sketch ideas, define what you actually need from a compact UK bathroom. You’ll map goals against constraints to keep scope realistic. Identify essential tasks: shower, toilet, sink, storage, and occasional guests.
Prioritise spatial flow, access, and ventilation, then shortlist plumbing fixtures that fit small rooms without compromising usability. Consider wall-mounted options to maximise floor area and ease cleaning.
Clarify tolerance for tradeoffs between size and comfort, such as a compact basin versus a full-width vanity. Define budget, installation timelines, and future-proofing, like easy reconfiguration or modular elements.
Note favored bathroom decor styles and how fixtures harmonise with them. Document non-negotiables, like accessibility needs or priority lighting, to guide decisions and prevent scope creep.
This crisp plan anchors practical layout choices.
How to Assess Your Space: Measurements and Vision
Start by measuring every relevant dimension—length, width, height, door swing, and fixed utilities—so you know your real canvas.
Then translate those numbers into a practical plan, noting clear constraints and opportunities for movement or storage.
Finally, visualize your space with simple sketches or a photo-mashup to align your goals with what’s feasible.
Measure Twice, Plan
To design a bathroom that truly fits your space, start with precise measurements: walls, door swing, window clears, and any built-in fixtures. You’ll map total footprint, door clearance, and switch locations, then note obstructions like radiators or pipes.
Create a grid from floor to ceiling to visualize proportions before selecting fixtures. Measure multiple times, twice on each dimension, and verify with a second person.
Translate measurements into a scaled plan, checking for feasible clearances around taps, toilets, and outlets. Focus on Color schemes and Material choices early, ensuring harmony with the room’s light and ventilation.
Prioritize modular, compact solutions that maximize usable space without visual clutter. Finally, test your layout with a mock arrangement to confirm traffic flow and accessibility.
Visualize Your Space
Take a clear-eyed look at the space by translating measurements into a visual plan you can walk through. You’ll sketch footprints of fixtures, then place them in your mind’s eye from door to far wall. Use a simple grid: measure walls, door swings, and window clearance, and note any obstructions.
Visualize traffic flow: how you’ll move between sink, toilet, and shower without squeezing past. Translate this into a plan you can test with tape on the floor or digital apps.
Consider Color schemes to help perception of space: light tones expand, dark accents define zones. Material choices should reflect damp conditions yet stay low maintenance.
Prioritize scale and clearance, then refine with furniture and storage that align to your visual plan.
Zoning for Daily Flow in Tiny Rooms
Even in tiny bathrooms, smart zoning makes daily routines smoother by separating activities—washing, shaving, and storage—so you’re never crossing paths in a tight space.
You’ll gain flow by defining micro zones: a wet area near the shower, a dry prep zone for grooming, and a compact storage wall that keeps toiletries out of the main path.
Use horizontal boundaries—slim shelves, a shallow vanity, and a shower curtain or glass divider—to guide movement without visually shrinking the room.
Prioritise acoustics by placing the toilet and sink away from the shower when possible; soft mats and mats beneath doors reduce noise travel.
Choose eco friendly materials for surfaces and cabinetry to sustain a small footprint without compromising durability or style.
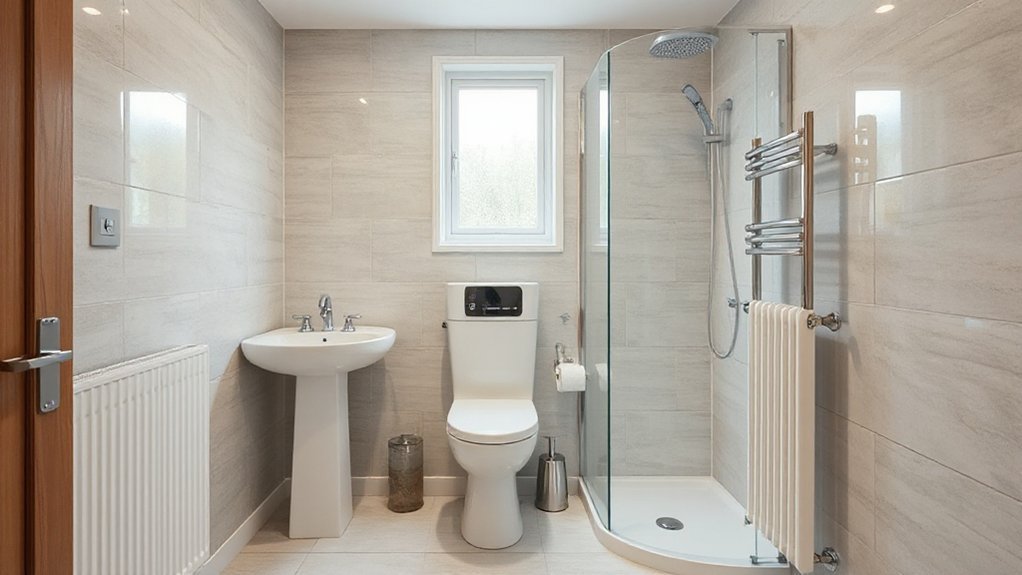
Choosing Wall-Hung Fixtures to Save Floor Space
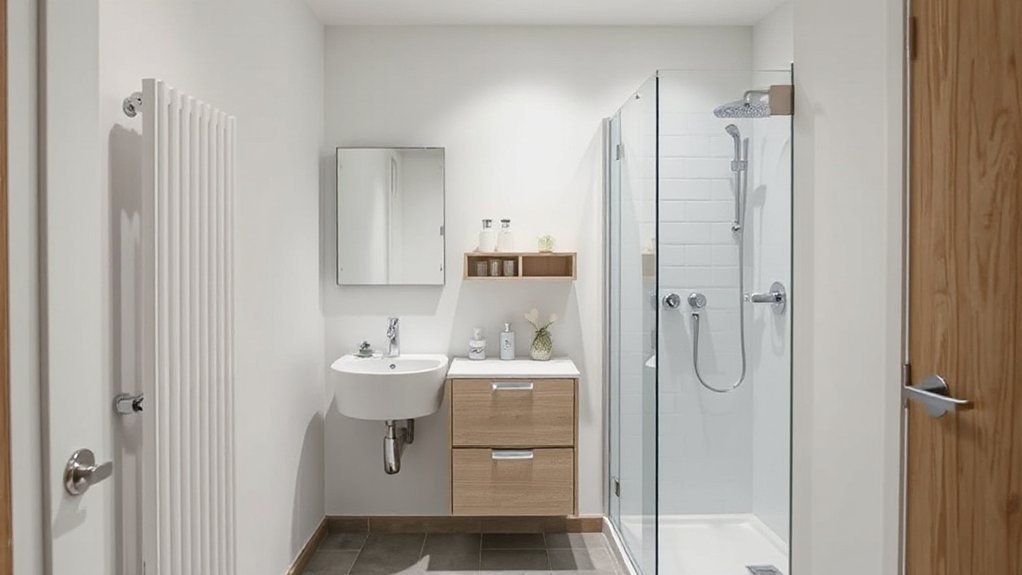
Wall-hung fixtures instantly free up floor space, making a compact UK bathroom feel larger and easier to clean. You’ll gain a sense of openness without sacrificing function, since wall mounted fixtures accept standard UK dimensions and heights.
For reliability, choose high-quality fittings and guarantee proper wall support with solid fixing backplates. Space saving ceramics stay neat under tighter sightlines and simplify cleaning routines around bowls and sinks.
- Install a wall-hung basin and toilet to maximize maneuverability, while keeping essential clearance.
- Pick compact cisterns and rounded edges to reduce splash risk and maintenance.
- Pair with a slim vanity or open shelving to maintain storage without crowding the floor.
This approach optimizes flow, enhances hygiene, and aligns with current UK bathroom standards.
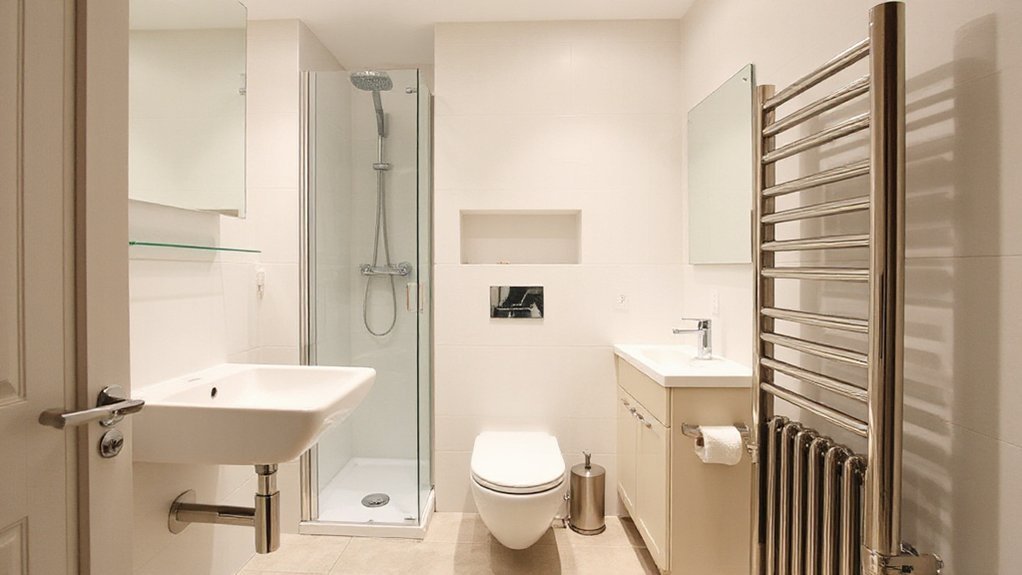
Corner and Quadrant Options for Freespan Layouts
Corner showers can maximize space by tucking into awkward corners, boosting usable floor area without shrinking the bath’s feel.
A quadrant layout concentrates wet zones for efficient drainage and easy cleaning, while still leaving a compact, open footprint.
You’ll gain practical flow insights as you compare fixture placement and access within freespan configurations.
Corner Shower Efficiency
One smart way to maximize a freestanding layout is to choose a corner or quadrant shower that fits the available space without intruding on the room’s flow. A well-chosen Shower enclosure shapes the path through your bathroom and preserves landing space for towels and bins.
Focus on a tight Corner configuration that minimizes wasted floor area while keeping door operation smooth. Consider clear glass to visually expand the room and reduce sightlines that shrink the perceived space.
- Opt for a sliding or bi-fold door to avoid swing clearance issues.
- Choose a compact, low-profile tray to maintain floor continuity.
- Prioritize reinforced enclosures with leak seals and easy-clean surfaces.
Quadrant Layout Benefits
Quadrant layouts offer a balanced use of floor space by pairing a compact corner setup with a freestanding design, letting you tailor shower footprint to your room’s flow. You gain efficient access, reduced door swings, and a visually open feel that enhances bathroom aesthetics.
The quadrant approach supports varied glass proportions and tile layouts, so you can zoning-clean lines without crowding. Choose a corner entry to minimize splash without sacrificing accessibility, then align the freestanding section to create a natural traffic path.
Practicality meets performance: durable, easy-clean surfaces resist damp zones, while sleek profiles keep the room feeling larger. Eco-friendly materials are easy to integrate, from recycled glass to low-VOC tiles.
In tight UK spaces, this layout blends style with function, maximizing usability and longevity.
Slimline Tubs and Alternative Tub Placements

Are slimline tubs truly the smartest choice for tight UK bathrooms, or should you explore alternative placements first? You’ll weigh footprint, access, and elbow room, since every millimeter matters in compact layouts. Slimline tubs save space, but they’re not always the best fit for full bathing; consider how you’ll use the bath and where doors swing.
Alternative tub placements can open floor plans, improve circulation, and free up wall space for storage or a shower. Be precise about alcoves, corner fits, or against-wall integrations that maintain usability without cramping the room.
- Assess alcove options to maximize open floor area without sacrificing bathing capability.
- Consider corner tubs or offset placements to extend walkways and enhance access.
- Pair compact tubs with a shower enclosure for flexible daily routines.
Vertical Storage: Cramping Narrow Walls Into Usable Shelves
Vertical storage on narrow walls isn’t a luxury in compact UK bathrooms—it’s a necessity. You’ll maximize every square inch by choosing vertical shelving that climbs rather than expands.
Opt for wall mounted units that align with plumbing lines to avoid bulky backsplits and wasted space. Install shallow, open-ended shelves to display essentials without accumulating dust, keeping clearance for door swings.
Use corner adaptors or tall, slim cabinets above the toilet or sink to harness dead vertical space. Choose units with integrated baskets or modular tiers so you can reconfigure as needs change.
Finish with a uniform color or flush fronts to reduce visual clutter. Remember, wall mounted units should be anchored securely, supporting weight without sagging into adjacent fixtures.
Pocket Doors to Widen the Usable Footprint
Pocket doors can dramatically widen the usable footprint in compact bathrooms. When you swap hinged doors for pocket doors, you gain floor space without encroaching on the room’s centre. This improves circulation and makes fixtures feel proportionate in tight UK layouts.
For space optimization, choose versatile finishes and high-quality hardware that glide smoothly and resist humidity.
1) Choose a track system rated for damp environments to prevent sticking and sagging.
2) Specify a door with a slim profile and mirrored or light-reflective surface to enhance perceived spaciousness.
3) Plan precise cabinet and fixture placement so the door clears taps, towel rails, and storage when retracted.
Pocket doors reduce wasted square footage, streamline movement, and support pragmatic space optimization.
Optimising Door Swing in Tight Spaces
Consider pocket or inwards-opening options when possible, but if a standard door remains, reimagine its pivot points.
Door clearance matters: measure clearance at the opening, noting any obstructing knobs, towel rails, or cabinetry. Position hinges to maximise swing without colliding with adjacent walls or furniture; hinge placement can shift the door’s effective reach and reduce pinch points.
Use partial openings for frequent passes, and install soft-close mechanisms to control motion in confined corridors.
Finally, test practical routes in real scenarios, adjusting clearance and hinge layout for seamless operation.
Plumbing Layouts for Efficient UK Bathrooms
Think about efficient pipe routing first, so hot and cold feeds reach fixtures with minimal bends and vertical runs.
Pair that with compact fixture planning, grouping sinks, toilets, and showers to share wall cavities and reduce wall damage.
This approach keeps plumbing practical, serviceable, and neatly integrated into compact UK bathrooms.
Efficient Pipe Routing
- Map every run before cutting, marking entry points and clearances.
- Use L- or straight runs to limit fittings and pressure drops.
- Group services (hot, cold, vent) to simplify future checks.
Compact Fixture Planning
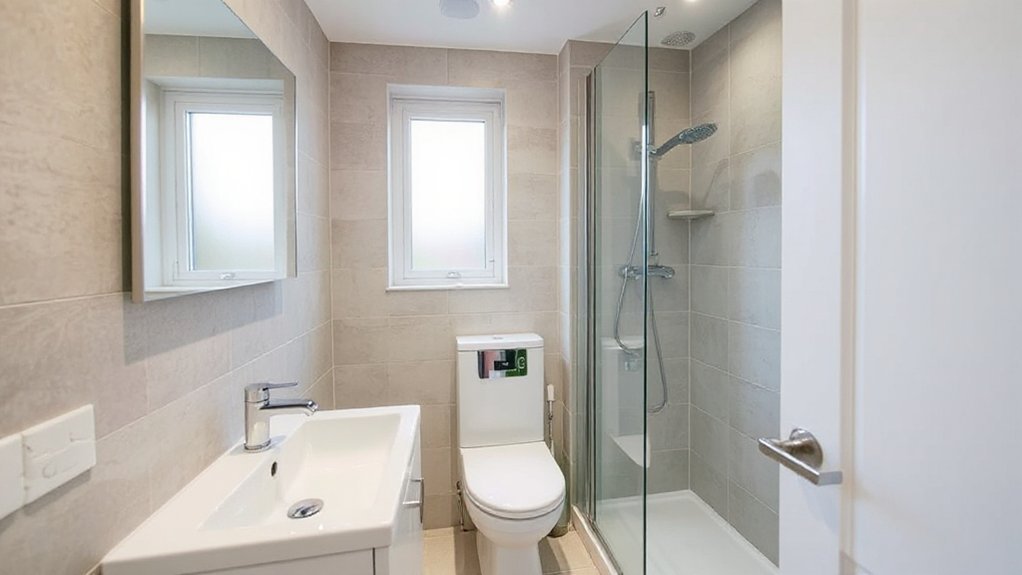
So where should you place fixtures in a compact UK bathroom to maximize space and flow without compromising usability? Start with a single-wall layout or a corner cluster to minimize pipe runs and heat loss.
Prioritize a short, straight run for the loo and basin, then nest the shower against the opposite wall with a recessed cubicle or wet area to keep floors clear.
Use wall-hung units to free floor space and boost perceived roominess. Choose compact, shallow basins and a dual-flush toilet to save water.
Consider Vintage fixtures for a timeless look without bulk, and Eco friendly materials for sustainable durability.
Plan access for future maintenance, and seal transitions tightly to prevent leaks. This approach delivers practical, efficient plumbing layouts.
Lighting First: Brightness and Ambiance in Small Rooms
Good lighting is essential in compact bathrooms, where every watt and layout choice counts. You’ll maximize space perception with layered brightness: ambient, task, and accent.
In small rooms, choose fixtures that diffuse light evenly and avoid harsh shadows, so mood enhancement comes without glare.
- Use a dimmable ceiling light paired with a cool-to-neutral color temperature for ambient lighting to keep the room feeling open.
- Add task lighting around mirrors, ensuring glare-free reflection for shaving or makeup.
- Introduce subtle accent lights, like under-cabinet LEDs, to guide without overpowering the space.
Tip: combine ambient lighting with mirror glare control and dimming capability to sustain mood enhancement while preserving practicality.
Ventilation Solutions for Compact UK Homes
Compact UK bathrooms often suffer from damp and mould when ventilation is weak. To address this, prioritise continuous air exchange and targeted extraction.
Install a quiet, appropriately sized extractor fan linked to humidity sensors or a timer, so it runs when moisture peaks and turns off automatically.
Use an inline vent or ducted system if possible to remove damp air directly to the outside, avoiding recirculation.
Include a ramped boost setting for showers and baths, and consider passive ventilation like external routes or high-level vents where feasible.
Pair ventilation with air filtration to reduce airborne pollutants and improve air quality.
Keep doors slightly ajar during use and maintain seals, ensuring consistent moisture control across the room.
Regularly clean filters and ducts for optimum performance.
Heating and Towel Warmer Options for Small Bathrooms
Smart budgeting and space awareness guide your heating choices, so you’ll want high-efficiency options that fit tight layouts without blowing your energy bill.
For small bathrooms, look at compact towel warmers and wall-mounted radiators that heat quickly and evenly, minimizing heat loss from doors and vents.
We’ll compare efficiency, size, and installation practicality to help you pick warmers that deliver comfort without clutter.
Heating Efficiency For Small Bathrooms
To heat a small bathroom efficiently, start with a thoughtful mix of sizing, placement, and heat sources that minimize waste—focusing on warm taps, towel warmers, and quick-acting radiators.
You’ll boost thermal insulation and energy conservation with tight seals, double-glazed windows, and insulated pipework, cutting heat loss at every edge.
Choose compact radiators sized for room volume and heat them with smart controls to avoid overshoot.
1) Prioritize low-flow, energy-efficient fittings and a programmable timer to match usage patterns.
2) Position heaters where heat rises toward the ceiling and isn’t blocked by furniture or doors.
3) Pair towel warmers with a dedicated timer or thermostat for targeted comfort without excess load.
Compact Towel Warmer Options
When space is tight, choose towel warmers that maximize heat output without occupying precious wall area. Compact towel warmer options can blend form and function, delivering reliable heating while preserving bathroom footprint.
Consider towel radiators with high heat output per wall length, or compact vertical models that fit narrow alcoves. For small layouts, a dual-function unit that serves as a radiator and towel rack keeps essentials accessible without clutter.
If you prefer underfloor or wall-mounted possibilities, guarantee the installation doesn’t compromise bathroom layout or safety clearances. Opt for models with sturdy mounting, robust thermostatic control, and rust-resistant finishes for longevity.
In short, evaluate towel radiator options by output, footprint, and ease of use to achieve efficient heating towel performance.
Mirrors and Glass to Maximize Light

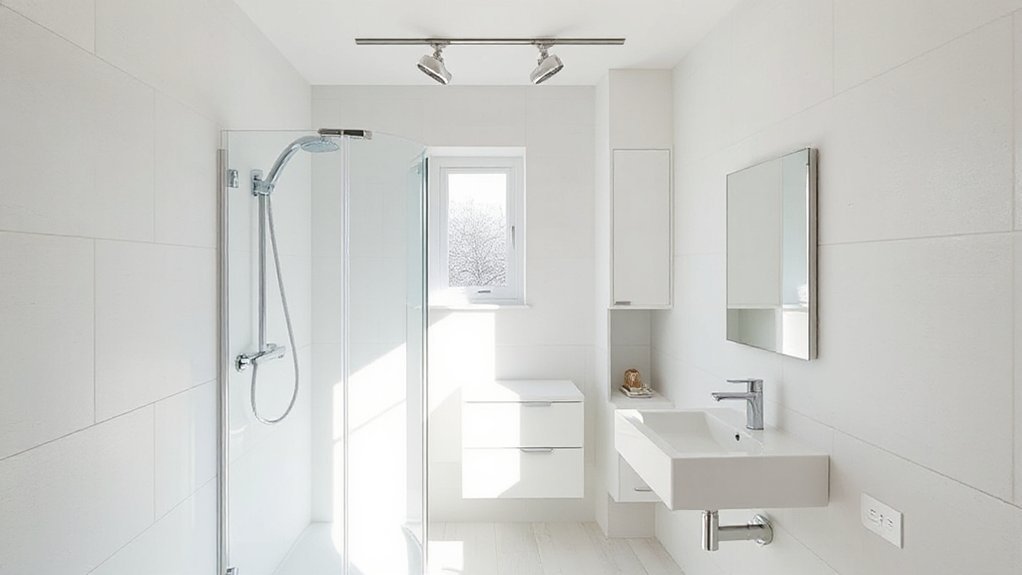
Mirrors and glass are your best tools for making a compact bathroom feel brighter and more open. You’ll leverage reflective surfaces to bounce light from windows and lights, visually expanding the space.
Focus on mirror placement to maximize exposure to natural and artificial light, and choose glass panels that minimize visual barriers while keeping privacy where needed.
- Mirror placement: position above sinks and adjacent walls to catch both daylight and ceiling lights, avoiding heavy frames that absorb light.
- Glass panels: opt for clear, frameless designs for doors or shower enclosures to reduce visual clutter and keep lines airy.
- Layered lighting: combine task, ambient, and accent lights with mirrors to amplify brightness without increasing clutter.
Recessed Niches and Shelving: Storage Islands
Recessed niches and shelving create hidden storage islands that keep fixtures lean and spaces uncluttered.
You can combine built-in niche shelves with compact bath zoning to separate wet zones from dry, while preserving floor real estate.
This approach yields practical, stay-clean storage that’s right at hand without crowding the room.
Hidden Storage Islands
1) Recessed niches keep daily items within reach while staying out of view.
2) Slim shelving anchors towels and toiletries without crowding the counter.
3) Integrated lighting improves visibility and enhances the perception of space.
This approach emphasizes hidden storage your family will appreciate, balancing practicality with style.
Built-In Niche Shelves
Plan niches at eye level for ease of use and at varying depths to hold bottles, towels, and decor without cluttering. For small rooms, choose frameless edges and light shelves to reduce visual weight.
Consider moisture-resistant materials and sealed laminates to prevent warping. Use niche lighting to highlight toiletries and create a calm, inviting feel.
Align color schemes with your overall bathroom decor to ensure cohesion; soft neutrals brighten tight spaces, while a bold accent niche can anchor a compact layout.
Built-In Niche Shelves deliver function with minimal intrusion.
Compact Bath Zoning
Where can you maximize storage without cramping a small bathroom? Compact Bath Zoning uses recessed niches and slim shelving to keep essentials accessible without crowding floors.
Focus on defined zones: wet areas, dry storage, and display, so you don’t overfill counters. Built-in niches reduce clutter while preserving floor space, and floating shelves at vanity height add reach-in storage without bulk.
Choose materials with moisture resistance and clean edges to keep lines tight and easy to wipe down. Integrate proper bathroom lighting to highlight niches and improve usability, and pair with quiet ventilation systems to prevent mold in damp corners.
This zoning approach preserves airflow and makes maintenance simpler while enhancing perceived room size.
- Recessed niches in shower walls with LED lighting
- Slim, tall vanity shelving behind doors
- Corner storage islands with integrated towel hooks
Corner Access: Movement Zones in Compact Plans
Corner access shapes how you move through a compact bathroom, turning tight footprints into efficient routes. You map movement zones to keep circulation smooth, avoiding blind corners and unnecessary detours. Place the door so it doesn’t cut into traffic paths, and position fixtures to form logical triangles for entry, use, and exit.
In tight plans, rotate zones around a central pivot—the sink or shower—so you can reach every area without stepping over others. Prioritize accessibility features, such as lever taps and rounded edges, while maintaining a clean flow.
Use clear sightlines and minimal obstructions to reduce trip hazards. Balance function with aesthetic considerations, selecting compact, wall-mounted pieces that visually expand the space while preserving practical movement throughout the room.
Corridor-Free Layouts for Odd Widths
Ever wondered how to design a bathroom that feels spacious even when the width isn’t standard? Corridor-free layouts optimize flow by eliminating dead ends and embracing diagonal or L-shaped fixtures that chase sightlines.
Prioritize elements that visually expand the space: light-reflecting surfaces, narrow cabinets, and wall-hung pieces to keep floors visible. Choose color schemes that brighten the room with cool neutrals and a bright accent to add depth.
Material choices should favor matte finishes on walls and glossy accents on the vanity or tiles to bounce light without glare. Use built-in storage to minimize clutter.
Keep door swings out of the main path and consider a pocket door for additional width.
- Optimize sightlines with coordinated colors and seamless joints
- Choose wall-hung units and recessed storage
- Pair light tones with controlled, purposeful textures
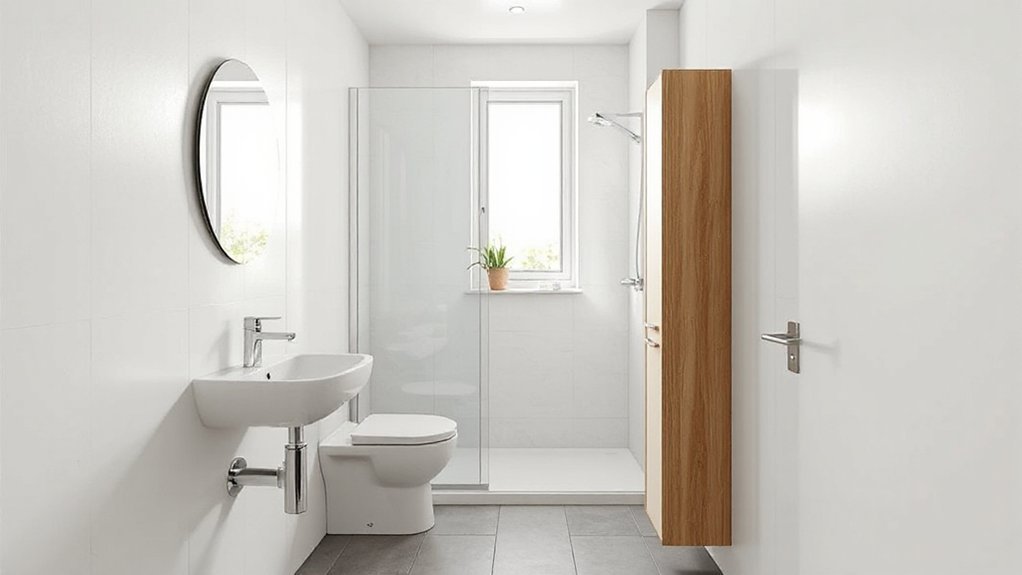
Wet Zone Strategy: Shower-First Layouts
Shower-first layouts put the wet area at the heart of the plan, guiding sightlines and traffic flow from the moment you enter. You define the core zone first, then position dry zones and storage to support it. This approach minimizes water splash spread and simplifies plumbing runs, saving space and cost.
Place the shower ahead of entrances or doors to contain moisture and speed up cleaning. Use a clear glass partition to maintain light and openness while keeping spray contained.
Color schemes should emphasize calm, cohesive tones that visually expand the room; limit contrasts to avoid visual clutter. Material choices matter: choose slip-resistant tile, moisture-resistant cabinet finishes, and resilient countertop surfaces.
Prioritize a compact, efficient shower enclosure and streamlined storage that doesn’t encroach on circulation.
Finishes That Make Space Feel Bigger
- Use seamless panels and continuous color across walls, floors, and cabinetry.
- Select smooth, low-gloss surfaces with restrained textural variation.
- Pair slim fixtures with frameless mirrors to extend sightlines.
Budget-Smart Layout Changes for Real UK Constraints
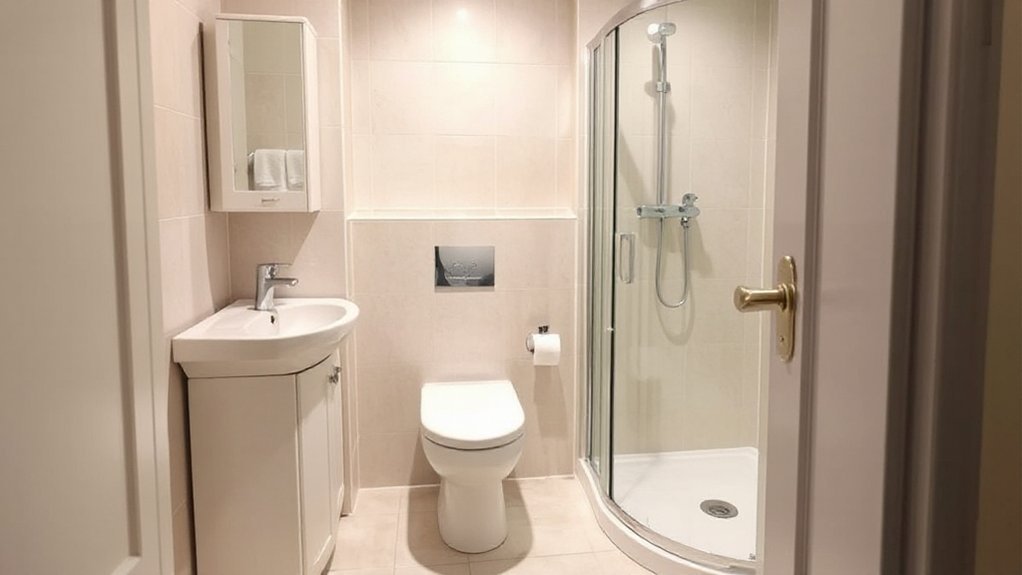
When space is tight and budgets are tighter, you’ll benefit from layout choices that maximize efficiency without compromising feel. Begin with a zone approach: separate wet and dry areas, using a sliding door or curtain to save footprint.
Opt for compact fixtures that still read spacious, like a wall-hung basin and toilet to free floor space. Choose a linear shower with a low-profile tray and clear glass to visually extend the room.
Prioritize easy-to-clean surfaces and durable materials to reduce maintenance costs. Color schemes should enhance perception of space—soft neutrals with a single bold accent wall can enlarge visuals without clutter.
Flooring options matter: align grout lines with cabinet edges for cohesion, and pick light-toned, water-resistant options for continuity.
Frequently Asked Questions
How to Declutter Effectively in a Tiny UK Bathroom?
Declutter by prioritizing essentials and using vertical storage. You’ll implement storage solutions that fit tight spaces, rotate items seasonally, and keep only daily-use basics. Focus on space optimization with wall shelves, over-toilet units, and slim organizers.
What бюджет Options Exist for Budget UK Bathroom Upgrades?
You can upgrade on a budget by prioritizing essentials: repaint, replace fittings, and optimize storage. Look for luxury fixtures and designer accessories on sale, balance durability with cost, and install yourself where possible to maximize value and impact.
Can I Retrofit Underfloor Heating in a Small Space?
Yes, you can retrofit underfloor heating in a small space. Start with underfloor insulation, then install slim, compatible mats or pipes. Use precise heating controls to avoid overheating; a 12–15°C floor rise saves energy and costs.
Which UK Building Regs Affect Compact Bathroom Layouts?
You’ll need to follow UK Building Regulations that cover room heights, drainage, and access, plus ventilation standards and moisture control. Guarantee compliance with Building codes and ventilation standards, and consult Approved Documents for bathrooms to avoid costly fixes.
Best Low-Maintenance Finishes for Small UK Bathrooms?
You should choose low-maintenance finishes like porcelain or ceramic walls and quartz countertops; they resist moisture and stains. For a small UK bathroom, pair Decorative wall tiles with a sleek Freestanding bathtub to maximize space and style.
Conclusion
Think of your bathroom as a tiny ship steering through a narrow corridor—every inch counts. Start with a clear plan, measure ruthlessly, and zone for daily flow. Favor wall-hung fixtures, corner options, and shower-first layouts to free floor space. Choose finishes that bounce light and feel airy. Stay budget-smart by prioritizing changes that open up the most space and practicality. With disciplined layout and clever details, your compact UK bathroom becomes a surprisingly roomy, effortlessly efficient retreat.


