
When you’re planning a kitchen diner knock-through, it’s a happy coincidence that a clear load path often reveals itself early in design and limits future surprises. You’ll assess feasibility, identify main supports, and map how walls transfer weight before you touch anything. This isn’t just about opening space; it’s about selecting beams or lintels, coordinating utilities, and aligning with codes. Stay alert to how decisions ripple through structure and finish, and you’ll gain a stable foundation for what comes next.
Key Takeaways
- Assess load paths and determine required transfer elements (beams, posts, lintels) before removing any walls to maintain structural integrity.
- Document all utilities and services, verify accessibility, and ensure permit scope covers knock-throughs and inspections.
- Plan temporary supports and shoring during demolition to control transient reactions and prevent settlement risks.
- Align design with existing frame, foundations, and headroom; verify bearing, edge conditions, and vibration/deflection limits.
- Choose beams or lintels based on span and load, considering wall type, material behavior, and future service access.
Feasibility and Goals for a Kitchen Diner Knock-Through
A kitchen diner knock-through is feasible when structural and service constraints align with your design goals, but it requires early planning to avoid costly changes later. You’ll assess load paths, openings, and service routes to determine achievable spans without compromising privacy or storage zones.
Define clear goals for interior aesthetics and function, such as traffic flow, seating layout, and daylight. Engage your contractor early to translate concepts into constructible plans, specifying tolerances, finishes, and fixings.
Prioritize room for utilities, ventilation, and integrated appliances, so the final layout preserves usability. Document constraints, required inspections, and access for ongoing works.
Maintain concise, frequent contractor communication to surface issues before procurement. This early alignment minimizes revisions and supports a precise, safe, and stylish result.
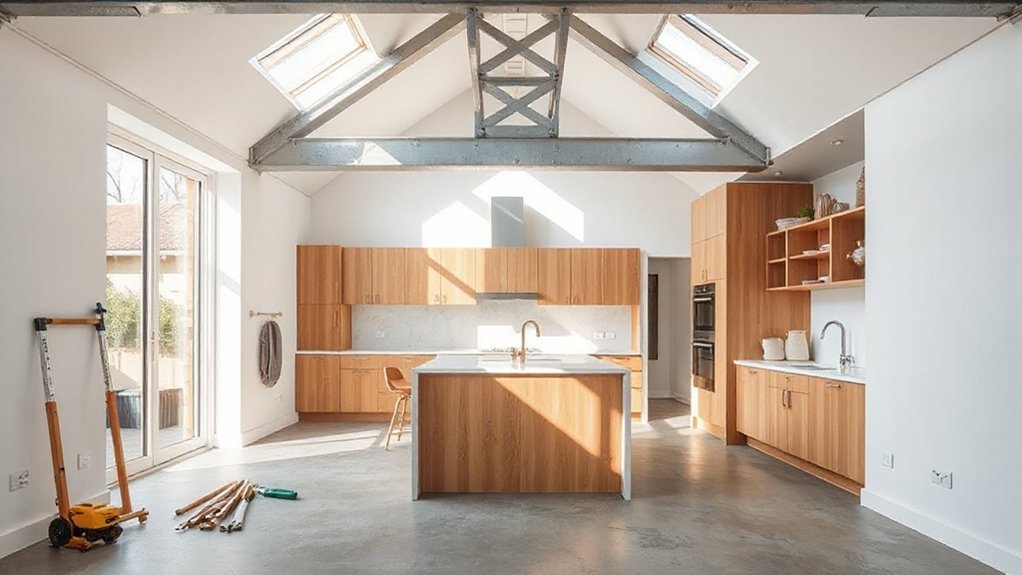
Feeds and Load Paths: How a Knock-Through Affects Structure
You’ll assess how the knock-through re-routes loads from above to the new opening, identifying where beams, posts, and joists must carry altered fractions of weight.
Expect immediate shifts in the structural path as upper floors and roof loads transfer through the altered framework, so you map load paths from lintels to supports.
This sets the stage for detailing which elements need reinforcement or redistribution to maintain stiffness, stability, and serviceability.
Load Path Impacts
In a knock-through, the loads and their paths must be re-evaluated to guarantee structural safety, because removing internal walls changes how weight transfers from the roof, floors, and surrounding walls to the foundation. You’ll examine continuity of load paths, ensuring beams, joists, and transfer walls align with the new geometry.
Pay attention to supporting elements above and how pier spacing or a new header redistributes shear and bending forces. This is where practical detailing matters: connection methods, fastener schedules, and vibration control to prevent resonance in the open plan.
Consider decorative elements and aesthetic considerations that don’t compromise structural integrity, such as concealed support terms and clean line appearances. Document, verify, and monitor to maintain a robust, serviceable result.
Structural Load Shifts
As walls come down, loads no longer follow the old ribbed path and must be rerouted through new transfer elements and open spans. You’ll observe how structural load shifts occur as ceilings, joists, and walls lose lateral restraint and long spans demand redistribution.
Identify primary load paths before demolition and map how floor slabs, beams, and columns share gravity and wind effects post knock-through. Implement temporary supports during sequencing to control transient reactions and avoid overstress.
Design transfers with adequate capacity to handle load redistribution without compromising architectural intent. Check connections for continuity, guarantee shear transfer through secondary members, and verify that bracing remains effective under altered eccentricities.
Prioritize maintaining structural integrity while enabling serviceability, minimizing deflection, and sustaining safety margins throughout reconfiguration.
Do You Need a Beam or Lintel? Decision Criteria
Determining whether you need a beam or a lintel hinges on span, load, and wall construction. You assess span length, live and dead loads, and whether the wall is load-bearing or partition.
For short spans with modest loads, a lintel can suffice; for longer spans or higher loads, a beam becomes necessary to maintain vertical and horizontal stability.
Consider wall type, masonry integrity, and tie-ins with adjacent structural elements. Placements must respect doorways, openings, and floor-level shifts to prevent settlement.
Size, reinforcement, and bearing must align with code requirements and manufacturer guidance. Practical detail matters: specify bearing length, reduce stress concentrations, and ensure serviceability.
Decorative elements and aesthetic considerations should integrate with structural needs without compromising safety or performance.
How to Choose a Lintel: Materials, Span, and Support
When you pick a lintel, start with material mass and load path—steel, reinforced concrete, or timber—matching your span and wall type for predictable performance.
Consider span limits, bearing support, and end fixings early in the design to avoid over- or under-sizing, then verify with appropriate code and manufacturer data.
Keep practical margins for future loads and alterations, and align choice with your kitchen-diner’s moisture, heat, and traffic conditions.
Material Choices Guide
Choosing the right lintel hinges on three factors: material behavior, span, and the load it must carry. You evaluate options against how each material bends, deflects, and resists fire, then match span limits to your opening width.
Steel lintels offer high strength for longer spans with slim profiles, while concrete lintels suit heavier loads and discreet aesthetics. Timber presents cost advantages for short spans but requires treatment for durability and moisture.
Composite options blend steel cores with concrete or timber veneers, balancing performance and install ease.
Consider installation tolerances, bearing details, and edge conditions, since small gaps propagate stress concentrations.
Plan defenses against decorative finishes and furniture arrangements: ensure lintels won’t obstruct reveals or cabinet alignments, and verify that finishes won’t compromise load paths or insulation.
Span and Support Basics
Short spans may use non-loadbearing studs with a lightweight lintel; longer openings demand reinforced concrete, steel, or engineered timber. Consider bearing width, seat depth, and edge conditions to guarantee proper transfer and crack control.
Material choices impact deflection, fire rating, and durability. Installers align lintels with wall ties or continuous masonry for redundancy.
Decorative accents and aesthetic considerations matter in visible spans, but you prioritize structural performance first. Always verify with manufacturer specs, building codes, and on-site tolerances, then complement with precise detailing and clean, unobtrusive finishes.
Collaborating With Builders and Staying Within Codes
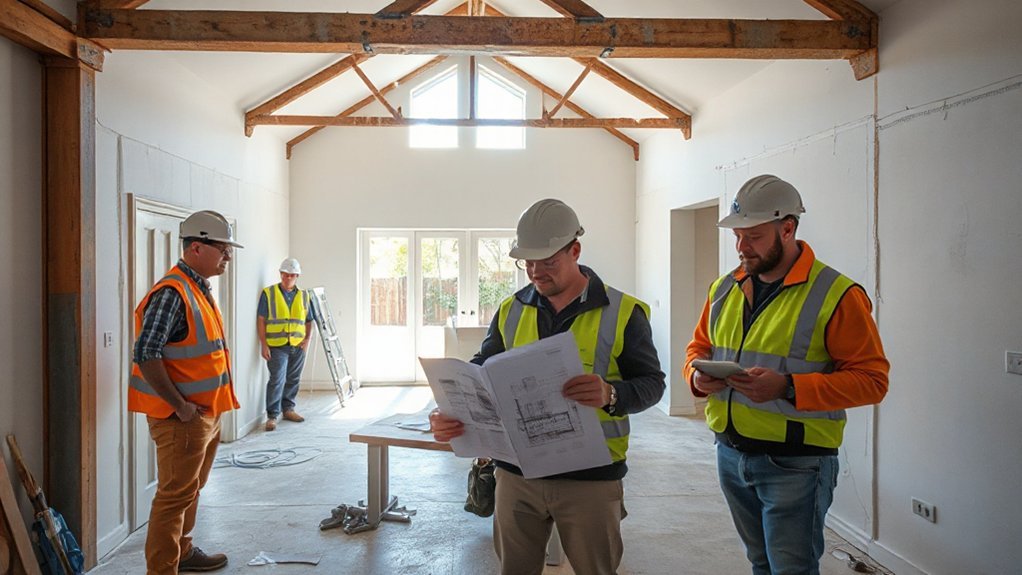
Working closely with your builders is essential to keep a kitchen-diner knock-through on track and compliant. You’ll align structural intent with practical buildability, balancing load paths, timber and steel details, and approved fixings.
Communicate clearly about allowable deviations, fire-rating requirements, and party-wall constraints, so approvals move smoothly. Maintain a documented design brief that translates drawings into installable steps, preventing on-site guesswork.
Coordinate timing for structural supports, lintels, and pile or slab interactions, ensuring temporary works meet safety standards. Track workmanship quality, tolerance bands, and material certifications to avoid rework.
When you discuss decorative finishes and aesthetic considerations, verify that chosen finishes won’t compromise structural or fire-stopping performance. Stay within codes by documenting changes, approvals, and inspections, avoiding risk through proactive collaboration.
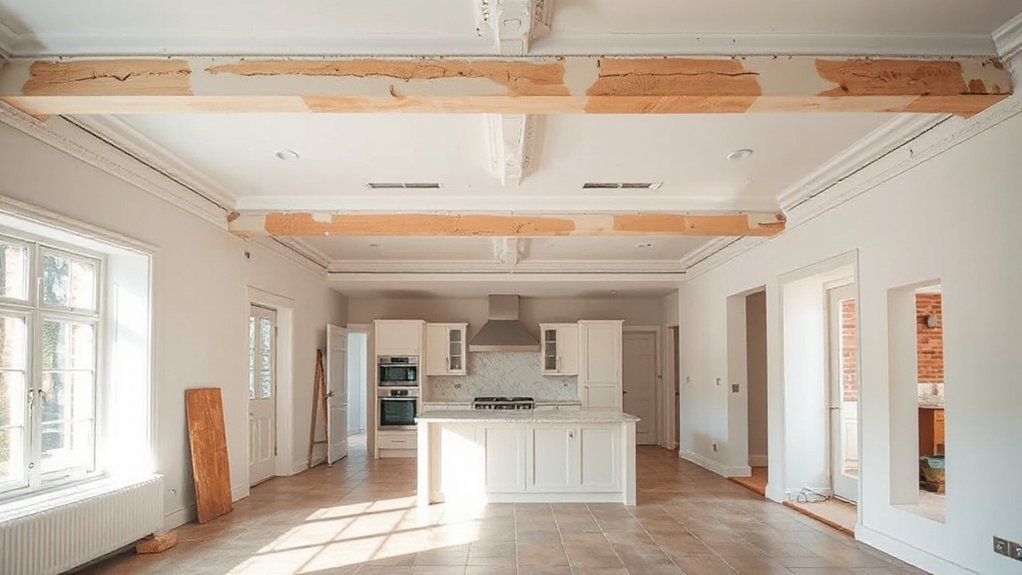
Pre-Demo Checks: Measurements, Utilities, and Permits
Before you lift a tool, verify your baseline: measure precisely, map all utilities, and confirm permits are in hand.
You’ll draft as-built dimensions from wall faces, door swings, and ceiling heights. Then recheck offsets for cabinetry and appliance placement.
Draw and compare structural alignments with the existing frame, noting any variances that affect load paths.
Verify utility routes—gas, water, electrical, and venting—are documented, accessible, and compliant with code, appliance placement, and future service access.
Confirm permit scope matches the planned knock-through and any required inspections.
Assess access constraints, headroom, and substrate conditions to prevent surprises during demolition.
Keep the design intent in view, ensuring Kitchen design coherence while preserving critical clearances and service zones.
Document decisions for clarity and coordination.
Pitfalls to Avoid and How to Prevent Them
By anticipating common missteps, you can keep a kitchen-diner knock-through on track from day one. Pitfalls to avoid include underestimating load paths, overloading supporting walls, and neglecting temporary supports during dining-area openings.
You must verify structural implications before removing joists or beams, ensuring adequate shoring and alignment with existing foundations.
Prioritize Foundation stability by detailing footing continuity and avoiding unintentional settlement, which can crack finishes or misalign cabinets.
When planning openings, implement proper Wall reinforcement with engineered lintels, compatible studs, and sufficient nogging to resist shear and bending.
Coordination between architect, builder, and me is essential to prevent gaps in load transfer.
Document temporary works, sequencing, and bracing in the design brief to minimize on-site surprises and rework.
Frequently Asked Questions
What Is the Typical Cost Range for a Knock-Through Project?
Typically, you’ll spend about £8,000–£25,000 for a knock-through, depending on scope and finishes. You’ll factor in structural steel, health and safety, and contractor fees.
Your design considerations include load paths and service relocations, while material choices influence both cost and aesthetics.
Expect higher costs if you need underpinning or complex lintels.
You’ll save by coordinating trades early, selecting standard-sized openings, and balancing insulation, acoustics, and visual continuity through careful detailing.
How Long Does a Kitchen Diner Knock-Through Usually Take?
A typical kitchen diner knock-through takes about 4 to 8 weeks, depending on scope and site conditions. You’ll see that 60% of projects hit the mid-range when structural works align with MEP installs.
You should plan around five weeks for design approvals and two for site prep.
In your kitchen design, focus on material selection early to avoid delays, and guarantee seamless connections between spaces. Consider load paths and detailing for durable material selection and finish.
Can You Reuse Existing Foundations for the New Opening?
Yes, you can reuse existing foundations if a foundation assessment confirms adequate bearing capacity and no movement issues.
You must plan to meet Building regulations, including suitable temporary supports and precise load transfer at the new opening.
If weaknesses are found, underpinning or re-piling may be required.
Make certain detailing considers load path continuity, lintel sizing, and drainage.
Engage a structural engineer to validate calculations and compliance before construction.
What Are Common Post-Completion Inspection Requirements?
70% of projects in residential refurbishments show post-completion inspections uncover minor deviations.
You’ll need to follow common post-completion inspection requirements: verify alignment, inspect structural connections, and confirm loads meet design considerations.
You’ll document corrections, test temporary supports, and review safety protocols with the contractor.
You’ll record material certifications, check tolerances, and guarantee fire-rated assemblies remain intact.
You’ll deliver a concise report highlighting design considerations, observed deficiencies, and any recommended actions for long-term safety.
How Do Warranties Apply to Structural Work and Lintels?
Warranty coverage typically extends to structural work and lintels when installed to approved specs, with coverage detailing how long protection lasts and what’s excluded.
You’ll verify the structural integrity post-installation and guarantee inspections meet manufacturer and builder requirements.
If movement, cracking, or failure occurs, the warranty triggers repair or replacement obligations.
Maintain documentation of design loads, lintel sizing, and load path continuity, as these factors uphold warranty validity and overall structural integrity.
Conclusion
In short, you must translate design intent into safe, workable reality by verifying loads, selecting the right support, and coordinating with trades. Think early utility routing, accurate measurements, and compliant permits to avoid surprises. For example, a recent retrofit used a masonry lintel with temporary shoring during removal, followed by a steel beam that re-routed floor joists and preserved ceiling heights. When in doubt, codify decisions in a concise design brief and document every step.


