
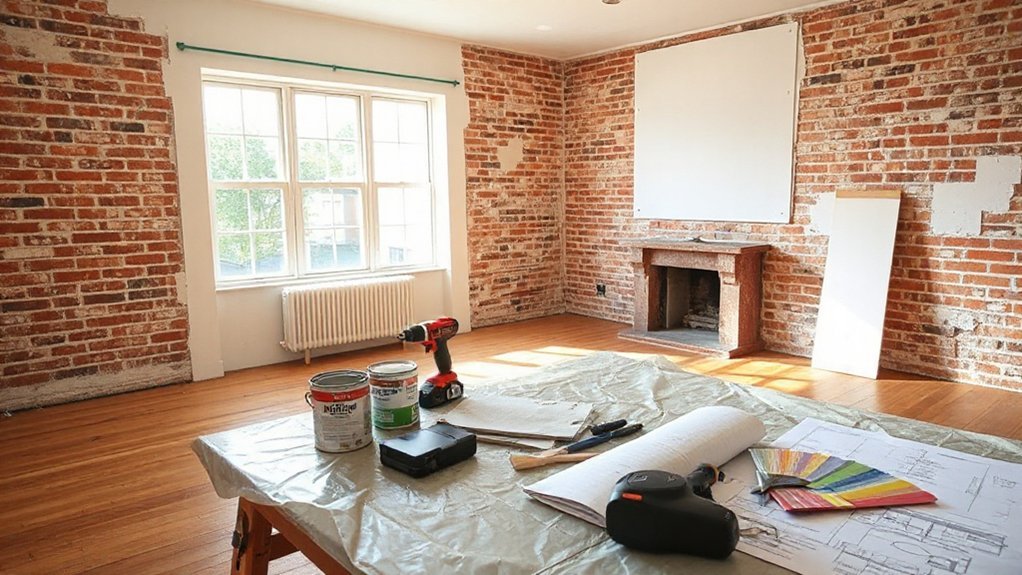
Renovating a house is like pruning a stubborn tree: you cut just enough to grow value, not risk losing the shade. Start with a solid, realistic budget and clear priorities so you don’t chase every shiny fix. You’ll need practical staging—phase the work, lock in durable, cost-effective materials, and get precise quotes. Decide what you can DIY without compromising safety, then plan flexible milestones that protect quality and your bottom line. The next step? map your targets and constraints to concrete actions.
Key Takeaways
- Set a clear budget and phased plan with fixed milestones, contingencies, and a bottom-up itemized estimate to control costs from the start.
- Prioritize high-impact areas (kitchen, baths, living spaces) using durable, timeless materials and smart, space-saving design.
- Balance DIY and professional help by matching tasks to skills and reserving complex tasks for pros to ensure safety and quality.
- Obtain detailed, itemized quotes, verify contractors, and maintain ongoing cost tracking with weekly reviews.
- Use value-first procurement (secondhand where viable, low-VOC materials, modular elements) and monitor progress to reallocate funds as needed.
Set Your Renovation Budget: Define Scope and Success
Set a clear renovation budget by defining the scope and your success criteria up front. You’ll map out what stays, what goes, and what quality you expect for each area, then tie costs to those decisions.
Break the project into phases with fixed targets: materials, labor, contingency, and soft costs like permits. Use a bottom-up approach: estimate every item, then total with a safety margin you can live with.
Prioritize essential renovations first, and defer optional upgrades until after you see real costs.
When you choose materials, weigh durability against price, and document options to compare value quickly.
In contractor negotiations, request itemized bids, clarify responsibilities, and set decision points.
This disciplined framework keeps scope aligned with your budget while preserving decision clarity.
Prioritize High-Impact Rooms for Maximum Value
Start by identifying the rooms that buyers and daily living value most—kitchens, bathrooms, and primary living spaces.
Pinpoint interventions that boost curb appeal and daily use without overhauling entire layouts.
Plan investments where you’ll see the fastest, clearest return in comfort, function, and sale appeal.
Prioritize High-Impact Spaces
When planning a full-house refurbishment, focus first on the high-impact spaces that buyers notice most: the kitchen, bathrooms, and the living areas. You’ll gain the most value by upgrading fixtures, finishes, and layout in these zones, while keeping budgets tight.
Prioritize one solid design direction to avoid scope creep, then invest where it moves the needle: durable materials, timeless style, and efficient lighting.
Plan clever storage solutions that feel seamless rather than added clutter—think integrated cabinets, pull-out organizers, and hidden shelving.
Emphasize energy efficiency with smart thermostats, LED lighting, and well-sealed windows.
Treat high-impact spaces as the project’s backbone, ensuring each decision strengthens appeal, functionality, and throughput.
Maintain a concise change log to manage costs and track progress.
Maximize Value Through Rooms
To maximize value, zero in on high-impact rooms and plan improvements that buyers notice first: the kitchen, bathrooms, and living spaces. You’ll gain the most return by updating surfaces, fixtures, and layout efficiency rather than chasing trendier, expensive upgrades.
Prioritize functional upgrades over novelty: durable countertops, quality cabinets, and reliable appliances in the kitchen; water-efficient fixtures and timeless tiles in bathrooms; and an inviting, uncluttered living area with ample natural light.
Implement creative lighting to sculpt ambiance and highlight features without overhauling wiring. Add smart storage solutions—built-ins, under-stair organizers, and concealed shelving—to reduce clutter and boost perceived space.
Keep changes cohesive with the rest of the home, and match finishes to preserve resale appeal while staying within budget.
Durable, Cost-Effective Materials by Room
You’ll compare durable materials by room to balance longevity with cost, focusing on sensible choices that stand up to daily use.
For kitchens and bathrooms, pick water- and stain-resistant surfaces that wipe down easily.
While living areas favor resilient, low-maintenance options.
Consider longevity through design by selecting timeless looks and modular elements that can be refreshed without full overhauls.
Durable Materials By Room
Durable materials save money over time by withstanding daily wear in every room. You’ll choose surfaces and finishes that balance resilience with cost, avoiding frequent replacements.
In kitchens and baths, pick impact‑resistant laminates, porcelain tiles, and solid‑surface composites that resist scratches and moisture.
For living areas, opt for engineered wood or high‑grade vinyl flooring, paired with stain‑resistant fabrics for furniture.
Hallways and stairs benefit from dense carpets or durable laminates with protective underlays.
Eco friendly options—recycled glass countertops, cork flooring, and low‑VOC paints—reduce environmental impact without sacrificing performance.
Smart technology integration can enhance durability, like self‑cleaning coatings and sensor‑activated lighting that minimizes wear.
Plan room‑specific materials now to save upkeep costs later.
Cost-Effective Room Choices
With durability in mind, you can tailor cost-effective choices for each room while keeping long-term upkeep low. In living spaces, choose durable, easy-clean surfaces like quartz countertops and porcelain tiles, which resist stains and wear.
For kitchens, invest in semi-gloss cabinets and thermofoil doors—affordable, wipeable, and simple to refresh without full replacement.
Bathrooms benefit from high-porcelain sinks and composite countertops that endure humidity; pair with moisture-resistant paint to minimize upkeep.
For bedrooms, select low-cost, durable flooring such as LVT or engineered wood that tolerates traffic and pets.
Eco-friendly materials, when feasible, reduce lifecycle costs and environmental impact.
Smart technology integration, like programmable thermostats and smart lighting, lowers energy bills without complicating maintenance, keeping the project budget practical and future-proof.
Longevity Through Design
Smart design starts with materials that stand up to daily life. In each room, pick durable options that resist wear and still feel calm. Prioritize surfaces you’ll touch often—kitchens, baths, entryways—using materials with proven resilience and easy maintenance. You’ll save over time by choosing timeless elegance that ages gracefully, not trends that disappear.
Look for solid cores, low-maintenance finishes, and simple, repairable components. Favor sustainable materials sourced responsibly, minimizing embedded energy and waste. For flooring, consider dense woods or high-quality laminates with real-wood texture; for counters, quartz or porcelain that don’t stain; for walls, washable paints or durable coatings.
Plan layouts that reduce traffic damage and allow straightforward repairs. By designing for longevity, you achieve lasting value without compromising style.
Get Quotes That Save Time and Money: What to Ask

To get quotes that save time and money, you first need a clear brief of your project goals, scope, and constraints.
You’ll then share this brief with each contractor in a standardized format, so responses stay comparable.
Ask for itemized bids with unit costs, timelines, and milestones, plus what’s included or excluded.
Focus questions on contract negotiations, payment terms, warranties, and change-order processes to avoid surprises later.
Request references and samples of similar work to gauge reliability.
For material sourcing, probe availability, lead times, and substitutions if items aren’t on site.
Confirm who’s responsible for deliveries, hoarding, and site cleanup.
Finally, set a realistic deadline for quotes and stipulate contingencies for price fluctuations and unforeseen delays.
DIY or Hire: Match Tasks to Your Skill Level
Weigh tasks against your skills and the project timeline, then decide what you can safely DIY and what deserves a pro. When you map tasks, prioritize critical systems first—plumbing, electrical, structural work—where safety and code compliance matter most.
For cosmetic upgrades, you may DIY tips like painting, tiling, and cabinet updates, if you’re confident and have the right tools. Be honest about your limits: rushing a risky job often costs more later.
Document your plan and set milestones so you can gauge progress without overreaching. For complex or high-risk tasks, hire professionals to ensure quality and compliance.
Balancing DIY with professional help keeps costs controlled, minimizes mistakes, and preserves timelines. Remember: DIY tips save money only when they align with your skill level; hire professionals when necessary.
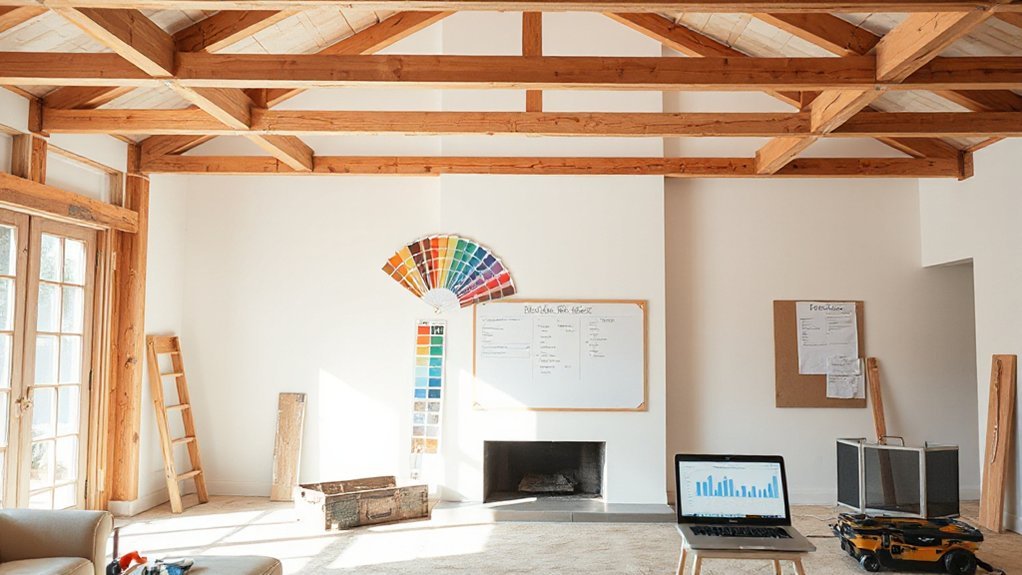
Plan in Flexible Phases: A Practical Timeline
Flexible planning keeps a refurbishment on track by breaking work into doable chunks aligned with your budget and deadlines. You’ll map projects into phases, starting with essentials and saving noncritical upgrades for later. Define clear milestones, assign owners, and set realistic durations so you can track progress at a glance.
Use a phased approach to test ideas without overcommitting resources: begin with structural or high-impact areas, then move to improvements like Creative layout decisions that support flow and function.
Plan for efficiency by grouping nearby tasks and ordering them to minimize downtime. For lighting, sequence Smart lighting installations alongside electrical work to avoid rework.
Keep reviews tight, adjust timelines weekly, and document learnings to refine subsequent phases. This disciplined cadence sustains momentum and controls costs.
Build Buffers: Contingencies to Expect and Manage
Budget surprises happen. You build buffers into your plan to guard against them, not to trigger paralysis by overthinking. Start with a realistic contingency as a percentage of the total budget, then tailor it to project risk: structural work, vintage systems, and permit delays deserve bigger cushions.
Document scenarios—delays, material shortages, subcontractor gaps—and assign dollar values so you can compare options quickly. Use a rolling reserve that you only dip into after you’ve exhausted cheaper fixes.
Practice risk management by identifying high-impact risks and choosing mitigations that preserve scope. Communicate buffers clearly to stakeholders, so expectations stay aligned.
Review your contingencies at key milestones, adjusting only when new data proves it necessary. Keep buffers proportional, transparent, and practical.
Track Progress and Adjust Without Breaking the Bank
Tracking progress is your early warning system: check milestones, compare actuals to the plan, and flag variances before they derail the budget. You’ll set weekly checks, log costs, and review remaining scope against remaining funds.
If a milestone slips, reallocate resources or trim nonessential tasks now, not later. Prioritize decisions with the smallest cost to impact, like swapping finishes or sourcing secondhand where quality remains solid.
Use a baseline for sustainable materials and energy-efficient upgrades to forecast long-term savings. Incorporate smart home technology only where it delivers measurable value, and confirm compatibility with existing wiring and future maintenance.
Hold quick, focused reviews with contractors, and document changes officially. Maintain contingency buffers, track supplier lead times, and adjust timelines to avoid overpaying for rush orders.
Frequently Asked Questions
How Can I Maximize Resale Value With Minimal Upfront Spend?
You maximize resale value with minimal upfront spend by prioritizing impact per dollar. Start with curb appeal and interior lighting upgrades, choosing efficient LED fixtures and layered lighting to feel brighter.
Focus on durable flooring options like mid-range vinyl or laminate that mimic real wood. Refinish instead of replace where possible, and update hardware, trim, and paint in neutral tones.
Keep layout practical, fix any major flaws, and document upgrades for buyers.
What Unseen Costs Typically Blow a Refurbishment Budget?
Unseen costs that typically blow a refurbishment budget include material costs and design complications. You’ll often face price fluctuations, delivery delays, and waste from bespoke finishes.
Factor in permits, contingency, disposal, and hidden structural work you didn’t anticipate.
You’ll save by locking in quotes, ordering bulk materials early, and documenting changes promptly.
Keep a buffer for overruns, and communicate clearly with suppliers and trades to avoid scope creep.
Plan for contingencies; don’t rely on optimistic estimates.
Which Permits or Approvals Are Legally Required for Renovations?
What permits or approvals are legally required for renovations? It depends on location, but you typically need building permits, planning approvals, and possibly electrical or plumbing inspections.
Check permit regulations and approval procedures with your local authority before starting. You’ll avoid fines and rework if you apply early, document compliance, and schedule inspections.
Confirm drawings, timelines, and contractor details are ready; track deadlines and fees to stay on budget and on track.
Do you have the permit checklist ready?
How Do I Assess Contractor Reliability Before Hiring?
You should check a contractor’s background and verify their references before hiring. Look for consistent project timelines in past jobs, ask for a written schedule, and confirm they’ve met milestones on time.
Review licensing, insurance, and any red flags like frequent budget overruns. Talk to previous clients about communication quality and reliability.
Request a detailed project timeline, a clear payment plan, and a warranty. Document expectations and keep notes for comparison.
What’s a Realistic Contingency Percentage for Delays?
Expect a realistic contingency of 10–20% for delays. You should plan a buffer within your Budget allocation and adjust only when the project timeline shifts considerably.
Track supplier lead times, permit hurdles, and weather factors, then reallocate funds as needed. Build this cushion into your schedule so delays don’t derail progress.
Stay proactive: confirm milestones, document changes, and communicate early to protect your project timeline and keep costs on track.
Conclusion
You’ll finish with a debt-free dream home so perfect you’ll mistake it for deluxe television ads. Stick to your budget like glue, and watch every penny stretch further than a yoga instructor on a treadmill. Prioritize what users actually notice, quash scope creep with ruthless clarity, and phase tasks like a master chess player—calm, strategic, unstoppable. When surprises pop, you’ll juggle them with ease, because your plan isn’t a guess, it’s a finely tuned, money-saving masterpiece.


