
You probably don’t realize how much a studio’s layout can mute or magnify comfort until you map distinct zones that flow. You’ll define living, sleeping, and work areas with furniture and color without closing in the space. A precise plan ties in layered lighting, smart storage, and textiles, so every corner earns its place. Keep the vibe cohesive but personal, and watch the space start to feel like home—but a few strategic tweaks await your next move.
Key Takeaways
- Define clear zones (living, sleeping, cooking, work) with furniture and decor to create distinct, cohesive areas in a single space.
- Use warm, layered lighting with dimmers and task lights to add depth and a welcoming atmosphere.
- Employ a light, cohesive color palette, mirrors, and reflective surfaces to visually expand the studio.
- Maximize storage with vertical solutions and multipurpose furniture to reduce clutter and maintain flow.
- Personalize with textures, textiles, scents, and meaningful objects to create warmth and a lived-in vibe.
Identify and Carve Distinct Zones in a Studio
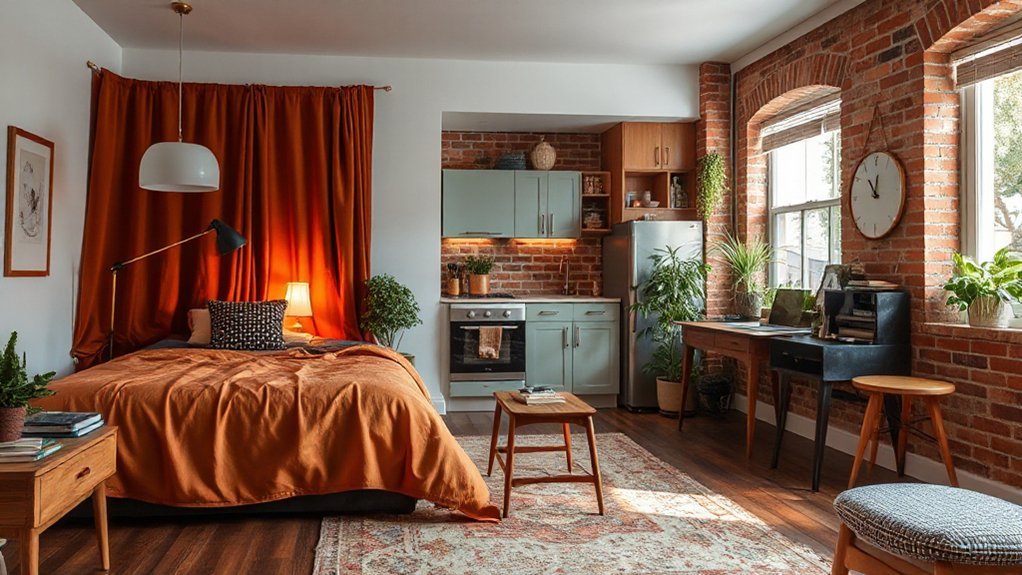
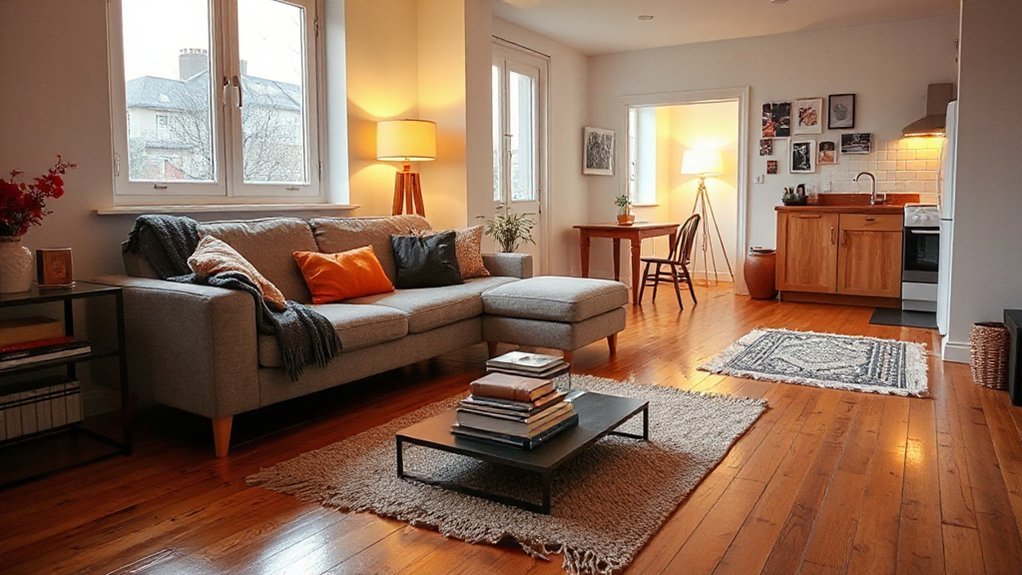
To transform a studio into a home, start by identifying natural activity zones and carving them distinctly. You map traffic flow, then assign clear boundaries for living, sleeping, dining, and work.
Use furniture placement to create visual anchors without clutter. Place a compact sofa facing a defined eats-and-relax area, then tuck a foldable table for meals or work near a power outlet.
Introduce Creative decor that signals each zone: a rug under the seating, a compact desk with ergonomic chair, and a low divider or bookshelf to separate spaces while keeping sightlines open.
Personal touches—photos, plants, and curated objects—anchor identity. Maintain cohesion with a unified color palette and scalable storage.
Review weekly to preserve purpose, balance, and ease of use.
Plan Lighting: Layer Brightness for Warmth and Depth
Start by layering ambient lighting to set a base mood and add depth as you move through each zone.
Use a dimmer to smoothly modulate brightness, creating warmth without sacrificing clarity for tasks.
Pair task lighting with zone-specific placement to highlight work areas while maintaining cohesive, soft overall illumination.
Layer Ambient Lighting
- Define lighting zones by function and traffic flow
- Use dimmable sources for gradual shifts
- Pair indirect with direct light to reduce glare
- Prioritize warm, consistent color temperature
- Integrate decorative fixtures for texture and depth
Dimmer for Depth
Use a central fixture for ambient glow at low, steady levels, and introduce task or decorative lights at higher outputs only where needed. Keep color temperature consistent to prevent visual discord; choose a warm white and maintain it across layers.
Place dimmers on every circuit you plan to vary, and set short-press routines for quick scenes.
Calibrate with your eye: test at eye level, note where shadows sharpen or soften, and refine until focal points emerge naturally without overpowering the room’s cohesion.
Task Light Zoning
When planning Task Light Zoning, designate dedicated zones for focused work and reading, then tailor brightness and color temperature to each activity. You’ll implement precise layering: a primary task light, supplementary fill, and ambient support to minimize glare and shadows.
Use zoning concepts to map lights to zones like desk, sofa, and entry alcove, aligning output with your workflow. Balance luminance with warm hues to foster proximity and comfort, while preserving contrast for accuracy. Adjust directionality to prevent monitor glare and to reveal textures.
Schedule dimming at dusk to maintain circadian rhythm. Track performance with simple checks: visibility, glare, and ease of use. Fine-tune over weeks as routines shift. Task lighting, zoning concepts, proven improvement.
- Define zones by activity
- Pair task lamps with dimmers
- Calibrate color temperature per zone
- Minimize reflective surfaces
- Review weekly for tweaks
Choose a Color Palette That Makes a Small Space Feel Bigger
Light reflects space when you pick light, airy tones and keep surfaces consistent, so rooms feel larger.
Pair calm color combinations with strategic contrast to guide the eye and add perceived depth.
Use subtle monochrome manipulations to expand scale without clutter, and let your palette support furniture placement and storage efficiency.
Light Reflects Space
Opt for a light, airy palette and reflective surfaces to make a small studio feel larger; by choosing colors with low saturation and high reflectivity, you bounce natural and artificial light around the room, visually expanding the space. You should select whites, off-whites, and pale grays, avoiding heavy browns or saturated blues that absorb tone.
Use matte walls with a gloss-free ceiling to balance glare and prevent hotspots. Integrate mirrors opposite windows to multiply daylight, and place glass or acrylic furniture to reduce visual weight. Guarantee lighting layers: ambient, task, and accent, aligning with natural light patterns.
Keep transitions seamless, so color shifts aren’t jarring.
- Maximize natural light with sheer window treatments
- Reflective surfaces strategically placed near light sources
- Light-colored furnishings minimize visual density
- Mirrors as space-expanders without duplicating clutter
- Consistent color temperature across rooms
Calm Color Combinations
Choosing a calm color palette is your fastest path to making a small space feel bigger; opt for subdued, low-saturation tones that reflect light without drawing attention to themselves. Begin with a dominant neutral like warm gray, pale taupe, or soft ivory as the base.
Introduce accent colors sparingly—one or two muted hues—so color harmony remains controlled rather than chaotic. Use matte finishes to minimize glare and create depth, then layer with textiles in slightly different saturations to enhance visual balance.
Prioritize consistent undertones across walls, furniture, and accessories to avoid jarring shifts. Employ ample white or light surfaces for bounce light, and keep clutter minimal to preserve clarity.
This disciplined palette yields cohesion, spaciousness, and a calm, readable flow throughout the studio.
Monochrome Manipulations
Monochrome manipulations can amplify perceived space by leveraging a single, unifying color family. You’ll select a light base and build depth with tonal variations, keeping furniture streamlined to avoid visual clutter.
Incorporate color contrast through subtle differences like satin vs. matte finishes, or upholstery in a slightly darker shade to carve zones without breaking cohesion. Maintain monochrome harmony by repeating key hues across walls, textiles, and accessories, which reinforces continuity while still creating distinct areas.
- Use a single family of neutrals with varied finishes to signal function
- Contrast textures (velvet, linen, metal) for depth without color shifts
- Elevate ceilings with a lighter shade than walls for vertical lift
- Mirror or glass elements reflect light, expanding the room
- Limit accents to one or two tonal pops to preserve unity
Smart Storage Ideas That Free Floor Space
One smart approach is to maximize vertical storage and underused nooks, so you free floor space without sacrificing function. Install tall, modular shelving with adjustable brackets to tailor height as you add items. Choose wall-mounted cabinets above counters to keep essentials within reach while freeing surface areas.
Use magnetic strips or pegboards for small tools, spices, and cables, minimizing drawer clutter. Opt for multi-purpose furniture: a bed with drawers, an ottoman that opens, a coffee table with hidden storage.
Hang vintage decor and statement artwork on walls, not shelves, to draw the eye upward and create depth without crowding. Label containers inside cabinets for quick access, and rotate rarely used items to higher racks.
This combination sustains order and practicality in compact living.
Textiles and Textures to Soften the Studio
Layering soft fabrics and varied textures creates warmth and depth in a studio without adding bulk. You’ll use textile layering to soften hard edges, while controlling color and light. Choose natural fibers for coziness, and pick textures that contrast without clashing.
- Textile layering: mix woven, knotted, and brushed surfaces for depth
- Texture contrast: pair smooth with tactile finishes to define zones
- Rugs and throws: place near seating to anchor space and absorb sound
- Cushions: vary scale and pile height for visual interest
- Curtains: add vertical softness to frame windows and soften lines
This approach delivers practical warmth, reduces echoes, and creates a cohesive feel. You maintain a precise, clutter-free aesthetic, guiding attention to architectural details rather than bulky decor.
Multipurpose Furniture That Saves Room and Adds Function
Multipurpose furniture is your ally in a studio, delivering storage, seating, and work surfaces without hogging floor space. You’ll choose pieces that serve at least two needs, then confirm each unit’s footprint fits typical layouts.
Opt for hidden compartments in ottomans and coffee tables to conceal clutter while keeping surfaces ready for work or dining. A wall-mounted fold desk paired with collapsible chairs creates a clean line when not in use, preserving openness.
Consider a sofa bed with a slim profile to maximize daily living space and guest accommodations. Prioritize modular storage that adapts to changing routines, using units with clear labels and accessible shelves.
Embrace artistic expression through color accents and patterns, and reflect Cultural influences in purposeful, space-aware selections.
Scent, Sound, and Personalization for a Lived-In Feel
A studio space gains warmth and personality when scent, sound, and personalization work together to create a lived-in atmosphere. You should align aromas, audio, and personal touches so each enhances the other, not compete for attention.
Focus on targeted Aromatherapy techniques to select calming or energizing notes that suit your daily rhythms, then pair with a concise soundscape design that respects your light, layout, and privacy needs.
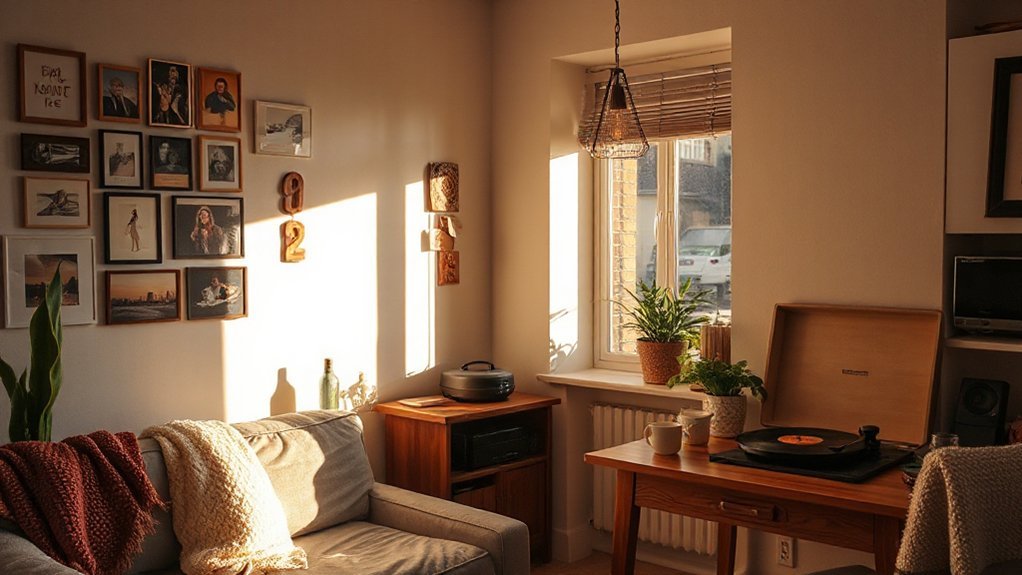
Personalization comes through curated objects, textiles, and photos placed to reduce clutter while boosting familiarity. Keep changes incremental to test impact, avoid sensory overload, and maintain a cohesive vibe.
Implement a simple routine that preserves balance as you move through the day.
- Use Aromatherapy techniques to craft a signature scent profile
- Build a restrained soundscape design with adaptable layers
- Curate textiles and objects for visual warmth
- Test changes gradually, recording mood shifts
- Maintain consistent, uncluttered focal points
Layout Tricks to Improve Flow and Permeability
Efficient flow starts with deliberate spacing: clear sightlines from entry to key zones, and furniture positioned to invite movement rather than trap it.
In open floor plans, define zones with subtle cues—rug boundaries, differing textures, or ceiling-height shifts—so you perceive dedicated areas without walls.
Optimize furniture arrangements to maintain one unobstructed path across the room; place sofas and chairs to face entry points without blocking them. Use low-profile pieces to preserve sightlines, and keep essential surfaces reachable from all zones.
Align storage with your traffic pattern, so items return to their places naturally.
Prioritize vertical momentum: tall shelving draws the eye upward, adding perceived space.
Finally, test layouts by walking the space at human speed, refining gaps until every passage feels seamless.
Quick-Start Checklist to Implement These Ideas
To get your studio flat moving toward a homey feel fast, start with a quick-start checklist that aligns layout, sightlines, and zones with your daily routines. Focus is on clarity, practical steps, and measurable results. Use this checklist to energize sightlines, establish functional zones, and quickly add personality through concise choices. Prioritize Creative decor and Personalized touches with purpose, *guaranteeing* each action supports both space and habit.
Aim for immediate improvements you can verify in a day or two, then iterate for comfort and efficiency.
- Assess primary activity zones (sleep, work, cooking) and guarantee clear transitions.
- Tidy sightlines by concealing clutter and selecting low-profile storage.
- Deploy a cohesive color palette and lighting plan for mood and function.
- Add compact, multifunction furniture to save space.
- Introduce subtle Creative decor and Personalized touches that reflect you.
Frequently Asked Questions
How Can I Rent or Modify a Rental Studio Without Losing Deposit?
Yes, you can rent or modify a rental studio without losing your deposit by documenting everything and communicating clearly.
Start with a move-in checklist and take dated photos of furniture arrangement and wall decor you plan to add.
Get written approval for any changes, keep receipts, and request a written agreement on acceptable modifications.
Reversals should be documented.
If a dispute arises, reference the checklist and photos to show proactive care and maintenance of the space.
What Budget-Friendly Plants Thrive in Low-Light Studio Corners?
You should choose indoor greenery that thrives in low light, like ZZ plants, pothos, and snake plants. These low light plants survive dim corners and require minimal maintenance, making them budget-friendly additions.
Place them away from direct sun, rotate weekly for even growth, and use a lightweight, well-draining mix.
Water sparingly, letting soil dry between drinks.
Combine a few varied leaf textures to brighten the space without clutter, keeping your studio feeling fresh and organized.
Can I Incorporate a Home Office Without Sacrificing Living Space?
Yes, you can. You’ll implement multipurpose furniture that folds, tucks away, or doubles functions, so your work zone vanishes when you relax.
Choose a compact desk that nests into a console, a bed with storage, and a chair that doubles as a small stool.
Use space saving decor—wall-mounted shelves, slim organizers, and vertical plant displays—to keep surfaces clear.
Bottom line: deliberate layout, hidden tech, and flexible pieces maximize living and working harmony.
How Do I Soundproof a Shared-Wall Studio on a Budget?
Noise travels up to 70% more in shared-wall setups than non-adjacent rooms, so you can’t ignore it.
You can soundproof a budget, multi-step approach: start with wall insulation you can install yourself, seal gaps, and add mass-loaded vinyl where feasible.
Optimize furniture placement to disrupt sound paths, use thick curtains and fabrics, and fill shelves with dense items.
Focus on leaks, then test and adjust for quieter days.
What Small Changes Boost a Studio’s Resale or Rental Value?
Small upgrades boost resale value: you’ll see impact from smart decorating tricks and organized storage solutions.
Start with a neutral, durable palette, add hidden storage under beds and seating, and install modular shelving to maximize every inch.
Choose multi-purpose furniture, like a fold-away desk, and replace dated fixtures with modern, efficient hardware.
Improve lighting with layered options, and declutter to create clean lines.
These precise tweaks deliver quicker rent or sale without major upheaval.
Conclusion
You’re the captain steering a tiny vessel through a vast harbor. Define decks (zones), trim the sails with light, and paint a single, inviting color across every hull board. Choose compact, multi-use furniture as your loyal crew, and store quietly behind hidden hatches. Let textiles be your soft ballast; scent and sound, your steady wind. When clutter clears, the ship glides, doors open, and every cabin breathes home. Your studio isn’t small—it’s expertly charted, warmly anchored.


