
You’re aiming for a flooring plan that guides movement and feels cohesive from room to room. Start with a clear visual goal—seamless continuity or intentional shifts—and test how core materials, color, and grain read across spaces. Consider lighting, acoustics, and practical sizing to avoid abrupt interruptions. Don’t settle for guesswork; the right shift strategy can transform the flow, but you’ll want to see how choices play out in real life before you commit.
Key Takeaways
- Plan flows and zones by matching overall feel, while allowing deliberate transitions where appropriate to cue room boundaries.
- Select cohesive materials with consistent thickness, wear layers, and similar environmental performance to ensure uniform durability.
- Align patterns, grain direction, and color shifts across rooms to maintain visual rhythm and minimize disruptions.
- Use thresholds and transitions thoughtfully (trim, reducer, or accent) to control movement and sightlines between spaces.
- Document subfloors, installation guidelines, and warranty terms to support long-term stability and cohesive appearance.
What Coordinating Flooring Really Means for Flow and Function
Coordinating flooring across adjacent rooms isn’t just about matching colors or textures; it’s about how shifts guide movement, define zones, and uphold the home’s rhythm. You assess progressions, not just surfaces, seeking deliberate progressions that feel inevitable.
Material durability matters where traffic concentrates, ensuring longevity without harsh replacements. You prioritize practical performance alongside visual appeal, recognizing that resilience supports consistent flow through entry, kitchen, and living areas.
Aesthetic harmony emerges when grain, sheen, and undertone echo across thresholds, yet you allow subtle variation to cue distinct functions without disruption. You map sightlines, noting how light bounces and furniture aids, so the path remains legible.
Your method yields spaces that read as one composition, where durability and design converge to sustain movement, function, and a cohesive atmosphere.
Assess Your Space: A Room-by-Room Flooring Review
To assess your space effectively, start with a room-by-room inventory that notes traffic, function, and existing materials. You’ll map how people move, identify high-traffic zones, and flag moisture-prone areas.
Next, evaluate each room’s purpose—sleep, work, entertaining—and how that affects durability and acoustics.
Document current subfloors, thresholds, and connectors, then note lighting and color influences.
Prioritize surfaces that tie rooms together, seeking cohesive yet distinct material choices.
Consider eco-friendly materials where possible, and weigh maintenance requirements against longevity.
For budget planning, categorize options by upfront cost and long-term wear.
Seek budget-friendly options that don’t compromise performance.
Use findings to guide connectors, ensuring you’ve chosen resilient, compatible materials that support your overall design intent without sacrificing practicality.
Define Your Visual Goal: Seamless or Deliberate Transitions
You decide whether you want a seamless visual flow or deliberate shifts that cue each room.
Consider how your chosen flooring textures, colors, and patterns align to guide movement without shouting.
This choice sets the rhythm for every doorway and defines the room-to-room experience.
Visual Flow Choices
Visual flow sets the mood between rooms by choosing two clear paths: seamless shifts that unify spaces, or deliberate shifts that mark each room’s boundary.
You select how you guide the eye, aligning color, texture, and material logic across thresholds. For seamless flow, you vary planks or tiles within a restrained palette, letting grain direction and finish subtly echo from room to room.
For deliberate changes, you introduce a perceptible difference—contrast trim, a shift in tone, or a different substrate—while maintaining overall harmony. Prioritize color coordination to avoid clashes at joints, and assess material durability so wear patterns remain consistent across spaces.
Document your rule set before installing; then verify edges, alignment, and transition cues during the final inspection.
Seamless Or Deliberate Transitions
Seamless shifts demand a unified palette and continuous material logic, so the eye travels smoothly from room to room without noticing abrupt junctions. You define the visual goal by weighing continuity against deliberate cues, then align flooring choices to support that aim.
In a seamless approach, maintain consistent grain direction, finish, and scale, letting transitions vanish as thresholds are implied rather than announced. If you prefer deliberate transitions, use a controlled contrast—vary patterning or direction at boundary points to signal a shift in function or mood, while preserving durability.
Consider Creative patterning to introduce subtle interest without breaking flow, and prioritize Material durability to endure foot traffic and moisture across rooms.
Document exact tolerances, install sequences, and verification steps to ensure your chosen transition remains intentional over time.
Choose Core Materials That Work Across Rooms
You’ll start by selecting core materials that perform well in both spaces, ensuring a single foundation across shifts.
Consider cross-room material suitability so your chosen option handles wear, moisture, and foot traffic consistently.
This approach reduces seams and reinforces visual harmony while keeping maintenance straightforward.
Consistent Core Materials
Choosing core materials that work across rooms is essential for a cohesive flooring system. You’ll evaluate options by prioritizing consistency in thickness, wear layer, and underfoot feel, so transitions stay seamless.
Start with core materials that tolerate similar environmental conditions, resisting moisture and temperature shifts alike. Consider material compatibility with common subfloors to prevent delamination or squeaks, and verify matching expansion gaps to avoid buckling.
Assess how each option handles foot traffic, cleaning, and long-term stability, ensuring a uniform performance profile. When you pair products, confirm color and texture alignment for a harmonious flow.
Document warranty terms and installation guidelines to minimize surprises after you complete the project. With careful selection, your space stays visually connected and practically durable.
Cross-Room Material Suitability
Prioritize core materials with proven Material durability across climates, then verify that thickness, rigidity, and resilience align with both rooms’ subfloors and junctions. Consider installation techniques that minimize movement gaps, accommodate expansion, and preserve a uniform surface height.
Choose options that resist cracking under point loads while remaining forgiving enough for occasional moisture exposure. Document performance expectations for noise, comfort, and wear patterns, and align these with warranty terms.
In practice, you’ll select a single, versatile core and standardize transitions to maintain visual and functional continuity.
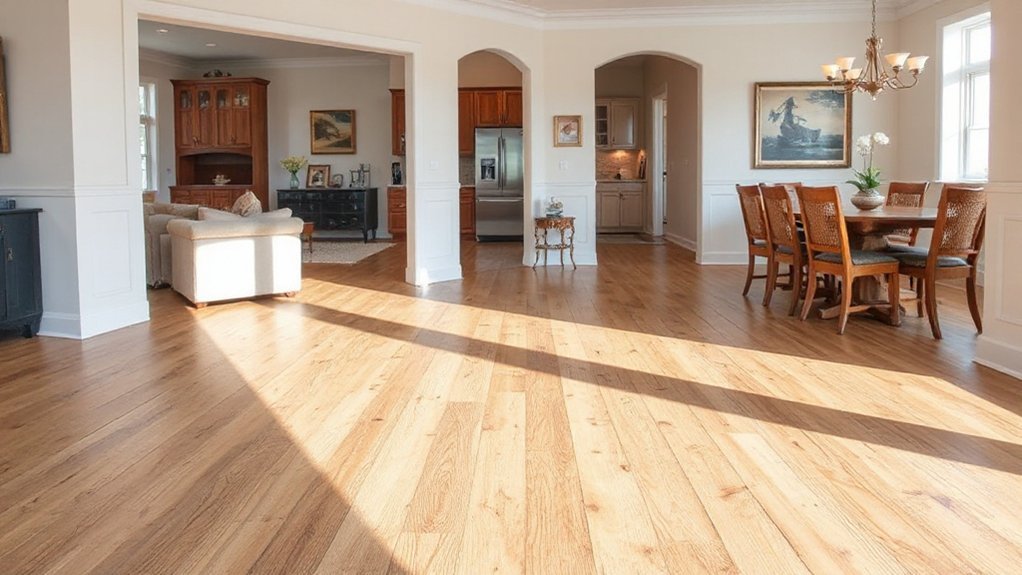
Build a Cohesive Color and Texture Palette
A cohesive color and texture palette unifies rooms by choosing a core set of hues and finishes that repeat with purpose. You start by selecting a dominant color story—a neutral base with one or two accent tones—that travels across spaces.
Next, pair textures that share scale and mood, not just color: matte surfaces with subtle grain, and a gentle sheen that catches light similarly in each room. Limit the palette to three to five finishes to maintain cohesion and allow focal elements to stand out.
Consider outdoor durability and indoor comfort when choosing materials, ensuring progressions feel seamless. Favor eco-friendly options that meet performance needs while reducing environmental impact.
Document your choices in a simple swatch map to guide consistent implementation.
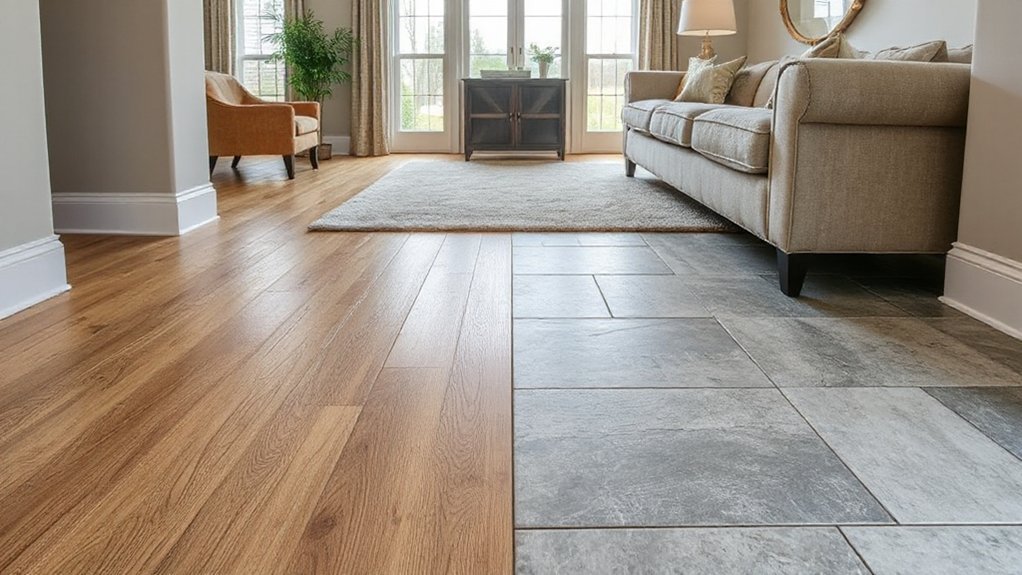
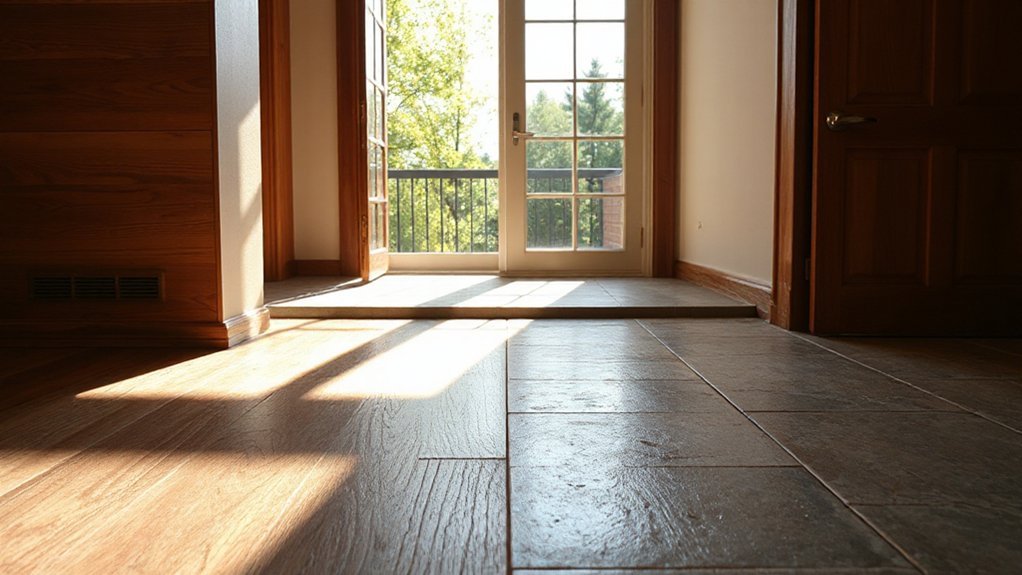
Transition Strategies: Thresholds, Seamless Fits, and Zoning
With a cohesive palette in place, you’ll shape shifts that feel intentional rather than abrupt. You approach changeover as a design decision, not an afterthought. Threshold design becomes a micro-architecture move: low-profile reducers for flush planes, raised profiles for step-like emphasis, or metal trims that read as deliberate accents.
Consider material continuity and edge treatments to minimize visual disruption while signaling zones. Zoning techniques guide function without physical barriers: use directionality, grain orientation, or subtle color shifts to distinguish areas while preserving harmony.
If materials differ, align the board width, finish, and sheen to maintain flow. Document clear rules for transitions, so future renovations preserve the strategy. Keep thresholds purposeful, harmonizing movement and perception across rooms.
Doorways and Sightlines: Handling Narrow Strips
Doorways and sightlines in narrow strips demand precision, because every fraction of space changes perceived width and flow. You align the substrate edges to preserve doorway symmetry, ensuring shifts feel intentional rather than accidental.
Sightline framing guides your eye toward focal points, avoiding abrupt stops or awkward gaps. When you install trim, keep consistent reveal and bevels to maintain a seamless corridor.
- Maintain doorway symmetry with balanced gaps and matched profiles
- Align sightline framing to preserve continuous lines across rooms
- Use consistent grain direction and color shifts to reduce visual breaks
With careful measuring, you minimize jogs and misalignment, preserving spacious feel. Check every corner, confirm planks land within nominal widths, and adjust shifts before adhesive cures. Your goal is clarity of path and harmony of form across doors and sightlines.
Stairs and Elevations: Safe, Smooth Transitions
Stairs and elevations demand exacting control to guarantee safe, smooth changes between connected levels. You approach progressions by detailing step heights, nosing profiles, and landing widths, aligning them with surrounding flooring to prevent tripping hazards.
Use, not guess, a consistent rise and run to reduce slope surprises that can cause missteps. When evaluating staircase design, verify headroom, guard height, and handrail continuity to maintain secure movement through the space.
Elevation adjustments should account for existing substrates and future flooring additions, with precise underfoot support and slip resistance. Document measurements and tolerances, then test with deliberate foot placements to confirm comfort and safety.
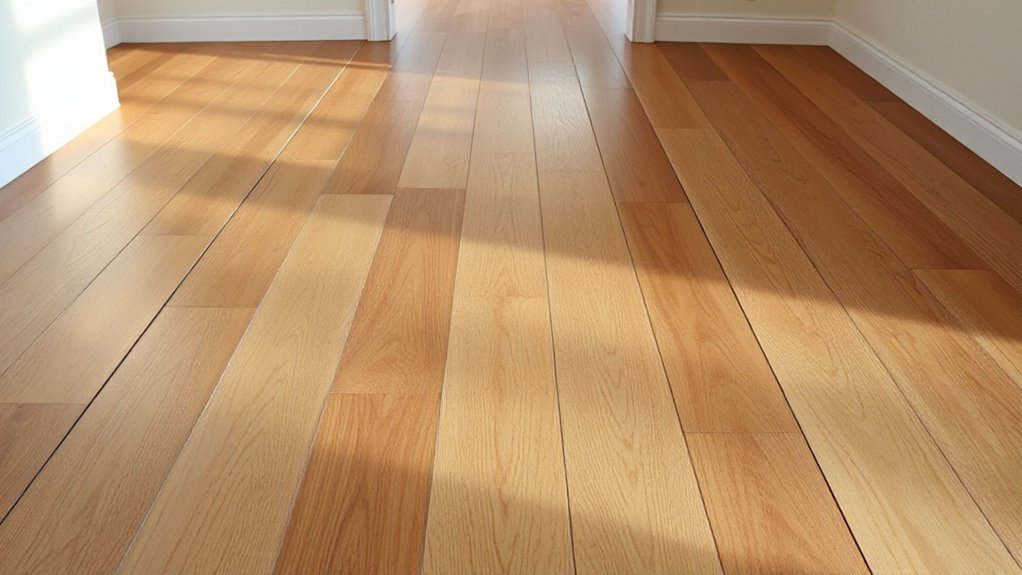
Align Pattern and Grain for Flow and Interest
You’ll align pattern across rooms to guide the eye and create a unified rhythm.
By coordinating grain direction, you’ll promote a natural flow from space to space and reduce visual breaks.
Maintain consistent color shifts to reinforce continuity without abrupt shifts.
Align Pattern Across Rooms
- Establish a shared starting reference
- Map shifts at doorways for alignment
- Review color and texture relationships across rooms
Flow Through Grain Direction
To achieve a flowing rhythm from room to room, align the fiber orientation and pattern so that sightlines and movement feel natural. You’ll determine the primary fiber orientation for each room and confirm joints align with doorways and corridors.
Start with the longest wall or main traffic path, then place boards to follow that line, creating visual continuity. When transitions occur, shift fiber subtly to avoid abrupt changes while preserving a unified feel.
Prioritize matching end fibers and edge details at full-height openings to minimize focal interruptions. Consider flooring layouts that steer attention along established sightlines, not against them.
Document your fiber choices for each space and verify consistency before installation. This approach reinforces visual continuity and a cohesive, deliberate flow.
fiber orientation, visual continuity.
Consistent Color Transitions
Consistent color shifts reinforce flow by aligning both pattern and grain across rooms. You’ll keep base tones coordinated, then match boards so repeats skim through each doorway.
Consider how Lighting contrasts reveal subtle shifts in color and texture, guiding the eye naturally from space to space.
Texture variations should be deliberate, balancing smoother finishes with tactile relief to maintain legible rhythm. When changing from one area to another, choose planks with similar undertones and grain direction, and stagger seams to avoid abrupt breaks.
This approach preserves continuity without sameness, letting each room retain its character.
Focus on three core moves:
- align pattern across thresholds
- harmonize grain direction and subtle color differences
- vary texture intentionally while maintaining bidirectional flow
Practical Sizing Rules: Joints, Widths, and Gaps

Practical sizing rules for joints, widths, and gaps matter because proper dimensions keep flooring stable, aligned, and visually clean across rooms. You start with consistent joint placement to prevent trip hazards and misaligned seams.
When selecting a flooring material, map board lengths to room dimensions, allowing for expansion gaps at edges. Keep straight, parallel joints in long hallways and staggered seams in wide spaces to distribute stress evenly.
Measure width tolerances carefully, balancing expansion and contraction without crowding edges. Avoid tight tolerances that trap debris or cause binding.
Use uniform gaps for passages between rooms, and plan for occasional refinishing without reworking layouts.
Document your chosen widths and gaps, then verify with a dry-fit before final installation to assure a seamless, durable result.
How Lighting and Acoustics Influence Flooring Perception
Lighting and acoustics shape how flooring looks and feels underfoot, so evaluating them before installation helps you avoid surprises later. You’ll notice lighting effects change color warmth, sheen, and perceived texture, making some finishes read differently in each room.
Acoustic considerations affect sound absorption, which can alter the sense of firmness or softness you perceive while walking. Plan for lighting temperature and fixture layout to guarantee consistent color.
Consider room use and foot traffic, since echoes or quiet can exaggerate or mute surface characteristics. Align materials with both light and sound goals to prevent mismatches.
- Assess daylight and artificial lighting for color shifts
- Anticipate reflective surfaces and glare
- Factor room acoustics into underfoot comfort and durability
Troubleshooting Common Mismatch Scenarios
If you’ve aligned lighting and acoustics with your flooring plan, you’ll still encounter mismatches when materials meet real-world conditions. Common scenarios include abrupt shifts between textures, unexpected sheen differences under varied lighting, and subtle height discrepancies that create tripping hazards or visual jags.
To troubleshoot, compare planned specs to actual samples in the same room and under the same lighting. Prioritize color coordination across adjacent zones, adjusting finishes or edge profiles to minimize conspicuous contrasts. Check installation tolerances and substrate flatness, correcting irregularities before final transitions.
Consider durability expectations: choose materials with compatible wear resistance and moisture performance to preserve uniformity over time. Document observed gaps, test remedies, and reassemble a cohesive sequence that preserves flow and perceived continuity.
Frequently Asked Questions
How Do I Budget for Coordinating Flooring Across Rooms?
You should start by outlining a realistic budget allocation, then refine as you compare options. First, define total project cost, then allocate for materials, labor, and contingencies.
Do a cost estimation for each room based on square footage, underlayment, and handoffs. Include a buffer for surprises and delivery delays.
Track changes in real time, adjust allocations, and document decisions. This methodical approach keeps you precise, proactive, and ready to reallocate as costs evolve.
Can Varying Room Door Heights Affect Seamless Transitions?
Yes—varying door heights can disrupt seamless shifts. You’ll want to assess door height discrepancies and plan for quiet, level changes.
Use transition strips to bridge gaps, choosing flush profiles for high-traffic areas.
Measure precise floor elevations across rooms, then select trims that match your flooring’s thickness.
Install strips with proper adhesive or fasteners, ensuring no trip hazards.
Recheck clearance at doors, adjust as needed, and maintain continuity with moisture barriers beneath shifts.
What About Pet Durability in Mixed Flooring Zones?
Pet durability in mixed flooring zones matters: about 75% of pet owners report fewer concerns when using pet friendly materials and scratch resistant finishes.
You’ll want tougher wear layers in high-traffic areas and seamless connections to prevent snagging.
Choose pet friendly materials for living or entryways, and pair with scratch resistant finishes in bedrooms to reduce scratches.
You’ll verify performance by testing with pets, ensuring ease of cleaning, and maintaining grip across passages.
How to Handle Radiators and Floor Height Differences?
To handle radiators and floor height differences, choose radiator placement that minimizes disruption to flooring changes and heat flow. Mark ideal positions first, then plan floor height adjustment where needed.
Use a thin subfloor ramp or connection strip to bridge gaps, ensuring even benefits across rooms.
Confirm floor height tolerances with your installer, and maintain consistent underlayment.
Radiator placement should avoid high-traffic edges; floor height adjustment should prioritize level, stable support for both floors.
Is Underlayment Necessary Between Different Floor Types?
Underlayments aren’t always necessary, but you should use underlayment when changing between flooring material types. It smooths ridges, handles minor height differences, and improves sound and comfort.
Check each product’s underlayment requirements and the subfloor’s moisture level. If you’re not sure, opt for a compatibility-tested underlayment.
You’ll align installation with the manufacturer’s guidance, ensuring a stable, durable result across shifts. This systematic check keeps your floors level and ready for years of use.
Conclusion
You thought this was just about choosing floors, right? Surprise: it’s choreography. You’ll match grains, colors, and progressions until a room-to-room rhythm feels inevitable, not accidental. You’ll plan joints, thresholds, and lighting like a tiny orchestra, and notice how acoustics whisper the harmony you’ve engineered. When a mismatch sneaks in, you’ll triage it with calm, precise steps, not drama. Embrace the discipline, enjoy the flow, and pretend the house always meant to be this cohesive. Irony, satisfied.


