
Did you know your 1930s cavity walls may not be a true “empty.” Many have plastered inner skins and lightweight outer leaves with little continuous insulation, which can trap moisture and create cold bridges. You’ll need a careful cavity survey, breathable mineral insulation, and detailing that makes the retrofit reversible. Start with a plan that anticipates moisture management, thermal bridging, and monitoring, then weigh internal versus external approaches before committing to materials and install methods. The path you choose will shape long-term performance and historic integrity.
Key Takeaways
- Assess 1930s cavity walls with non-destructive surveys to locate voids, damp zones, and bridging before retrofit planning.
- Prefer breathable, mineral-based insulation and continuous insulation strategies to reduce thermal bridging and moisture risk.
- Decide between internal or external retrofit based on site constraints, aesthetics, and how each method affects moisture control and drafts.
- Prioritize detailed documentation, compatibility, and reversibility of materials, with a focus on period-appropriate finishes.
- Implement targeted moisture management, ventilation, and drainage to prevent damp, mold, and salt efflorescence during retrofit.
Why 1930S Cavity Walls Pose a Unique Insulation Challenge
1930s cavity walls present unique insulation challenges because their construction relied on plastered inner skins and timber or lightweight brick outer skins with limited or no continuous insulation. You confront a system designed for heat retention via mass and ventilation, not modern U-values.
The plaster layers are inherently brittle, prone to cracking, and can trap moisture, risking damp paths that undermine performance. Timber elements introduce timber decay risk and thermal bridging, while lightweight bricks increase differential movement and reduce airtightness.
Historic fabric demands careful treatment to avoid aesthetic or structural damage, so you must balance insulation gains with historical preservation needs. Modern compatibility demands careful material compatibility, ventilation strategy, and reversible approaches where feasible, ensuring retrofit options respect original methods while delivering improved thermal performance.
Step-By-Step Cavity Assessment for Retrofits
Begin with a systematic survey of the cavity to establish baseline conditions before any retrofit work. You’ll map wall assemblies, identify brickwork joints, and note existing insulation gaps. Assess cavity width, moisture indicators, and signs of thermal bridging to prioritize interventions. Measure wall permeability to pinpoint vapor pathways and potential condensation risk. Document exterior finishes and any veneer that may constrain access, ensuring measurement repeatability for future comparisons.
1) Conduct non-destructive scans to locate voids, damp zones, and bridging points, recording precise coordinates and conditions.
2) Verify existing cavity gaps at lintels, openings, and corners, log deviations, and flag locations needing spacer insertions or reconditioning.
3) Establish performance benchmarks for air leakage, humidity levels, and thermal gradients to guide retrofit targeting and monitor progress.
Choosing Materials That Respect Period Charm
When selecting materials, you balance period-respecting options with modern performance needs, ensuring compatibility with 1930s wall assemblies.
You should assess historical aesthetic compatibility, prioritizing finishes and textures that read as authentic while meeting current insulation standards.
You’ll also evaluate durability and moisture management to achieve subtle, effective performance without compromising the building’s character.
Period‑Respecting Materials
Choosing materials that respect period charm means selecting options that combine traditional aesthetics with modern performance. You’ll balance ventilation, moisture control, and insulation value without compromising exterior appearance or interior finish.
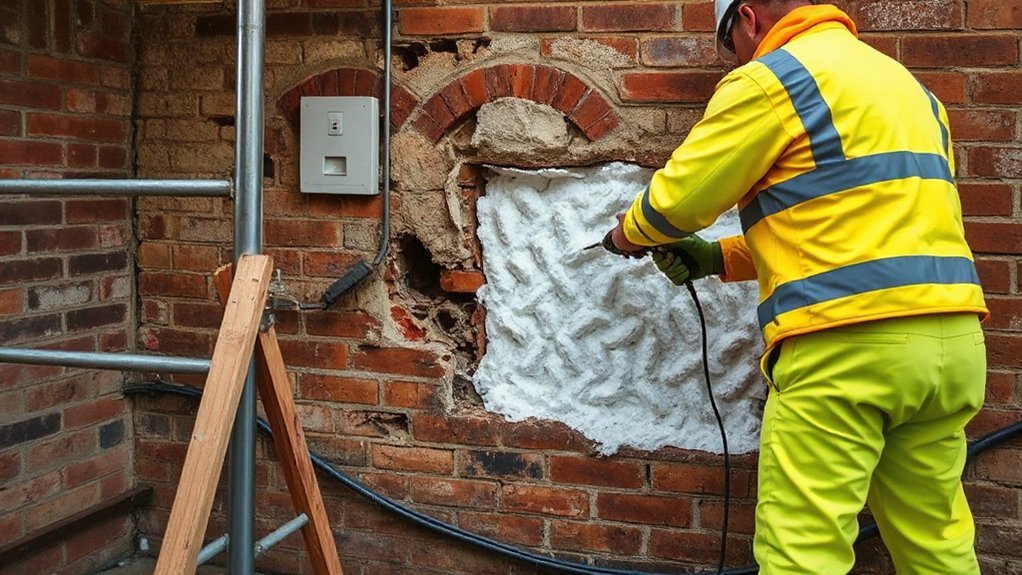
Opt for discrete, low-contrast textures and compatible substrates to maintain aesthetic harmony while meeting current building codes. Use tested, breathable, mineral-based products that minimize bulk, reduce thermal bridging, and preserve masonry integrity.
Schedule site checks to ensure compatibility with lime plaster and coal-tired finishes, avoiding modern incompatibilities that cause damp or delamination.
For longevity, prioritize materials with documented compatibility data, installation guides, and maintenance routines. Maintain archival records to support vintage preservation goals and future retrofits.
- Mineral-based, breathable insulation products
- Low-contrast, period-appropriate finishes and substrates
- Documentation-driven compatibility and maintenance planning
Historical Aesthetic Compatibility
To preserve period charm, select materials that visually harmonize with original finishes while delivering modern performance. You assess color palette options that align with plaster, brick, and woodwork typical of 1930s facades, avoiding stark contrasts. Prioritize low-gloss, muted tones that echo historic schemes and minimize glare on exterior reveals.
You evaluate architectural details—cornices, lintels, dentils, and sills—to guarantee insulation additions respect profiles and line work. For interior applications, choose finishes that mimic aged textures or plaster brush marks, preserving tactile authenticity.
Surface preparation should maintain existing patina, with compatible substrates to prevent detachments or staining. Documentation of material provenance and color matching aids maintenance reviews.
Final selection balances visual fidelity with thermal performance, ensuring seamless integration into the building’s character.
Subtle Modern Performance
A careful balance of performance and period integrity starts with selecting materials that deliver modern thermal efficiency without altering the building’s visual and tactile character. You’ll prioritize materials that offer high energy efficiency while preserving texture, color, and detailing visible on the exterior.
Choose compatible insulation forms, mindful of breathability, damp handling, and long-term stability, to avoid wall thinning or cosmetic distortion. Design innovation should guide interface details between old masonry and new substrates, ensuring seamless service routes for services without compromising historic features.
Energy efficiency improvements must be quantifiable, with performance targets aligned to retrofit goals. Consider the following options to maintain subtlety and effectiveness:
- Thin, high-R value fillings in cavities that respect cavity geometry
- Lightweight, breathable boards with discreet joints
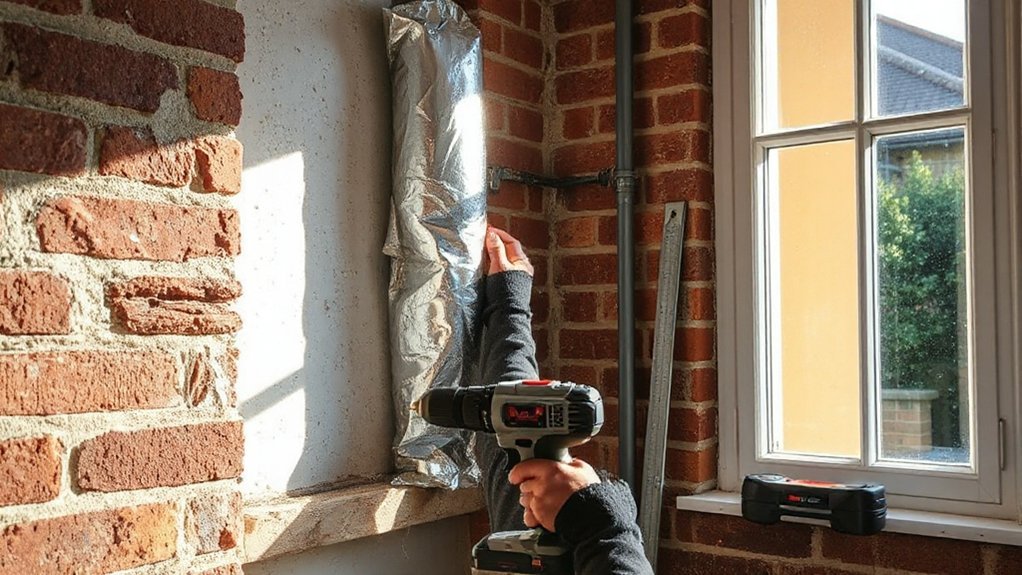
- Low-profile reflective barriers integrated behind existing render or plaster
Internal Vs External Retrofit: Pros, Cons, and Fit
Internal retrofit and exterior retrofit each present distinct trade-offs for 1930s houses. You weigh internal methods against external cladding externally, considering structure, access, and future maintenance.
With internal retrofit, you can target cavity insulation thickness precisely, minimize disruption to external aesthetics, and reuse existing wall finishes. But you may face thermal bridging at reveals, lintels, and openings, plus reduced internal space.
Exterior retrofit offers continuous insulation, reducing thermal bridges and improving airtightness. Yet it adds primer and render or cladding costs, alters detailing, and can affect window proportions and moisture management.
Choose based on fabric priorities: you gain or lose sunlight, plaster compatibility, and service integration.
Confirm detailing accounts for wind-driven rain zones, first-floor offsets, and potential trades access constraints while maintaining fire and sound performance.
Moisture, Damp, and Cold Bridging: How to Prevent Problems
You’ll start with moisture management, selecting breathable, slump-free materials and detailing proper drainage to prevent trapped water.
You’ll implement cold bridging prevention tactics by maintaining continuous insulation and detailing joints to avoid thermal shorts that invite condensation.
You’ll establish damp detection and mitigation protocols, using accessible monitoring, timely repairs, and targeted ventilation to keep growth of mold and salt efflorescence in check.
Moisture Management Strategies
Moisture control in 1930s cavity-wall homes hinges on stopping water ingress, drying any existing moisture quickly, and minimizing cold bridging that drives condensation. You’ll implement targeted measures that balance performance and practicality, focusing on proven methods for inside-out management and measurable outcomes.
Thermal bridging and ventilation strategies must be integrated into retrofit detailing to avoid latent damp and mould risk while preserving thermal comfort.
- Inspect and seal exterior joints and reveals to limit water ingress, then monitor for any reoccurrence with simple moisture checks.
- Plan controlled ventilation strategies that maintain air exchange without creating drafts, using passive or low‑energy ventilation as appropriate.
- Apply condensate management by optimizing surface temperatures and ensuring rapid drying paths in intermittently occupied spaces.
Cold Bridging Prevention Tactics
To prevent cold bridging in 1930s cavity-wall homes, identify likely junctions where thermal continuity is broken—around lintels, wall-to-floor interfaces, window reveals, and masonry-to-plaster shifts.
You then implement targeted strategies that preserve Historical accuracy while improving insulation durability. Use continuous insulation layers where feasible, ensuring discreet junction detailing to minimize thermal breaks without compromising historic fabric.
Seal openings at sills and jambs with appropriate gaskets and backer materials to block airflow paths. Install thermal breaks at masonry ties to reduce conductive bridging.
When upgrading, maintain measurement tolerances and cavity dimensions to avoid overpacking, which can impair breathability.
Document materials, methods, and performance data for future maintenance, keeping the retrofit reversible where practical.
Emphasize durability, compatibility, and long-term moisture resilience.
Damp Detection and Mitigation
1) Isolate and seal air leaks at penetrations, joints, and openings to lower inward moisture load while preserving ventilation.
2) Address thermal bridging with targeted insulation continuity and thermal breaks to minimize cold surfaces where condensation forms.
3) Implement drainage and vapor management—improve guttering, damp-proof courses, and breathable but wind-tight barriers to sustain long-term dryness.
Questions to Ask Installers and a Practical Project Checklist
Before you start work, gather a precise, project-focused list of questions for potential installers and map out a practical checklist to guide the retrofit.
You’ll confirm credentials, licenses, and warranties, then verify installation scope, milestones, and site access.
Ask about energy efficiency targets, insulation materials, and compatibility with your existing cavity; require a material spec sheet, R-values, and fire/smoke ratings.
Demand a pre-inspection plan, moisture controls, and a post-installation air-tightness test.
Specify ventilation considerations, warranty coverage, and contingencies for rework.
The checklist should track material deliveries, storage, tool calibration, and safety gear.
Record flow rates, injection pressures, and ad hoc measurements.
Make certain documented quality control steps, sign-offs, and a final performance summary aligned to your retrofit goals.
Case Studies: Measuring Heat Loss Before and After
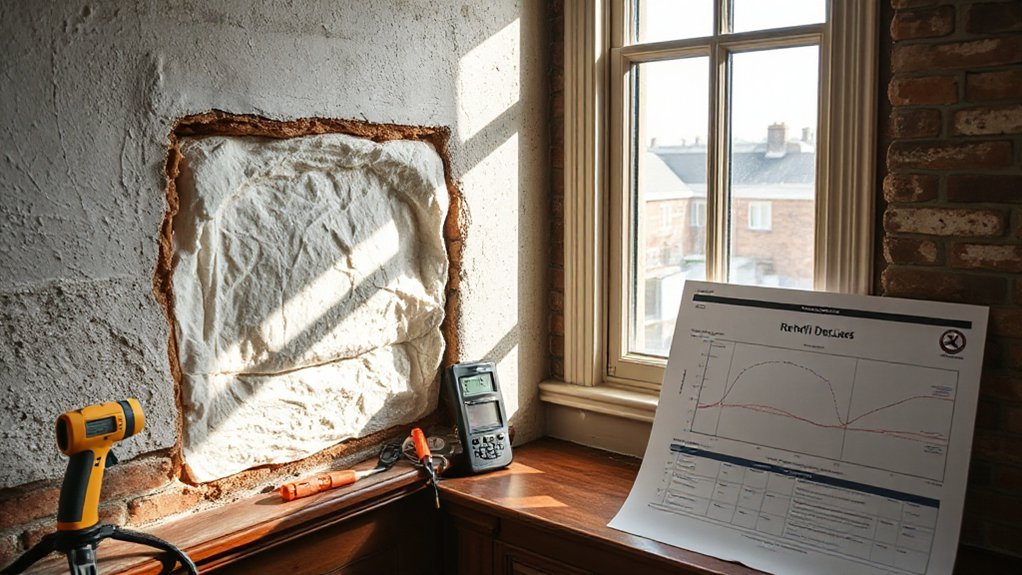
Case studies show how measuring heat loss before and after cavity wall insulation retrofit provides concrete, apples-to-apples results. You’ll document baseline performance, then compare to post-retrofit figures to quantify gains. Use controlled conditions where possible and record outdoor weather during tests to guarantee comparability.
Thermal imaging helps identify heat bridges, while blower-door measurements quantify overall leakage and airtightness.
Insulation materials vary in R-value, installation density, and thermal mass, so track performance per material type to inform decisions. Present data as delta values (before vs after) and include confidence intervals when feasible.
Guarantee repeatability by using identical sensor placement and timing in follow-up measurements.
1) Baseline vs. post-retrofit metrics
2) Thermal imaging findings and heat-bridge targets
3) Material-specific performance and installation notes
Frequently Asked Questions
How Long Does a Typical Retrofit Take From Start to Finish?
A typical retrofit takes about 1 to 2 days, depending on wall access and material choice. You’ll plan a short disruption window and coordinate with trades.
During the process, you assess thermal performance improvements and install insulation materials beneath the external or internal wall surface. You’ll verify airtightness and guarantee finishes suit your budget.
Expect potential minor redecoration afterward. You’ll record results and compare pre- and post-install readings to confirm sustained, energy-efficient gains.
Will Insulation Affect the House’s Character or Value?
Insulation can alter your home’s feel without wrecking its charm. It’s unlikely to harm character; any aesthetic impact tends to be subtle if you choose traditional finishes and careful detailing.
Regarding Property valuation, you usually gain, since better energy performance appeals to buyers. You’ll notice quieter rooms and steadier temps.
Practical note: document workmanship and warranties, and confirm compatibility with existing features to maximize the aesthetic impact while protecting value.
Can Retrofits Be Done Without Disturbing Tenants or Neighbors?
Yes, retrofits can be done with minimal disruption. You’ll coordinate access windows, work within quiet hours, and use staged drilling to reduce noise.
Implement planned ventilation and temporary enclosure to protect tenants. For neighbor privacy, schedule exterior work away from neighboring windows, contain debris, and use dust barriers.
You’ll notify residents in advance, provide a clear contact line, and limit onsite staff. Overall, you’ll minimize Tenant disruption while maintaining safety and quality standards.
What Ongoing Maintenance Does Cavity Insulation Require?
Maintenance is minimal but essential: you’ll check moisture management, inspect for damp spots, and reseal any gaps every few years.
You’ll keep vents clear and monitor insulation longevity by avoiding compressions or damage during work.
You’ll test for air leaks and confirm that adjacent plasters remain dry.
You’ll service weatherstripping as needed, and document performance data to anticipate future replacements.
Irony aside, proactive checks save cost and preserve efficiency.
Are There Grants or Incentives for 1930S Cavity Retrofits?
Yes, you can access government subsidies and tax incentives for 1930s cavity retrofit projects. You qualify if your property is your primary residence and upgrades meet current energy-efficiency standards.
Check local schemes for insulation grants, installer-funded rebates, and reduced VAT on renovations. You’ll need eligible documentation, a registered installer, and energy performance improvements certified.
Apply through official programs, compare total costs, and verify that stated savings justify timing, compliance, and administration requirements.
Conclusion
In short, retrofit success hinges on respectful, precise detailing more than sheer depth of insulation. You’ll want to acknowledge limits of the original fabric with a cautious, well-planned approach that avoids over-cladding and moisture traps. If your team uses breathable, mineral-based fills and monitors moisture pathways, you’ll likely gain comfort without compromising historic character. Subtle, technically sound adjustments can quietly deliver warmth, while keeping the building’s integrity intact—without inviting premature compromise.


