
Contrast your hopes with the realities of weather and wear, and you’ll see why a practical plan matters. You’ll define goals and budget, zone for flow, and select weather-ready materials that withstand your climate. Layer lighting, accessible power, and durable furnishings for comfort and adaptability, then add privacy via screens and plantings. The result hinges on a disciplined maintenance routine and a layout tuned for ease, nuance, and resilience—the kind that invites you to stay, yet leaves more to reflect on.
Key Takeaways
- Define goals and budget early, identifying zones for seating, dining, and circulation to guide decisions and control costs.
- Zone the space for flow with furniture placement, privacy screens, and layered materials that delineate areas without barriers.
- Choose weather-ready materials and durable outdoor furnishings that resist moisture, UV, and seasonal changes while preserving style.
- Plan lighting, power, and mood with zones for ambient, task, and accent light, integrated controls, and weatherproof wiring.
- Personalize with durable finishes and a maintenance plan to keep the space cohesive, scalable, and easy to maintain.
Define Your Outdoor Goals and Budget
To begin, clearly define what you want from your outdoor space and set a realistic budget. You’ll assess constraints—sun exposure, wind, drainage, and access—and translate them into measurable goals.
Begin with functional zones: seating, dining, and circulation, then align each with your daily cadence. Map requirements for landscape architecture elements, such as planting beds, built-ins, and lighting, ensuring durability and low maintenance.
Estimate costs for materials, labor, and contingencies, distinguishing essential from optional features. Prioritize outdoor furniture and textures that perform in your climate, selecting pieces with appropriate warranties and modular capabilities.
Document target outcomes, purchase timelines, and a approval process to track changes. This disciplined approach prevents scope creep and keeps you aligned with your budget while achieving a cohesive, inviting environment.
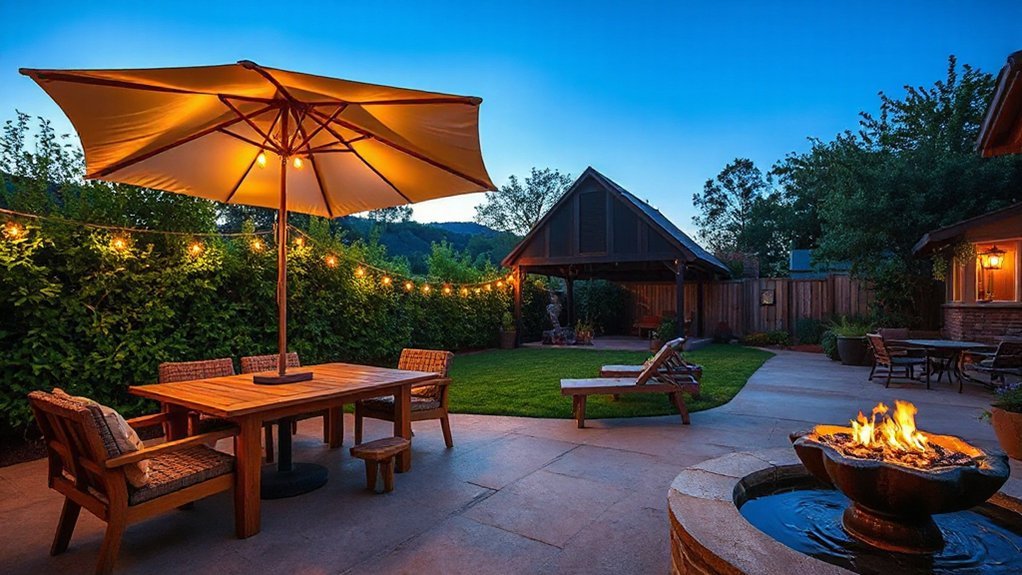
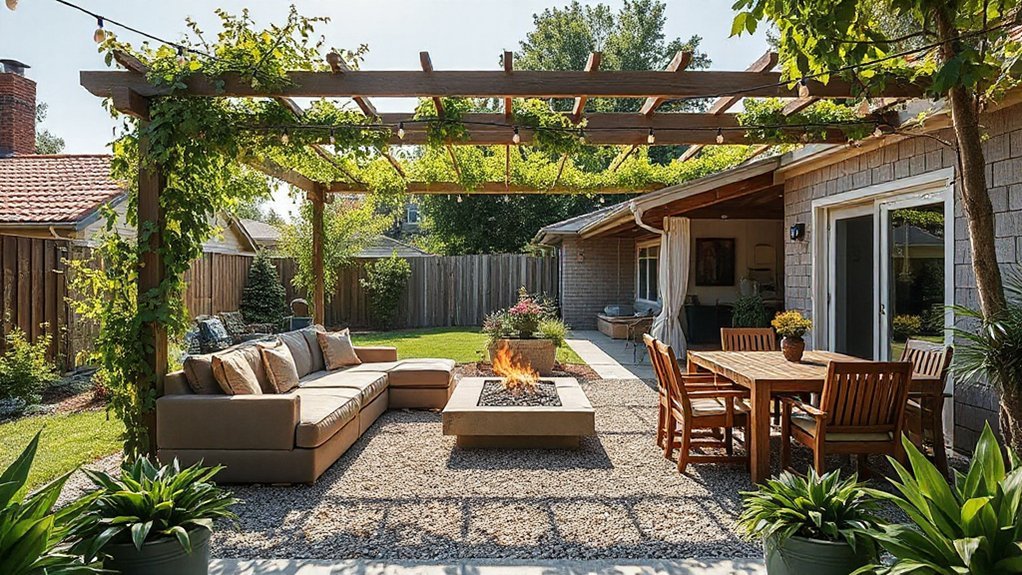
Zone the Space for Comfort and Flow
Place furniture to reinforce pathways: align seating to room edges, keep primary access clear, and create purposeful sightlines from entry doors. Use vertical layering and material contrast to delineate areas without walls.
Consider furniture arrangement that promotes conversation yet preserves privacy where needed, mapping edges to walls or plant screens to soften boundaries. Integrate privacy screening where visual intrusion is possible, leveraging lattices, screens, or tall plantings that don’t impede air flow.
Guarantee access to utilities, shade, and lighting align with each micro-area for consistent usability.
Choose Weather-Ready Materials for Your Climate
Choosing weather-ready materials begins with climate-driven performance as the baseline: select substrates that resist moisture, UV exposure, temperature swings, and wind-driven debris while maintaining aesthetic integrity. You’ll balance durability with form, prioritizing materials that endure seasonal shifts without dimensional changes or color fading.
Consider joinery, fasteners, and finishes engineered for your region, plus railings and decks that minimize maintenance. Start with substrate compatibility and service life, then evaluate texture, tone, and weathering behavior under local conditions.
Weather-resistive choices should integrate with drainage, thermal comfort, and microclimate goals. You’ll optimize long-term value through conservative specifications and test data.
Weather resistant furniture and climate-specific plants reinforce the system, completing a resilient, design-forward outdoor living space.
- Substrate performance certification and maintenance intervals
- Fastener and finish compatibility across seasons
- UV, moisture, and temperature aging data
Plan Lighting, Power, and Mood
With weather-ready materials in place, plan lighting, power, and mood to extend usability and comfort after sundown. You’ll specify zones for ambient lighting, task tasks, and accent highlights, ensuring seamless control from a central system.
Map electrical loads to outdoor outlets, lighting circuits, and weatherproof GFCIs, prioritizing safe cable routing and minimal trenching. Choose decorative fixtures that balance glare reduction with sufficient illumination, aligning color temperature to space function—warmer tones for lounging, cooler tones for cooking or grilling.
Implement dimming and scene control for mood shifts, integrating smart timers and occupancy sensors to conserve energy. Ground all fixtures, select corrosion-resistant hardware, and verify ingress protection (IP) ratings meet site exposure.
Conclude with a lighting plan memo detailing fixture types, placement, and maintenance notes.
Personalize With Style and Practical Maintenance
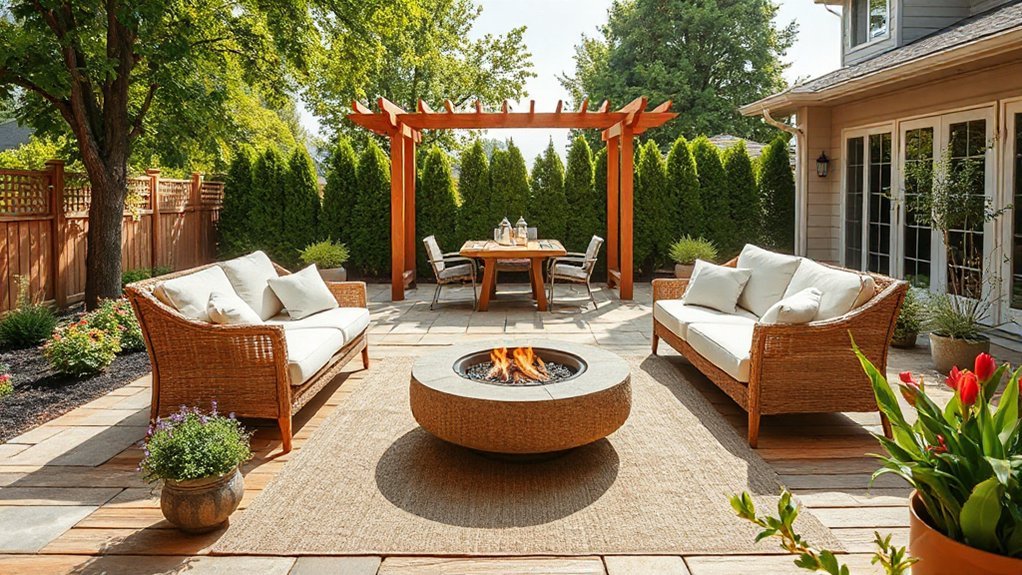
To tailor your outdoor space, blend personal style with practical maintenance from the start, ensuring aesthetics align with long-term upkeep. You’ll define a cohesive look by selecting durable materials, color harmonies, and modular components that endure weather and wear.
- Prioritize garden decor elements that synchronize with furniture arrangement, ensuring sightlines remain clear and access is unimpeded.
- Map a maintenance calendar tied to material warranties, seasonal cleaning, and quick-repair protocols to minimize downtime.
- Implement a scalable layout with standardized dimensions and anchor points, enabling effortless reconfiguration without tools or downtime.
This approach keeps design deliberate, repeatable, and resilient, while informing future upgrades. You’ll achieve a polished, low-friction space that feels intentional and easy to maintain.
Frequently Asked Questions
How Long Does Outdoor Living Space Maintenance Typically Require Weekly?
Outdoor living space maintenance typically requires about 1–3 hours per week, depending on size and plantings. You’ll sweep debris, trim edges, and inspect irrigation, lighting, and furniture for wear.
Schedule 15–30 minutes for lawn care, 15 minutes for pruning and plant health checks, and 15–30 minutes for lighting options and electrical safety.
Integrate landscaping ideas with a quick seasonal refresh, and set a recurring routine to prevent buildup. This keeps spaces vibrant and safe.
What Are Cost-Saving Materials With Long-Term Durability?
Budget-friendly, durable options lean on composite decking, treated timber, and permeable pavers, plus corrugated metal accents. Budget-conscious choices include concrete, stone veneer, and recycled rubber, paired with low-maintenance landscaping enhancements and enduring lighting solutions.
You’ll optimize durability by sealants, proper drainage, and UV-resistant finishes, while integrating modular benches, planters, and shade. Landscaping enhancements and lighting solutions elevate longevity, reducing upkeep.
You’ll design with parallel channels: cost, function, aesthetics, and resilience guiding every material selection and installation decision.
How to Maximize Privacy Without Sacrificing View?
You maximize privacy without sacrificing view by layering strategically spaced Privacy screens and Landscape barriers that align with sightlines.
Use perforated screens to obscure homes while preserving ambient light, and position translucent panels where you want soft glimpses.
Integrate tall planting trellises as vertical screens, compressing openness only where desired.
Select materials with UV resistance and low maintenance.
Maintain sightlines through gaps, and grid patterns to balance enclosure with open air and natural vistas.
Which Local Permits or HOA Rules Apply to Outdoor Projects?
You’ll need to check local ordinances and HOA covenants first to determine which landscaping regulations and HOA restrictions apply to outdoor projects. Verify permit types, setback requirements, height limits, and setback buffers for structures, fences, and hardscaping.
Confirm erosion controls, drainage, and irrigation rules, plus licensing if you install utilities. Coordinate with the HOA’s architectural committee, and document approvals before starting.
Maintain records of permits, inspections, and any amendments to guarantee ongoing compliance.
How to Seasonally Rotate Furniture for Weather Resilience?
Seasonally rotate furniture by staging a clear, weather-resilient sequence: move pieces away from direct sun and moisture, then swap to seasonal setups.
Use seasonal furniture storage for cushions and light fabrics, and store outdoors-only weatherproof cushions in breathable covers when possible.
Rotate heights and materials to reduce wear, and pivot toward wind-safe arrangements during storms.
Adjust cushions and hardware seasonally, inspecting fasteners, seals, and hangers for durability.
This keeps your space resilient and design-forward.
Conclusion
You’ve mapped zones, chosen hardy materials, and plotted lighting like a pro. Yet you’ll pretend this is mere decoration, not a precise system of comfort and utility. Fine—let satire do the heavy lifting: your outdoor space isn’t a photo shoot; it’s a workbench with weatherproof screws and dimmable LEDs. When you sit, you’ll measure shade, airflow, and sightlines as meticulously as a lab report. Enjoy the flawless balance of beauty, durability, and unapologetic, design-forward control.


