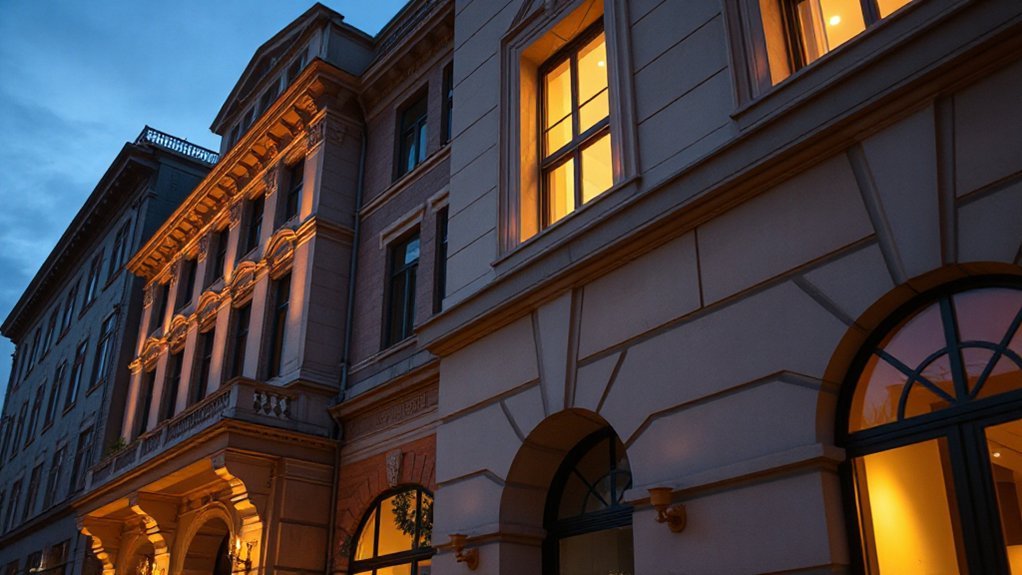
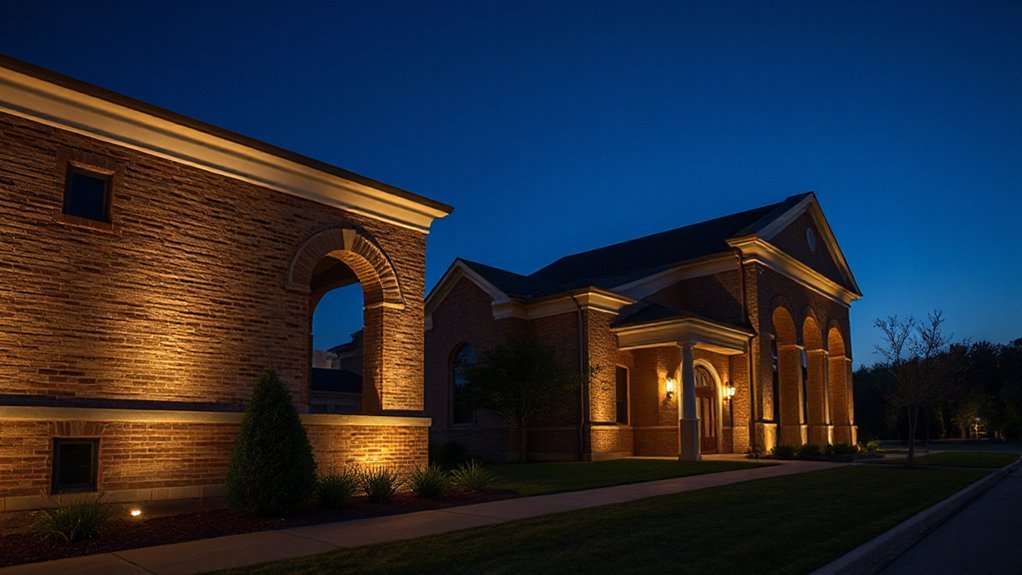
To highlight architectural details at night, you’ll layer lighting to reveal texture, depth, and form. Use grazing to pull out surfaces and wall washes for even tone, while discreet accent and downlighting define edges, cornices, and masonry. Choose fixtures with precise beam control and appropriate color temperature to preserve material nuance. Balance light and shadow to emphasize craftsmanship, then plan control and sequencing for versatile scenes that invite deeper consideration of the architecture. Now, consider how this approach fits your space.
Key Takeaways
- Use grazing and side lighting to reveal texture, edges, and grain on stone, brick, and trim for depth and definition.
- Highlight architectural silhouettes with narrow-beam fixtures placed to map shadows and emphasize lines.
- Calibrate color temperature and CRI to maintain true material color and avoid glare masking texture.
- Layer lighting (upward, downward, pathway) to create depth while preserving architectural hierarchy.
- Integrate smart controls (timers, motion sensors) to maintain consistent highlights and energy efficiency.
Understand Exterior Lighting Goals and Questions
To set effective exterior lighting goals, start by clarifying what you want to achieve: safety, security, ambiance, and functionality. You’ll define metrics, required illumination levels, and control strategies before selecting fixtures.
Establish a target for landscape integration to guarantee lighting complements plantings and architecture rather than competing with them.
Consider energy efficiency as a baseline, selecting LEDs, dimming, and smart controls to reduce waste.
Map zones by function: entry, walkway, facade, and driveway, assigning appropriate luminance and color temperature for each.
Prioritize glare reduction, uniform coverage, and dark-sky compliance to minimize light spill.
Document constraints like budget, maintenance, and warranty, then iterate with a simple checklist to verify goals are met during design, installation, and commissioning.
Read the Architecture: How Light Reveals Form
Read the light forms you’ve outlined, and observe how each beam defines mass, volume, and edges.
Highlight architectural silhouettes by positioning fixtures to emphasize contrast between light and shadow, so the form reads clearly at a distance and up close.
Layer texture and depth by varying intensity, color temperature, and grazing angles to reveal material nuances without clutter.
Read The Light Forms
Light reveals form by casting shadows and highlights that define edges, volumes, and materiality. You observe how light distribution emphasizes texture, contour, and depth, shaping perceived mass without altering actual geometry.
In practice, evaluate luminance contrast, angular incidence, and shadow softness to read architectural intent. Light color influences perceived material warmth or coolness, subtly altering form cues; cooler tones recede planes, warmer tones enhance tactile detail.
Assess consistency across elevations to avoid unintended distortions of volume. Energy efficiency drives selection of luminaires, optics, and control strategies that preserve form while reducing consumption.
Prefer glare-controlled fixtures with precise beam control to prevent cluttered silhouettes. Calibrate color rendering to reflect true material qualities, ensuring the full reading of form remains legible under variable ambient conditions.
Highlight Architectural Silhouettes
Architectural silhouettes are defined by crisp edges and strong contrast; use selective illumination to carve the building’s outline against the sky. You’ll shape the silhouette by placing boundary-lighting at soffits and parapets, guiding the eye along architectural edges without washing away form.
Choose narrow-beam, high-contrast fixtures to emphasize corners, cornices, and inset facades, while avoiding spill onto surrounding landscape. Align luminaires with structural lines to maintain legibility at distance, ensuring consistent cadences from street to entry.
For landscape integration, coordinate ground lighting to frame the base without altering the skyline, preserving the silhouette’s integrity after dusk. Prioritize energy efficiency by selecting fixtures with proper color rendering and dimming capabilities, and by limiting total lumen output to the minimum required to reveal form.
This approach balances visibility, sophistication, and ecological responsibility.
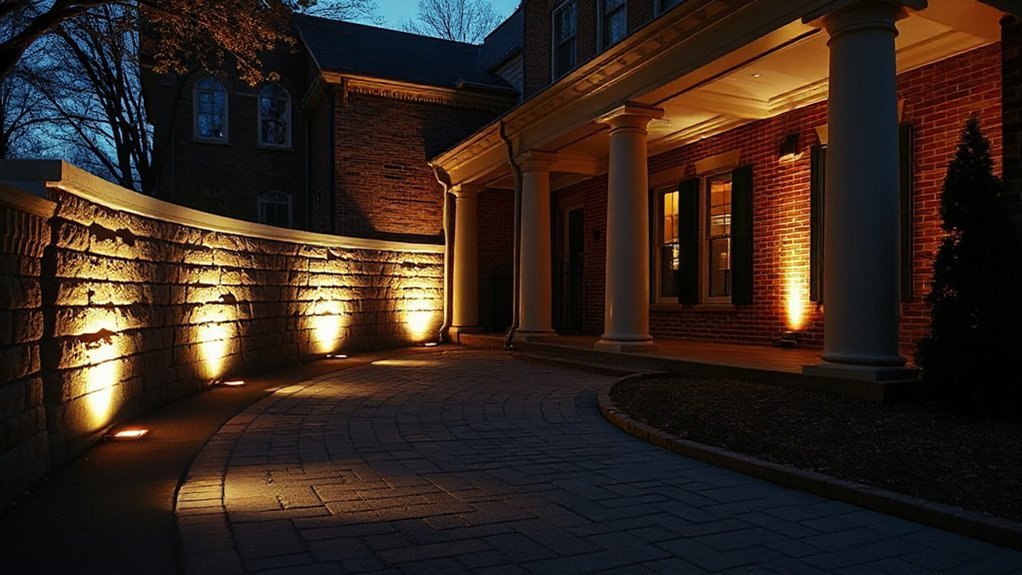
Layer Texture And Depth
You analyze how grazing angles emphasize finish, joints, and surface treatments, transforming flat planes into legible, tactile forms. Use directional lighting to illuminate edge recesses and texture breaks, adjusting height, tilt, and spacing to control contrast ratios without washing detail.
Consider color temperature to differentiate material warmth and to preserve true texture cues under different atmospheres. Balance luminance so shadows enhance depth without erasing detail, and monitor energy efficiency by selecting high-CRI, low-wattage sources with appropriate beam angles.
Document performance across conditions, validating that layered texture supports architectural hierarchy while minimizing glare and wasted light. Align fixtures with intent, ensuring sustained perceptual clarity.
Graze and Reveal: Texture-Focused Lighting Techniques
Texture-focused lighting—specifically grazing and reveal techniques—employs side illumination to sculpt surface detail. You leverage angled light to emphasize texture, grain, and depth without washing color. Precision matters: choose luminaires with appropriate beam control, spacing, and mounting height to avoid hotspots.
Landscape integration guides fixture placement near features, ensuring the light complements surrounding terrain and architecture rather than shouting from the curb. Color temperature selection influences perceived material authenticity and contrast, so align it with the building’s palette and landscape tones.
Use low glare, high-CRI sources to preserve texture fidelity while supporting safety and wayfinding. Consistency across elevations helps maintain cohesion during dusk-to-dark shifts, enhancing architectural legibility and ambiance.
- Align fixtures with landscape integration goals for balanced composition
- Calibrate beam angles to minimize glare and maximize surface definition
- Match color temperature to materials for authentic texture rendering
- Maintain uniformity across elevations to sustain cohesive nighttime drama
Wash the Facade: Even, Soft Illumination Strategies
Even illumination across the façade creates a seamless, welcoming skin that reveals form without drawing attention to individual light sources. You pursue uniform brightness by selecting wide-beam, diffused fixtures that minimize hotspots and shadowed progression.
Positioning matters: place luminaires at eave or soffit planes to wash vertical surfaces evenly, then calibrate lumen output to maintain consistent luminance across material textures.
Use color temperature ranges that harmonize with surrounding architecture and landscape, avoiding jarring contrasts that disrupt the façade’s cadence.
Control strategies should emphasize indirect reflection and glare control, not decorative focal points.
Prioritize fixture durability to withstand environmental exposure, ensuring steady performance over time.
Verify compatibility with transformers, drivers, and thermal management to sustain color stability and lumen maintenance, delivering durable, low-maintenance wash illumination.
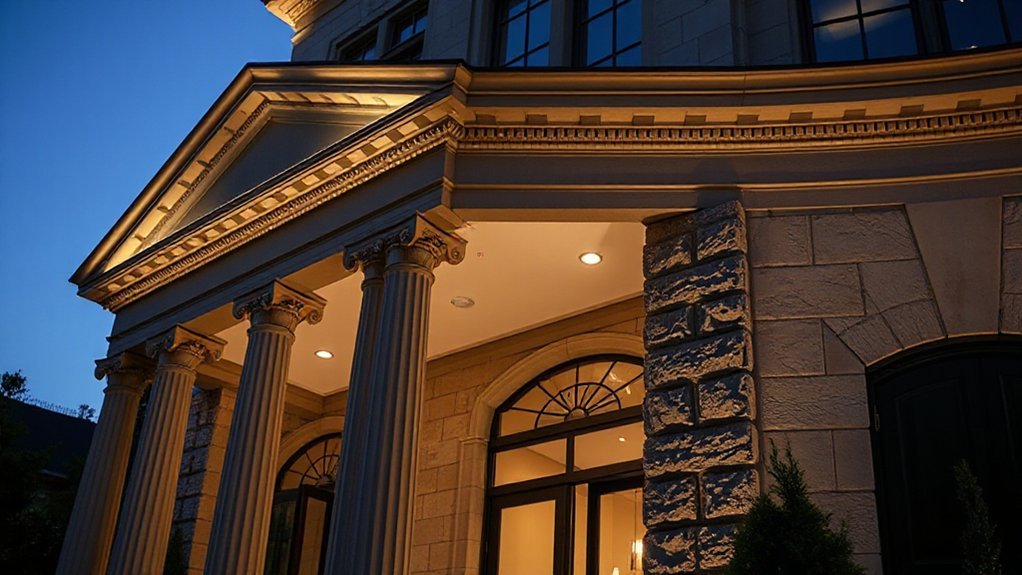
Outline Architectural Features: Edges, Cornices, Masonry
Edges, cornices, and masonry define the building’s silhouette and should be highlighted without overpowering the overall composition. You’ll use lighting to accentuate lines and textures, avoiding glare that blurs architectural edges.
Position fixtures so shadows map the structure’s depth, revealing cornice profiles and masonry joints at key angles. Favor narrow-beam luminaires or grazing techniques to emphasize vertical and horizontal outlines without washing out details.
Integrate landscape and site elements, such as garden pathways, to create a coherent frame around architectural features and guide the eye along the facade.
Guarantee light levels respect surrounding spaces, including outdoor furniture zones, preventing spillover onto adjacent properties. Calibrate brightness, color temperature, and beam spread to preserve material integrity and legibility.
- Use grazing or low-angle lighting to emphasize edges
- Align fixtures with architectural lines, not random placements
- Balance illumination between edges and surrounding landscape
- Consider scene at different times to maintain contrast with garden pathways and outdoor furniture
Highlight Materials in Proportion: Stone, Brick, Trim
Stone takes visual priority, so set its emphasis and proportion to guide the lighting plan.
Brick and trim should contrast without overpowering stone, creating clear hierarchy through shadow and highlights.
Balance texture with targeted illumination to unify surface variation and enhance material perception.
Stone Emphasis Proportions
When planning exterior lighting, balance the stone emphasis with brick and trim to create a cohesive facade. You should quantify proportions so the stone remains dominant yet complementing, ensuring visual weight aligns with façade geometry. Use cooler or neutral fixtures to protect texture readability, avoiding glare that masks grain.
Coordinate light intensity with landscape accents to prevent over-illumination of stone surfaces. Illuminate doorway reveals and masonry joints to reveal joints’ rhythm without washing color. Maintain consistent color temperature across materials to preserve harmony.
- Control lighting density by material area, not fixture count
- Prioritize subtle uplight along stone courses for texture without hotspots
- Align garden pathways lighting with stone edges for continuity
- Integrate landscape accents as focal anchors, not overpowering stone cadence
Brick and Trim Contrast
You balance material proportions by limiting brick to secondary mass and reserving trim for high-definition delineation around openings and corners. The goal is a cohesive sequence where color contrast guides reading of planes, while material shifts build legibility along elevations.
Use lighting to emphasize brick texture at key edges, creating controlled shadow lines that sharpen the trim’s geometry. Consider warm brick tones paired with cooler or neutral trim to enhance depth.
Shadow play becomes a diagnostic tool: it reveals outline, accentuates joints, and maintains visual rhythm without saturating the composition. Maintain consistency across elevations to preserve architectural integrity.
Texture Lighting Balance
- Proportional material emphasis guides perception
- Color temperature consistency preserves material integrity
- Energy efficiency minimizes wasteful illumination
- Controlled beam distribution reduces hotspots
Build a Layered Lighting Scheme: Pathway, Accent, and Downlighting
A layered lighting scheme integrates pathway, accent, and downlighting to illuminate a landscape efficiently and safely. You design with purpose, selecting fixtures that respect scale, glare control, and color rendering.
Pathway lighting guides movement, using low profiles and even spacing to minimize trip hazards while reinforcing sightlines.
Accent lighting highlights architectural details and landscape features, employing narrow-beam distributions to avoid spillover and preserve night sky quality.
Downlighting emerges from above to sculpt volumes, reduce shadows, and keep pedestrian areas evenly lit.
Coordinate luminance levels across zones to maintain contrast without visual fatigue.
Consider Landscape integration when placing fixtures to ensure seamless transitions between hardscape and planting beds.
Factor Seasonal lighting to adapt intensity and color temperature, optimizing performance year-round.
Fixture Styles by Era: Period Charm to Modern Minimalism
Fixture styles through history run the gamut from period charm to modern minimalism, reflecting shifts in technology, aesthetics, and user needs. You’ll compare era-specific silhouettes, materials, and joinery to judge suitability for architectural detailing, durability, and maintenance.
Historical restoration demands alignment with original cues while meeting today’s performance standards, so you’ll prioritize authentic profiles, compatible finishes, and proven weather resistance.
Fixture durability guides material choice, mount integrity, and long-term chromatic stability, ensuring resilient exterior illumination.
You’ll balance adornment against glare control, selecting fixtures that echo era traits without compromising energy efficiency.
Evaluate scale, mounting height, and photometric quality to preserve heritage accents while achieving consistent luminaire life.
- Authentic profiles and finish compatibility
- Weather resistance and mounting reliability
- Glare control in period-inspired designs
- Long-term chromatic and material stability
Placement and Control: Depth, Shadows, and Smart Management
Placement and control hinge on thoughtful depth and shadow management to shape curb appeal and safety. You position fixtures to create layered illumination, ensuring foreground details read clearly while preventing glare on nearby surfaces.
Depth is achieved by combining uplights, downlights, and wall washers at measured angles, establishing contrast that defines architectural features without washing them out. Shadows should be intentional, guiding pedestrians along paths and accenting textures.
Control relies on timing schedules that align with usage patterns, preventing overillumination during late hours and reducing energy waste. Automation controls integrate motion sensors and dusk-to-dawn sensors for responsive lighting zones, enabling seamless *progression* between security and ambiance.
Regular calibration maintains uniform output, avoiding hot spots and ensuring consistent architectural reads across seasons.
Frequently Asked Questions
How to Balance Energy Efficiency With Dramatic Architectural Lighting?
You balance energy efficiency with dramatic lighting by using smart controls to tune intensity and timing, keeping architectural highlights visible without waste.
Choose warm, high-CRI LEDs and dimmable fixtures, then set scenes that auto-adjust with sunset.
Incorporate solar options for low-amperage loads and back-up power.
Regularly audit energy use, switch to motion-activated or occupancy lighting where appropriate, and maintain fixtures to preserve efficiency while preserving dramatic, precise silhouettes.
What Are Color Temperature Choices for Historic vs. Modern Facades?
Color temperature for historic facades leans warm, around 2700–3000K, preserving historical accuracy.
Modern facades tolerate cooler 3500–4000K for crisp color contrast.
You’ll want softer tints for brick and stone, brighter, neutral whites for contemporary materials.
Use higher CRI to reveal textures without washing details.
Balance contrast with targeted fixtures, ensuring historical accuracy is reflected in color rendering.
You’ll achieve legible details, subtle drama, and coherent daylight-to-evening shifts.
How to Avoid Light Trespass on Neighboring Properties?
To avoid light trespass, position fixtures away from the property line and use full cutoff designs to prevent light spilling onto neighboring lots.
Implement shielded luminaires, low glare, and directed aiming, calibrating output to minimize light spillage while maintaining visibility.
Install motion or time controls and maintain fixtures at appropriate mounting heights.
Regularly inspect seals and baffles, and use lower color temperatures for nearby residences.
Monitor angles, reflectors, and enclosure to protect against unwanted brightness at the property line.
Which Mounting Heights Optimize Wall Texture Illumination?
You should mount wall wash fixtures at roughly 6–8 feet above grade to optimize wall texture illumination. This height concentrates light along vertical texture, creating a broad wall wash without harsh hotspots.
If siding is deeper or brick shows pronounced grain, adjust to 7–9 feet for even coverage.
Aim for uniform lateral spacing, preventing gaps that dull texture accent.
Prefer warm, neutral color temperatures to preserve material hues and reveal subtle depth in texture accent.
What Maintenance Schedule Keeps Fixtures and Lenses Clear?
Do you maintain a biweekly inspection and monthly cleaning to keep fixtures and lenses clear? You should implement a maintenance schedule that prioritizes fixture upkeep and lens clarity.
Tighten connections, check seals, and replace worn gaskets quarterly.
Clean lenses with a soft, non-abrasive solution, then verify aiming and photometrics after any re-lamping.
Record hours, lumens, and any corrosion.
Schedule annual electrical and thermal checks to prevent buildup and preserve performance.
Conclusion
As you walk the facade, imagine a storyteller with a lantern—each beam tracing the building’s spine. You tilt, you graze, you wash, you reveal—let texture speak in shadows and edges stand as characters. Your layered scheme is a well-timed chorus, where pathways hum, accents whisper, and downlights ground dreams. In this allegory, the architecture guides you, and you guide it back, until form and light mingle in a precise, harmonious conclusion you designed.