
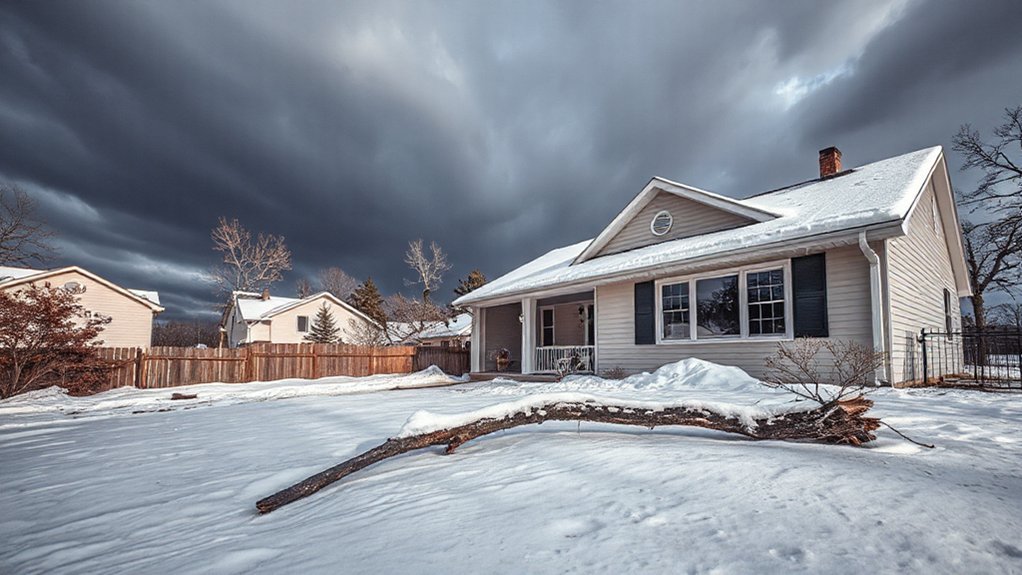
Winter storms threaten your roof, gutters, pipes, and power systems with freeze–thaw damage, moisture intrusion, and ice dams. Prioritize continuous attic insulation, air sealing, and clear drainage to curb heat loss and dam formation. Keep gutters clean, downspouts directing water away from the foundation, and exterior seals tight around doors, windows, and soffits. Protect pipes with insulation and controlled heat. Prepare backup power, test alarms, and map emergency routes. If you keep going, you’ll gain practical, step‑by‑step protection strategies.
Winter Storm Readiness: Your Top 5 Home Threats
Winter storms bring several immediate threats to the home, and knowing them helps you act fast. You’ll prioritize five core risks: roof integrity, gutter drainage, exterior envelope, electrical systems, and landscape leverage.
Roof integrity requires inspecting for loose shingles, ice dams, and attic condensation, then sealing penetrations to prevent leaks.
Gutter drainage demands clear flows to avoid overflow that damages fascia and siding; guarantee downspouts direct water away from the foundation.
Exterior envelope care focuses on vulnerable seals, doors, and windows, reducing drafts and heat loss.
Electrical systems demand surge protection and clear access to panels, with a plan for generator use if outages occur.
Landscaping tips include pruning overhanging branches and stabilizing loose soil to reduce impact risk, and consider outdoor decor placement that minimizes wind exposure and debris.
Prep Before the First Snow: 10 Budget-Friendly Tasks
Start the season by checking essential protections and replacing gaps before the first snow hits. You’ll inspect your gutters to prevent ice dams.
Weatherproof doors and windows to curb drafts, and test smoke detectors to guarantee early warnings.
This targeted, budget-conscious checklist keeps your home safer and more energy-efficient with minimal upfront expense.
Inspect Your Gutters
Gutters must function to channel roof runoff away from your foundation, so start by inspecting them for debris, sagging sections, and loose hangers. You’ll perform a targeted assessment rather than a broad sweep, focusing on connection points, slope, and all joints.
During gutter maintenance, check for corrosion, loose fasteners, and leaf buildup that can form ice dams. Remove debris with hand gloves or a plastic scoop, then rinse to verify flow paths remain clear.
Confirm downspouts direct water away from the footing and assess splash pads or grading nearby. Document issues that require quick fixes vs. parts replacement.
Schedule small repairs promptly to support roof inspections and overall drainage strategy. Prioritize durable fasteners and sealant compatibility for winter resilience.
Weatherproof Doors, Windows
Weatherproofing doors and windows before the first snow is a practical, cost-efficient way to stop drafts and curb energy loss. You’ll tighten gaps, reduce heat transfer, and protect interior finishes without major renovations. Focus on durable seals, proper alignment, and material compatibility to maximize performance.
Door weatherproofing and window sealing work together to minimize convective losses, address wind-driven infiltration, and maintain舒室 comfort with less furnace cycling. Choose weatherstripping that matches door thresholds and frame profiles, and treat sash gaps with appropriate sealants.
Prioritize inspection of corners, thresholds, and glazing beads to locate hidden leaks. Implement a simple, repeatable maintenance routine before temperatures drop, ensuring longevity and consistent performance throughout winter.
- Inspect and align doors for even gaps
- Select compatible weatherstripping materials
- Seal sash and frame joints thoroughly
- Test with gentle air from a flashlight
- Maintain a simple preventive schedule
Test Smoke Detectors Now
Testing your smoke detectors now is a quick, essential precaution before the first snow. You’ll verify placement against ceilings, walls, and stairwells to maximize coverage, then test each unit with its self-test feature and, if needed, a fresh battery.
Replace nonfunctional detectors and guarantee interconnected alarms trigger together, so evacuation alerts aren’t delayed. Confirm proper venting of kitchen and bathroom alarms to minimize nuisance false positives.
Inspect for dust, insects, or corrosion on sensors and wiring, cleaning with a soft cloth or compressed air rather than liquids. Record replacement dates and perform annual tests, especially as heating demands rise.
This practice reinforces fire safety by confirming audible alarms align with escape routes, reducing risk during severe weather and power interruptions.
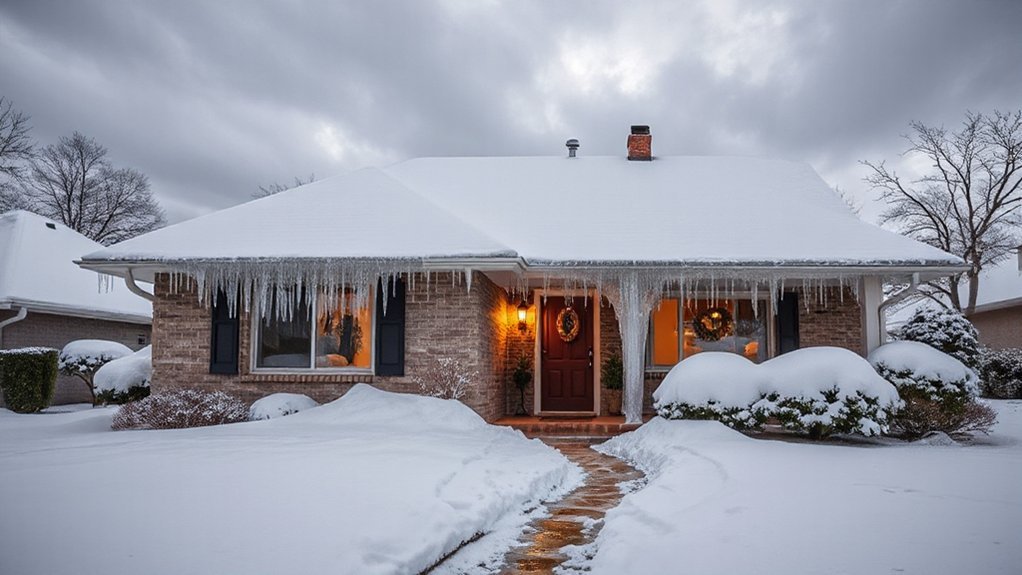
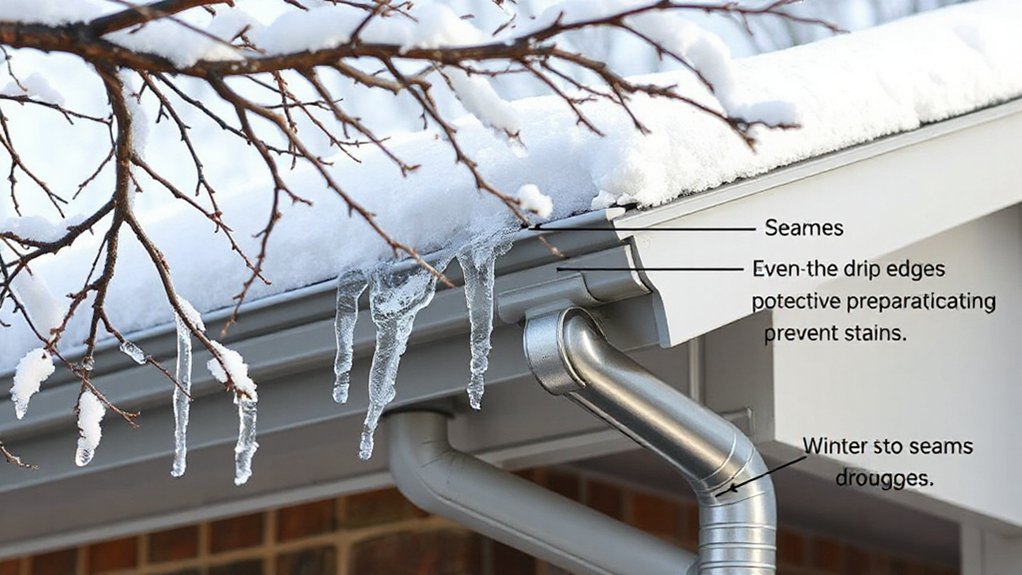
How Freezing Temperatures Hit Roofs and Gutters
Freezing temperatures stress roofs and gutters by forcing moisture in tiny channels to freeze, expand, and exert pressure. You’ll see how cold air drives frost penetration into flashing and joints, elevating micro-fractures that propagate into roof damage.
Gutter freezing concentrates weight, slows flow, and creates ice buildup that redirects meltwater. The combined stress increases ice dams risk, while snow weight compounds load on rafters and fascia.
You’ll notice icicle hazards forming at eaves, hazards that worsen with hail impact on exposed edges. Design sensitivity matters: proper insulation, ventilation, and seamless transitions reduce cold spots and moisture migration.
Practical emphasis centers on proactive inspection intervals, targeted heat tracing where appropriate, and ensuring drip edges shed water efficiently.
- Frost penetration patterns reveal vulnerable seams
- Organized drainage mitigates ice dams
- Sealed penetrations reduce infiltration
- Proper snow management limits load
- Clear gutters prevent gutter freezing
Prevent Ice Dams: Proven Methods That Work
To prevent ice dams, start with improving attic insulation to minimize heat transfer that melts snow on the roof.
Then seal air leaks early to keep warm air from rising into the attic and driving ice formation.
Finally, maintain gutters regularly so meltwater flows away cleanly and reduces dam buildup.
Improve Attic Insulation
Ice dams form when heat escapes from your living space into the attic, warming the roof edge enough to melt protected snow and refreeze at the eaves. Improve attic insulation to minimize heat transfer, targeting continuous, well-sealed assemblies that suit your climate. Achieve uniform R-values, address gaps around fixtures, and ensure proper ventilation to maintain cold roof temps.
Integrate solar panels with a thermal-heated roof approach where feasible, coordinating mounting to preserve insulation continuity. Consider landscape drainage to prevent water intrusion at the eaves and foundation. Select materials with proven performance under winter cycles and install tight junctions at penetrations.
Regularly verify attic hatch seals, baffles, and insulation depth to sustain system efficiency and reduce ice-dam risk over the season.
- Prioritize continuous insulation with tight seams
- Seal penetrations and chimney/flue gaps
- Maintain balanced attic ventilation with baffles
- Align solar panel mounting to protect insulation
- Plan for effective landscape drainage around the home
Seal Air Leaks Early
Even before storms hit, seal air leaks now to stop warm air from escaping and melting roofing snow at the eaves. You’ll reduce heat transfer risk by targeting known leakage paths: around soffits, chimney joints, duct penetrations, electrical boxes, and recessed can lights.
Start with a quantitative assessment: use a smoke test or infrared scan to locate leaks, then prioritize fixes by impact on attic temperatures and ice dam potential.
Draft sealing should emphasize continuous barriers rather than patchwork. Apply high-performance caulk, spray foam where appropriate, and weatherstripping on attic hatches.
Maintain airtight junctions between the attic and living spaces to minimize soil-from-hot-air transfer.
Air leaks suppressed, you improve energy efficiency and limit melt-freeze cycles that drive ice dam formation.
Maintain Gutters Regularly
Maintaining clean, clear gutters matters just as much as sealing leaks, because clogged troughs trap meltwater and funnel it toward the roof edge, where ice can form and back up under shingles. You’ll protect roof integrity by scheduling regular gutter cleaning and confirming all downspouts drain freely.
Pair this with a focused roof inspection to spot sagging fascia, loose hangers, or misaligned sections that trap debris. Remove leaves, twigs, and sludge, and consider gutter guards for seasonal simplification.
Address ice barriers early through safe de-icing strategies and structural assessments. Timely maintenance reduces weight stress on gutters and lowers ice dam risk across eaves.
Your plan should balance accessibility, safety, and long-term performance.
- Schedule routine gutter cleaning
- Conduct proactive roof inspection
- Clear downspouts to ensure drainage
- Check for loose fasteners and sagging sections
- Implement guard systems as needed
Protecting Pipes From Freeze-Back: Quick Wins
To protect pipes from freeze-back, start with immediate preventive steps that you can apply now. Target the highest-risk runs first: exterior walls, attics, crawlspaces, and garages.
Use pipe insulation on exposed copper and PVC lines to slow heat loss and reduce surface frost formation; overlap seams and seal with tape to eliminate gaps.
Implement frost protection by maintaining a minimum ambient temperature above freezing, and allow small continuous heat leakage from thermostats or space heaters to avoid cold spots.
Insulate access doors, ducts, and any voids that drain heat away.
Fit insulated sleeves around outdoor spigots and irrigation lines, and drain exterior faucets before cold snaps.
Prioritize practical, asset-conscious measures that minimize energy waste while preventing burst damage and water downtime.
Snow Load and Roof Stress: When to Worry and What to Do
Snow loads can push a roof beyond its design capacity even when the air is calm, so it’s worth evaluating before and after a big storm. You’ll want to assess load signs, flashing integrity, and membrane health, then decide on avoidance or intervention.
If you suspect overload, prioritize rapid, safe action and consult a professional for a structural appraisal. Maintain continuous roof ventilation to prevent freeze-thaw damage and reduce hidden stress from trapped moisture.
- Monitor sagging or creaking near midspan
- Check for missing or damaged shingles and flashing
- Clear debris around eaves to maintain airflow
- Schedule professional snow removal when threshold is reached
- Verify attic ventilation remains unobstructed and balanced
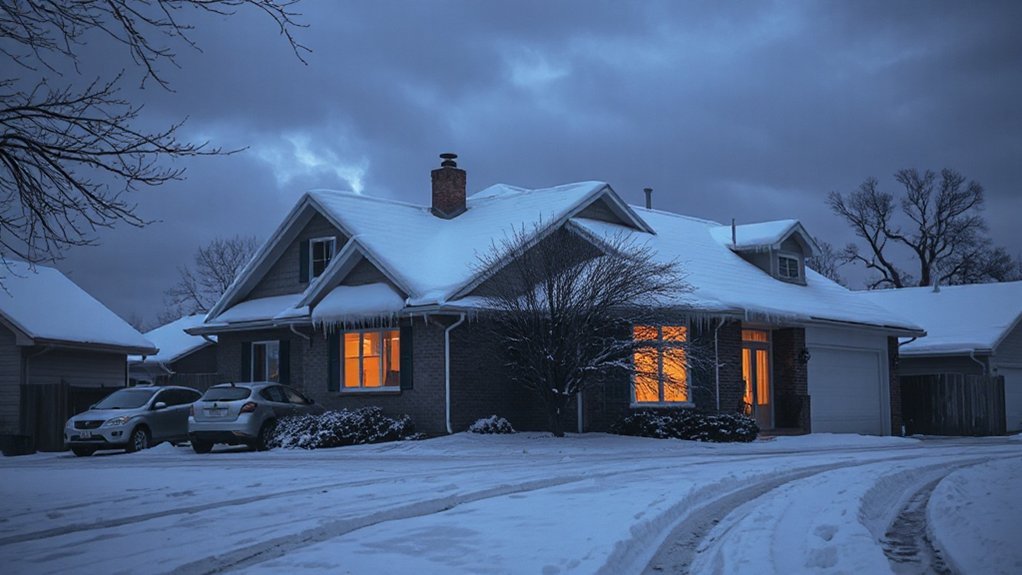
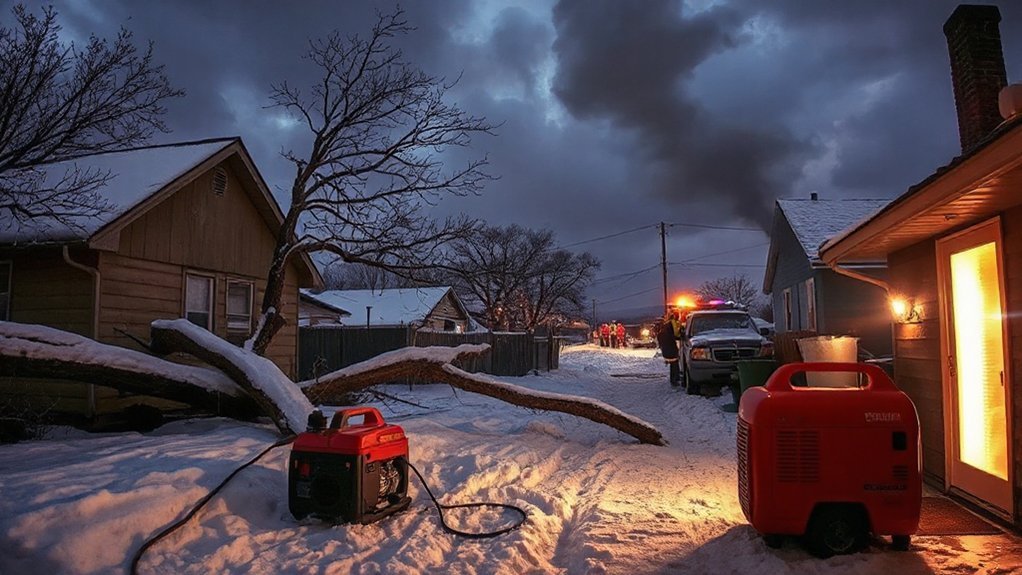
Surviving a Power Outage: Essential Heating and Safety
Power outages during winter can derail heating systems and put vulnerable occupants at risk, so you should plan to keep heat flowing and safety front and center. When a outage occurs, prioritize continuous heat delivery using your primary furnace or heat pump, and designate a safe backup method for essential spaces.
Maintain proper combustion ventilation, and only operate fuel-burning devices in well-ventilated areas to protect indoor air quality. If you rely on portable heaters, keep them at least three feet from combustibles and never leave them unattended.
Seal drafts, staged thermostats, and programmable controls help minimize energy loss. Monitor CO detectors and battery backups for alarms.
During restoration, follow holiday safety guidelines, recheck air intakes, and ventilate to prevent buildup while restoring comfort.
Electrical Hazards in Winter: Must-Check
To keep winter electrical use safe, start with electrical load balance to prevent overloading circuits during peak heating and thaw cycles.
Check water ingress prevention around outlets and equipment, since moisture coupled with cold can create hidden faults and corrosion risks.
Plan backup power safety by reviewing generator or battery outputs, proper installation clearances, and safe connection practices to protect people and appliances.
Electrical Load Balance
- Assess circuit amperage and appliance requirements before use.
- Distribute high-draw loads across multiple circuits.
- Use timers or smart plugs to stagger heater operation.
- Inspect cords, outlets, and extension cords for wear.
- Schedule professional dual-panel or main-breaker checks.
This approach emphasizes practical safety, design sensitivity, and reliable operation, aligning with electrical safety and proactive load management.
Water Ingress Prevention
Water ingress is a critical winter risk for electrical systems, and addressing it starts with robust enclosure integrity and thoughtful layout. You’ll prioritize weatherproof housings, gasketed doors, and sealed conduits to deter water intrusion from snowmelt and rain-driven moisture.
Assess exterior barriers for hairline cracks, joint penetrations, and moisture paths; upgrade where needed with rated enclosures and proper sealing compounds. Inside, plan cable routing to minimize exposure, maximize drainage, and prevent ponding near panels.
Control indoor humidity to reduce condensation on cooled surfaces and electrical gear; use dehumidification during damp spells and ensure ventilation supports steady humidity levels.
Practice mold prevention by eliminating lingering moisture sources, maintaining clean filters, and monitoring for signs of dampness around panels. Regular inspections verify that protections remain intact during freeze-thaw cycles.
Backup Power Safety
Backup power systems can create serious electrical hazards in winter if not handled correctly, so you should verify proper setup before a cold snap. You’ll assess installation integrity, ventilation, and clearance to prevent overheating or carbon monoxide risks. Additionally, you’ll confirm transfer switch labeling aligns with your equipment.
Prioritize generator safety by reviewing outlet placement, cord rating, and ground-fault protection to minimize risk while powering essential loads. Plan for power surge events by installing surge protection and choosing appropriately rated generators.
Develop a maintenance cadence that includes battery, fuel, and oil checks, plus idle run tests under load.
- Generator safety: placement, ventilation, CO awareness
- Transfer switch and interlock verification
- Cord and outlet wear inspection
- Power surge mitigation
- Regular load testing and fuel/oil maintenance
Tree Risk Assessment: After-Storm Hazards and Debris
After a storm, inspect your property promptly for immediate hazards and lingering debris that can threaten safety and access.
You assess tree risk by identifying damaged limbs, leaning trunks, and cracks in the root flare, recognizing these as potential failure points under load.
Prioritize downed branches that obstruct paths, driveways, and emergency routes, and note any overhanging limbs that could drop with additional wind or meltwater.
Evaluate storm debris for hidden hazards—hanging limbs, embedded nails, or nails driven into the trunk—and mark locations for professional evaluation.
Document context: species, approximate height, and proximity to structures or utilities.
Don’t attempt pruning or removal beyond your capability; engage certified arborists for risk reduction, load assessment, and targeted pruning to resolve tree hazards safely.
Maintain clear approach paths for responders.
Snowmelt Flooding: How It Can Affect Basements and Floors
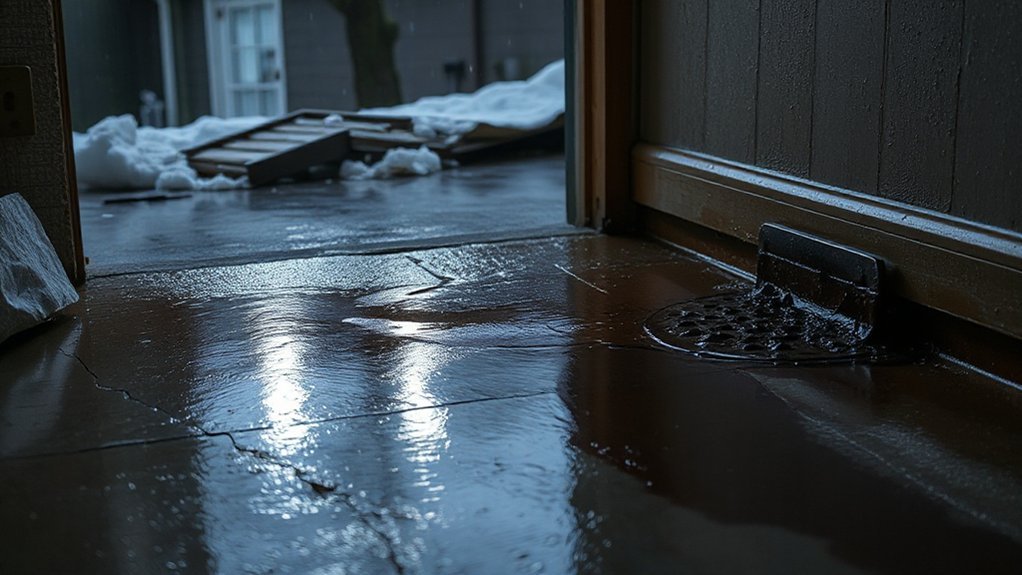
Snowmelt can push water toward your home’s foundation, raising basements to the front line of moisture risk. You’ll want to watch for early drainage issues that slow runoff and cause pooling around entry points, footing drains, or sump pits.
Look for signs of floor moisture and warping, which signal incremental intrusion that can compromise structural integrity and finish.
Basements Water Intrusion Risks
Snowmelt can push water through crawlspaces and basement walls when rapidly warming soils melt snow faster than drainage can keep up, creating pressure that forces moisture indoors. You’ll want to assess baseline vulnerabilities now, since basement flooding and water seepage often precede visible damage.
Focus on construction joints, window wells, and exterior grade around the foundation, where even minor leaks become recurring issues after a thaw. Practical defenses combine detection, drainage, and sealing without over-engineering the space. Prioritize durable, low-velocity mitigation that preserves usability and indoor air quality.
- Inspect foundation cracks and seal with appropriate materials
- Verify exterior drainage is unobstructed and slopes away
- Install or upgrade sump and pump redundancy
- Seal penetrations around utilities and pipes
- Maintain gutters and downspouts to direct runoff away
Early Snowmelt Drainage Issues
Early-season thaws can push water through foundation walls and under slabs long before you see a flood, so addressing drainage before the ground fully softens helps prevent unexpected wet spots. During early snowmelt, soil permeability changes rapidly, creating drainage problems where runoff concentrates near footing lines and under slabs.
You should map subsurface flow paths, assess gutter and downspout capacity, and guarantee surface grading directs water away from the structure. Implement continuous exterior waterproofing where feasible, and verify interior drainage components remain unobstructed.
Pay attention to sump pump readiness, backup power, and check-valves to prevent reverse flow during rapid thaw events. Consider soil staging in landscape design to minimize perched water, and document seasonal monitoring to adjust approaches as conditions evolve.
Early snowmelt demands proactive, technically informed management of drainage.
Floor Moisture and Warping Signs
When excess moisture infiltrates a basement, floor moisture and warping signs emerge as practical indicators of ongoing water stress. You’ll notice elevated humidity, damp concrete, and subtle edge curling where boards meet walls.
Warping signs often accompany differential drying, creating uneven surfaces that threaten insulation and finish materials. Targeted inspection reveals moisture patterns along seams, around sump areas, and under stored goods, signaling a need for mitigation before mold risk increases.
Addressing floor moisture promptly protects structural integrity and preserves living spaces.
- Assess substrate for standing moisture and early cupping
- Compare floor planes to detect twist or bow
- Inspect joint seals and edge coatings for degradation
- Monitor humidity swings with a reliable hygrometer
- Plan drainage or sump improvements to reduce recurrence
Keeping Access Open: Clear Routes for Emergencies
Keeping access routes clear is essential for timely emergency responses and daily safety, so you should map and maintain unobstructed paths to your home, driveways, and critical utility points.
You’ll design drive paths with minimum turning radii, adequate width, and load ratings that tolerate winter loads and storm debris.
Prioritize continuous visibility around corners and gates, installing sensors or markers where snow or ice can conceal obstacles.
Establish designated staging areas for snow storage that don’t block access, and implement a layered clearance plan that prioritizes emergency access and road clearance.
Regularly inspect lighting, signage, and drainage to prevent ice buildup.
Document contact details for local responders and utility services to assure rapid coordination when access is needed.
Emergency access remains a constant design parameter, not an afterthought.
Pre-Storm Maintenance Checklist: 15 Items That Save Money
Pre-storm system checks and preventive maintenance tasks form the core of cost-saving readiness, letting you identify vulnerabilities before they become failures. You’ll establish a disciplined routine to verify wiring, drainage, seals, and mechanical clearances.
Prioritizing critical systems that drive resilience and safety is essential. This checklist structure keeps maintenance actionable, measurable, and aligned with design-informed protection of your home.
Pre-Storm System Checks
To prevent expensive outages and last-minute repairs, start with a concise pre-storm system checks checklist that targets the two most critical aging components: the electrical service and the home’s major mechanicals. You’ll verify service capacity, inspect weatherhead integrity, test main disconnects, and confirm generator readiness or transfer switch operation.
Assess HVAC, water heater, and boiler/heat pump controls for proper sequencing, common flow, and safe venting. Review wiring for corrosion, loose terminals, and secure conduit routes.
Update storm tracking plans and align with winter weather alerts to anticipate demand spikes and freezing risks. This disciplined approach minimizes callouts and preserves equipment life while reducing fault progression.
- Verify main disconnects and service capacity
- Inspect weatherhead, grounding, and conduit integrity
- Test generator or transfer switch readiness
- Check HVAC and hot-water controls for safe operation
- Align with storm tracking and winter weather alerts
Preventive Maintenance Tasks
As you move from quick pre-storm checks to a proactive maintenance mindset, this 15-item preventive maintenance checklist focuses on cost-saving, reliability, and risk reduction.
You’ll verify seals on doors and windows, inspect gutters and downspouts, and clear obstructions from ventilation to prevent moisture buildup.
Test furnace filters, thermostat accuracy, and carbon monoxide detectors for safe operation during winter loads.
Inspect roof edges for loose shingles and ensure flashing remains watertight.
Lubricate garage-door hardware and confirm balance.
Inspect outdoor lighting circuits, replace failing bulbs, and address photometric zoning to deter intruders.
Inspect exterior siding for cracks and reseal where needed.
Emphasize home security by integrating smart sensors with lighting schedules, and confirm backup power readiness to maintain critical safety systems.
Roof Measures You Can Do This Weekend
You can start this weekend by inspecting your roof for obvious issues, then address them to reduce winter storm risk. A focused, practical approach helps you maintain performance without overhauling the system. Prioritize safety, verify fasteners, and assess flashing integrity while noting any debris or sagging sections that signal structural concerns.
Consider temporary protections for vulnerable edges if forecasts call for heavy snow or wind. Planitized actions reduce escalation of damage and simplify later maintenance, aligning with design-sensitivity goals that favor durable detailing and ease of access.
Execute these steps methodically to preserve roof longevity, insulation continuity, and drainage effectiveness.
- Inspect for loose or missing shingles and reseal where necessary
- Check flashing and edge materials for corrosion or gaps
- Clear debris from vents, louvers, and snow guards
- Test ridge vent and attic baffles for proper operation
- Schedule professional assessment if you find sustained leaks or soft decking
Roof inspections, snow removal
Gutter Care to Stop Ice and Water Stains
Gutters play a pivotal role in preventing winter damage by directing roof runoff away from the fascia and foundation, so a targeted care plan matters. You’ll minimize ice formation and staining by establishing a disciplined maintenance routine that targets first-point failures.
Begin with proactive gutter cleaning to remove leaves, debris, and nest material before cold fronts arrive; unobstructed flow reduces icicle buildup and overflows that wick moisture into siding.
Inspect hangers, joints, and sealing to guarantee positive slope toward downspouts, preventing stagnation that promotes ice dams.
Install grate covers or gutter guards where appropriate to deter debris during freeze-thaw cycles.
Consider heat cable placement only in sections prone to ice formation, keeping electrical safe and compliant.
Schedule seasonal cleanouts, documenting findings for next winter.
Plumbing Safeguards on a Budget: Quick, Reliable Fixes
Staying ahead on plumbing costs means prioritizing quick, reliable fixes you can implement now. You’ll use a practical, design-minded approach to prevent winter backups and leaks without breaking the bank.
Focus on essential, repeatable steps that reduce risk and downtime, using durable materials suited to home systems. Emphasize efficiency, safe testing, and clear documentation for future DIY plumbing tasks and budget repairs.
Prioritize shutoffs, leak diagnostics, and prompt component replacement to minimize water damage. Implement low-cost, high-impact measures that don’t compromise system integrity or warranty.
- Inspect visible connections and tighten or reseal where appropriate
- Install drip-free hose bibs and properly insulate exterior lines
- Use affordable inline shutoff valves for easy isolation
- Patch minor leaks with approved sealants and Teflon tape
- Document and label all changes for future maintenance
Insulation and Sealing That Save You Money
Even a small investment in insulation and sealing pays off by reducing heat loss and preventing cold-related damage. You’ll minimize energy waste by targeting thermal bridging at joints, corners, and penetrations, not just wall cavities.
Design for continuous paths, using spray foams or mineral wool where framing gaps occur, then seal with gasketed gaps and high-performance tapes.
Consider vapor barriers strategically to manage moisture without trapping it; place them on the warm side of assemblies in climate zones with significant humidity.
Prioritize attic, rim joists, and basement rim connections, where convection currents leak heat most readily.
Use air barriers behind siding or interior finishes to deter drafts.
Combine sealing with weatherstripping on doors and operable windows for immediate, measurable savings.
Affordable Backup Power and Heating Options
- Use compact generators or battery-inverter systems
- Favor energy-efficient heating modules
- Leverage automatic transfer switches
- Pair with smart thermostats
- Maintain essential fuel and charging cycles
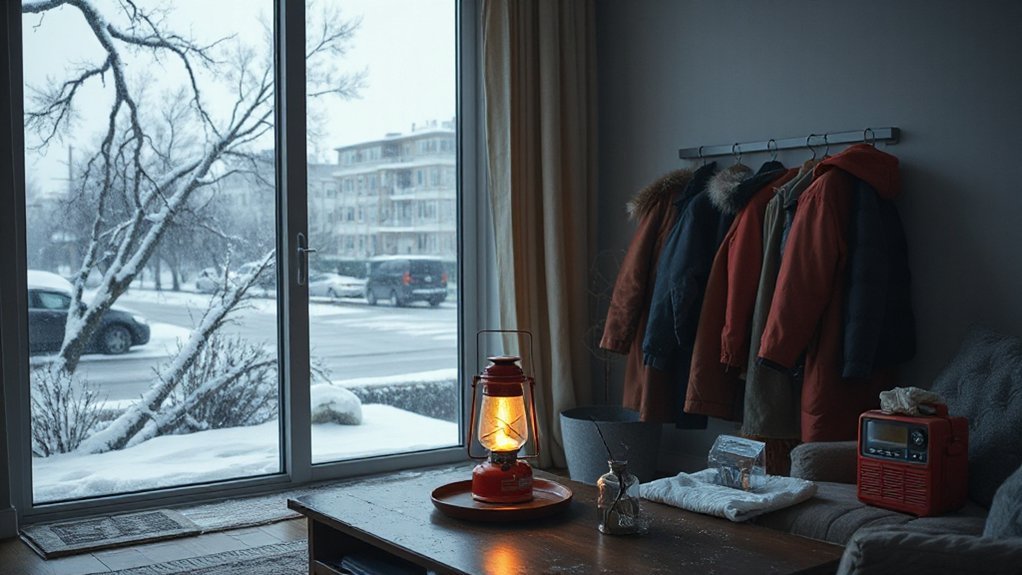
Winter Storm Emergency Kit: What to Include
A winter storm emergency kit focuses on rapid, reliable access to essentials when utilities go down or travel becomes impossible. You’ll prioritize core viability: shelter, warmth, hydration, nutrition, lighting, and safety signals, packaged for quick deployment.
Include a compact, multilayer system for winter storm clothing, designed to optimize thermal balance without bulk, plus durable footwear and insulated gloves.
Consolidate a regional, storm-aware communication plan with emergency communication gear—two-way radios, charged power banks, and a weather radio.
Stock nonperishable, high-calorie foods with a simple turn-and-go setup, plus a refillable water container and a basic first-aid kit.
Document copy of contacts and routes, a flashlight with spare batteries, and a small toolkit.
Regular checks, labeled compartments, and a clear replacement schedule elevate readiness and reduce fatigue during response.
Insurance and Claims: Key Steps Before, During, and After
Insurance and claims require early, methodical action to minimize disruption and losses; start by cataloging all damaged areas, documenting with photos, and noting dates of impact. You’ll assess policy coverage, contact your insurer promptly, and preserve records for claims processing.
Prioritize safety, secure property, and prevent further damage while maintaining a clear audit trail. Expect detailed inspections, depreciation considerations, and predefined timelines for documentation submissions.
Communicate clearly with adjusters, contractors, and mortgage lenders to manage expectations and avoid gaps in coverage. You should align repairs with your policy limits and avoid irreversible changes before approvals.
- Documented damage timelines and dated photographs
- Immediate safety and temporary stabilization steps
- Carrier notification and claim number tracking
- Contractor receipts and W-9s for repairs
- Policy coverage interpretations and depreciation handling
Post-Storm Recovery: Immediate Steps and Lessons Learned

Post-storm recovery hinges on rapid, focused action: secure the property, confirm everyone’s safety, and begin the damage assessment with a clear, chronological record.
You’ll establish a practical triage: isolate hazards, document structural integrity, and preserve evidence for claims and compliance.
Prioritize immediate containment: tarps over openings, utilities evaluated by licensed pros, and water intrusion halted to prevent mold growth.
Conduct a methodical sweep of interior and exterior spaces, noting load-bearing risks, electrical vulnerabilities, and compromised routes.
For post-storm cleanup, separate debris by category, control dust, and apply PPE to protect respiratory and dermal exposure.
In property restoration, align repairs with design intent, maintain moisture control, and verify material compatibility.
Capture lessons learned to refine checklists, timelines, and communication with contractors and insurers.
Frequently Asked Questions
How Can I Prioritize Hazards After a Storm Hits?
You prioritize hazards by securing yourself first, then evaluating immediate threats. Check for tree damage and downed wires, avoid leaning limbs, and confirm power outages. Document damages, contact utilities, and follow restoration timelines to minimize further risks.
What Simple Signs Indicate Roof Structural Risk?
Roof inspection reveals bending rafters, sagging ceilings, or cracked sheathing; these simple signs indicate compromised Structural integrity. If you notice any creaks, gaps, or misplaced shingles, halt work and contact an expert to assess load paths and guarantee safety.
When Should I Call a Professional for Ice Dam Removal?
Ice dam removal should be done promptly when you notice persistent ice buildup or water ingress; wait too long and damage compounds. Prioritize ice dam prevention, and apply roof insulation tips to minimize recurrence. Call a professional now.
How Can I Protect Valuables During a Flood or Power Outage?
To protect valuables during a flood or power outage, practice flood prevention and follow power outage tips: elevate essentials, waterproof containers, use surge protectors, back up critical data, store cash and meds, and keep portable chargers charged for essential devices.
What Budget Fixes Most Reduce Insurance Claims?
You open savings like a prudent captain steering toward calmer seas; budget fixes most reduce insurance claims, reducing risk and loss. You pursue insurance discounts and claim prevention through practical, technically informed, design-sensitive, cost-conscious improvements.
Conclusion
As winter tightens its grip, you’ve got a clear, practical playbook: harden roofs and gutters, insulate pipes, and keep heat and power resilient. Nail down a simple emergency kit, document insurance steps, and rehearse quick recovery actions so you’re not scrambling after the storm. Maintain budget-friendly upgrades now, and you’ll reduce damage, save money, and stay safer when the power flickers. And remember: even in a snow globe moment, preparedness is your strongest shield—trust the plan, not fate. Anachronism: dial-up modem hum.


