
Winter garden prep 2025 centers on protecting both plants and outdoor spaces. Start with goals and microclimate mapping to identify frost-prone zones, then prioritize which plants to shield. Insulate containerized pots, mulch deeply but not at crowns, and use windbreaks or hedges to curb desiccating air. Budget wisely, reuse materials, and employ DIY anti-freeze hacks like insulating irrigation lines. After winter, recover by pruning, mulching for warmth, and organizing tools—you’ll discover more strategies ahead.
Set Your Winter Garden Goals for 2025
Setting clear, actionable goals for your winter garden in 2025 sets the groundwork for a productive season. You’ll define outcomes that matter, then align tasks to reach them efficiently.
Start with Winter garden aesthetics in mind: envision color, texture, and structure across low, mid, and tall specimens, ensuring year-round interest.
Next, plan for plant diversity to bolster resilience and pollinator support, mixing edible crops with ornamentals for both function and beauty.
Set measurable targets: number of species, bloom windows, and harvests per month.
Identify constraints—light, space, and budget—and allocate resources accordingly.
Establish a schedule that spaces tasks to avoid bottlenecks, and assign roles if you garden with others.
Finally, document decisions to guide future adjustments and sustain momentum.
Assess Your Local Frost Risk and Microclimates
To protect your winter garden, start by evaluating frost risk and identifying microclimates around your space. You’ll assess how cold air drains to low spots, how heat from walls and fences lingers, and where shade or wind intensifies exposure.
Gather local data on Frost prediction timelines and recent low-temperature events, then compare against your site’s topography and plant zones. Create a simple map marking frost-prone zones, sheltered nooks, and exposed edges.
Use this Microclimate mapping to determine which areas require extra protection and when. Keep notes on seasonal shifts, wind corridors, and moisture pockets as you monitor changing patterns.
This proactive approach helps you plan resilient strategies without overinvesting in uncured assumptions.
Prioritize Which Plants to Protect This Winter
Prioritizing which plants to protect this winter starts with a clear view of your microclimate map. You identify species that are most vulnerable to cold, wind, and ice, then rank them by risk and value.
Focus on perennials, tender shrubs, and fruiting plants that carry the most production or ornamental payoff. For each, ask whether protection changes outcome, or if loss is acceptable.
Prioritize plants with slow recovery or limited replacements in your yard’s niches. Use plant pruning to shape exposure and reduce desiccation, and soil testing to gauge moisture and nutrient reserves that influence winter resilience.
Allocate resources to the top tier first, then address the next wave, ensuring a practical, scalable protection plan.
Insulate and Shield Containerized Plants Outdoors
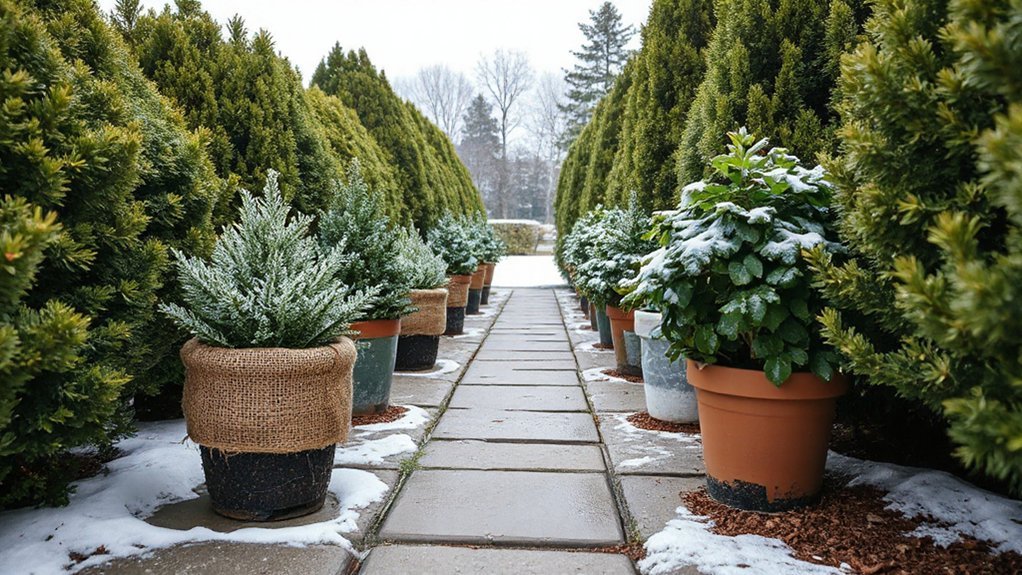
To protect containerized plants outdoors, start by insulating the pot drip line to reduce soil temperature swings.
Shield wind exposure with sturdy wraps or screens and mulch around the root zone to preserve moisture and warmth.
Consider wrapping roots to lock heat in and maintain a stable microclimate for winter vigor.
Insulate Pot Drip Line
If you’re overwintering containerized plants, insulating the drip line and surrounding soil helps preserve moisture and roots’ stability when temperatures drop. You’ll focus on the pot’s base and the immediate soil umbrella to minimize heat loss.
Apply insulation barriers around the drip lines and the outer rim, ensuring full contact with soil and pot, then cover with a breathable, insulating layer to prevent condensation buildup.
Elevate pots slightly on recycled bricks or a pot lift to reduce contact cold transfer from ground to container.
For added protection, consider frost resistant coatings on exterior ceramic or terracotta surfaces, which slow rapid temperature swings without trapping excess moisture.
Recheck yearly, removing debris before spring growth accelerates. Maintain clear drainage to avoid root rot.
Shield Wind Exposure
As winds pick up, shielding containerized plants outdoors becomes as important as insulating the soil around them. You protect root zones and foliage by locating pots behind wind barriers, such as sturdy fences, walls, or evergreen screens.
Position containers to minimize exposed stems, rotating piles to reduce pressure points. Use breathable, weather-resistant wraps or fleece when temps dive, but avoid constricting growth; allow airflow to prevent moisture buildup.
For airflow management, elevate pots slightly on risers, enabling circulation beneath and around canopies. Group specimens to create microclimates, placing tender species near shielded sides while wind-tolerant plants occupy exposed edges.
Regularly check ties, wraps, and bases for wear, replacing damaged components promptly to maintain consistent protection. Maintain accessible drainage to prevent waterlogged roots.
Mulch and Wrap Roots
Mulch insulates roots and moderates moisture, while wrapping protects both containers and delicate root zones from cold shocks. You’ll create a breathable barrier that shields against thaw-refreeze cycles, which can crack pots and injure fine feeder roots.
Begin with a layer of root mulching around the container’s base, extending a few inches outward without covering drainage holes. Choose organic mulch to maintain soil structure and color contrast for easy inspection.
For wrap, select frost fleece or burlap secured with soft ties; guarantee it’s loose enough to prevent girdling yet snug enough to block wind and sun exposure. Inspect weekly, remove excess moisture, and reapply as temperatures shift.
This approach supports root wrapping strategies while maintaining drainage and airflow for healthy progression into winter.
Mulching Essentials for Cold-Weather Care
Mulch at a depth that shields roots without smothering crowns, typically 2 to 4 inches, adjusting for rainfall and plant size.
For perennials, add a protective layer over the crown but avoid contact to prevent rot, and use a breathable material like shredded bark or straw.
Apply timing that precedes ground freezes and plan for seasonal reapplication as temperatures shift.
Mulch Depth Guidelines
Winter mulch depth matters most when preparing a garden for cold snaps: too little leaves roots exposed to freeze, too much invites moisture buildup and rodent nesting.
- Aim for a uniform 2–3 inch layer over beds, avoiding piling against stems.
- Keep mulch away from trunk bases and crown areas to prevent rot.
- Use fine-textured mulch near delicate perennials; coarser types elsewhere.
- Check soil moisture before applying; damp soil helps mulch settle evenly.
- Reassess annually after soil testing, adjusting depth as seasons shift.
Soil testing informs mulch decisions beyond depth, guiding irrigation and fertility.
Mulch types influence heat retention, moisture, and aeration, so match materials to plant needs and local climate.
Maintain a tidy, breathable mulch ring around plantings to deter weeds and pests.
Insulation for Perennials
When cold sets in, you can shield perennials from freezes by layering protective mulch that insulates roots and crowns without suffocating foliage. Start with a breathable base of coarse mulch, avoiding compacted layers that inhibit soil aeration.
Aim for a mulch depth that moderates soil temperature without smothering stems or crowns. In late autumn, apply a generous covering over vulnerable perennials, then taper the layer after the first hard frost if needed.
Keep mulch away from trunks to prevent rot, and refresh it as it settles. Choose mulch that complements native plant selection and local conditions, ensuring ongoing soil structure.
Monitor moisture, adjusting insulation to maintain steady hydration and aeration for robust spring emergence.
Seasonal Application Timing
With cold weather approaching, match mulch applications to the calendar, not just the temperature. Seasonal timing matters: apply mulch after soil cools, not at the first frost, to avoid delaying moisture exchange and to support root health.
Plan mulching windows around plant dormancy, pruning tasks, and winter pest management strategies, aligning care with natural rhythms.
Use a moderate depth to insulate without suffocating stems or crown zones. Monitor soil moisture and adjust timing after heavy rains or dry spells.
Focus on practical steps that prevent freeze-thaw damage and conserve soil warmth during cold snaps.
- Align mulch timing with seasonal milestones
- Coordinate with seasonal pruning windows
- Target winter pest management opportunities
- Assess soil moisture before application
- Apply evenly, avoiding crown contact
Watering for Dormant vs. Active Winter Plants
Dormant plants require far less water than their active winter counterparts, so adjust your routine accordingly: check moisture deeply, then water only when the soil is dry several inches below the surface.
During dormancy, prioritize infrequent, thorough watering that rehydrates root zones without saturating them. Aim for soil that remains just barely moist between sessions, allowing surfaces to dry to reduce fungal risk.
When temperatures rise and new growth appears, shift to steadier, deeper watering that supports active winter hydration without encouraging overwatering. Use a moisture meter to verify levels, and adjust based on container size, soil mix, and drainage.
Favor rest watering during quiet spells, then progress to measured irrigation as signs of activity return. Keep documentation precise for accurate seasonal comparisons.
Create Windbreaks, Shelters, and Microclimates
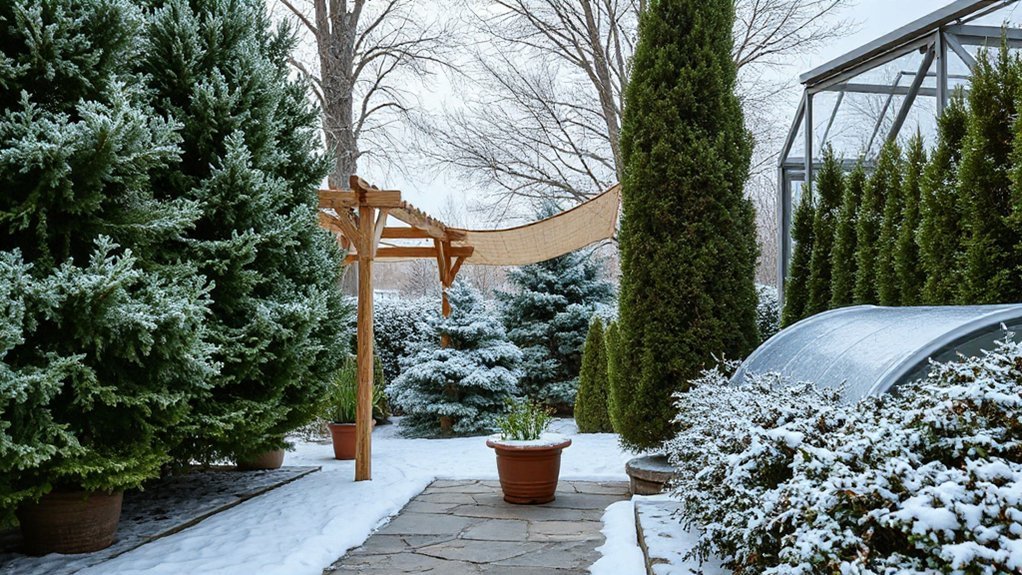
You’ll start by building seasonal windbreaks to shield vulnerable beds and extend your garden’s usable window.
Then, map microclimate shelters—warm, dry corners and protected paths—that concentrate heat where it matters.
Finally, designate zone-based cold-protection areas to guide plant placement and emergency coverage through frost events.
Build Seasonal Windbreaks
Windbreaks don more than curb winter wind; they microclimate your garden by reducing desiccating airflow, warming exposed beds, and guiding moisture to where it helps most. Build seasonal windbreaks with purpose: select wind resistant species, space for growth, and sturdy anchoring.
Use barrier planting to shield beds and entrances, while preserving light for understory crops. Install at least two tiers of protection to create backdraft zones that reduce cold gusts.
Maintain accessibility for pruning, mulching, and harvests, and choose deciduous varieties to minimize heat loss in summer.
- Wind resistant species selection
- Tiered barrier planting design
- Proper spacing and anchorage
- Seasonal maintenance and pruning
- Accessibility for care and harvests
Create Microclimate Shelters
Start by recognizing how windbreaks become microclimate shelters: hedges, fences, and layered plantings that slow gusts, trap warmth, and direct moisture where it’s most needed. You’ll design microclimate shelters that extend growing seasons and protect tender roots.
Use dense, evergreen elements for year-round frost protection, paired with deciduous accents to seasonally modulate airflow and sun exposure. Position shelters to shield micro-sites: southern faces for heat gain, low-lying beds for frost pockets, and narrow corridors to funnel warmer air aloft.
Incorporate mulches, reflective surfaces, and strategically placed rocks to absorb daytime heat and release it after dark. Maintain clear access for maintenance, and monitor windward gaps after storms.
With intentional layout, you create resilient microclimates that minimize frost damage and sustain essential functions.
Zone Cold-Protection Zones
Windbreaks, shelters, and microclimates work together to defend tender beds from gusts and frost, while guiding heat and moisture to where they’re most needed. Zone cold-protection zones help you tailor borders, walls, and windbreaks to protect exposed ground and vulnerable transplants.
Use sturdy evergreens as a backbone, supplemented by temporary screens that can be reconfigured with seasons. Position cold hardy plants and frost resistant varieties to maximize shelter zones and minimize heat loss during cold snaps.
Create a microclimate map for sun, wind, and moisture to optimize protection and growth.
- Install evergreen windbreaks on prevailing-wind sides
- Layer shelters with breathable fabrics during freezes
- Group cold hardy plants for shared warmth
- Use mulch to stabilize soil temperature
- Choose frost resistant varieties for resilience
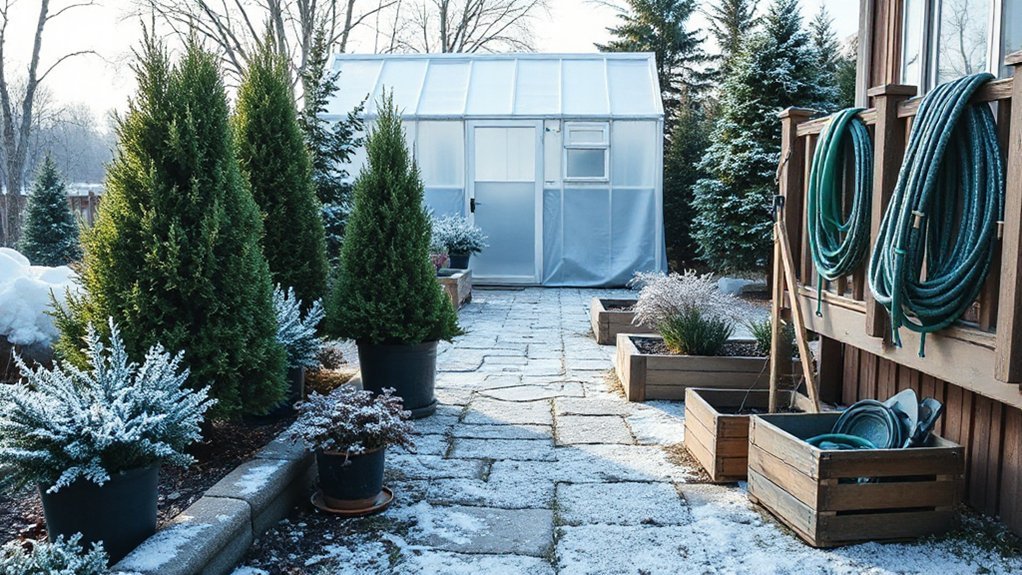
Protect Outdoor Furniture and Decor From Winter Weather
To protect outdoor furniture and décor from winter weather, begin by evaluating what’s exposed and what needs shelter. Then invest in covers and storage options that fit snugly and keep moisture out. Choose breathable covers to prevent mold and guarantee a tight seal against wind-driven rain.
Elevate delicate items off the ground with low-profile stands to avoid damp floors and salt exposure. For long-term protection, store cushions in a ventilated container rather than leaving them on furniture.
Treat wooden surfaces with a weather-appropriate sealant before colder months arrive. Regularly inspect fasteners and joints, tightening as needed to prevent wobble.
This approach preserves outdoor furniture and decorative accents, preserving form, color, and value throughout winter.
Quick Seasonal Cleanups to Spring-Ready Your Garden
As winter’s chill fades, your garden benefits from a concise, hands-on cleanup that tees up a healthy spring. You’ll focus on quick, effective tasks that set the stage for robust growth, emphasize plant pruning, and improve soil aeration for steady root development.
- Inspect beds for drifted debris and remove it
- Prune dead or damaged stems to shape plants
- Rake and loosen thatch, then aerate soil lightly
- Topdress with a thin layer of compost for soil nourishment
- Clean garden tools and sharpen blades for precise cuts
With these steps, you’ll reduce disease risk, promote air flow, and encourage earlier, stronger blooms. Keep routines steady, and your spring will reward your clarity, control, and care.
Winter Irrigation: Efficient, Low-Maintenance Solutions
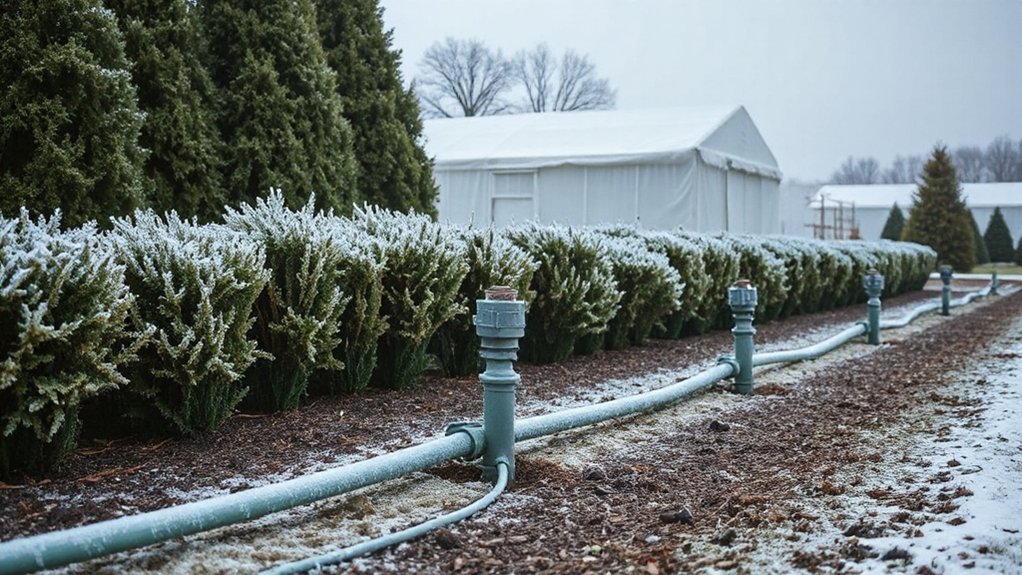
Winter irrigation matters less for quantity than for reliability: a compact system that prevents desiccation, minimizes evaporation, and keeps roots hydrated during cold snaps. You’ll prioritize steady delivery over flashy setups, choosing low-maintenance solutions that weather freezes without user intervention.
Drip irrigation excels here: emitters near root zones limit waste, reduce overspray, and tolerate low water pressure in winter. Pair it with moisture sensors to tailor cycles to soil conditions, avoiding overwatering when soils stay damp from meltwater.
Automate with a timer and seasonal shutoff to prevent leaks during freeze-thaw cycles. Insulate above-ground lines and protect rough, exposed splices. Regular, brief inspections today avert leaks tomorrow, preserving root integrity and garden readiness when spring warmth returns.
Winter Lighting for Visibility and Plant Health
Winter lighting isn’t just for visibility; it’s a tool for plant health as well. You’ll balance practical needs with targeted illumination to support photosynthesis and growth, while keeping energy use efficient.
We’ll start with the basics of winter lighting and how plant-focused illumination, or plant health illumination, guides your setup.
Winter Lighting Basics
One key question to start with: how can you balance visibility and plant health when daylight fades and indoor spaces demand more light? You’ll craft a practical plan that blends function with ambiance.
- Use a mix of cool-task and warm-ambient bulbs to maintain color accuracy without fatigue.
- Highlight walkways with low-glare, shielded fixtures for outdoor safety.
- Layer lighting from porch to garden beds to reduce harsh contrasts.
- Choose energy-efficient LEDs with dimmable options for flexibility.
- Add subtle festoon or string lighting that enhances festive ambiance without overpowering plants.
A thoughtful setup keeps paths safe, supports essential plant responses, and preserves a refined, seasonal mood.
Plant Health Illumination
To protect plant health while maintaining visibility, tailor your winter lighting to support photosynthesis and growth cues without creating heat stress or excessive brightness. You’ll balance duration, intensity, and spectrum to keep foliage strong and pests at bay.
Choose artificial lighting that closely mimics natural daylight during critical hours, focusing on blue wavelengths for vegetative vigor and red for flowering cues. Implement dimmable fixtures and timers so plants receive consistent daily rhythms without overheating nearby seating or pathways.
Monitor leaf color and transpiration; adjust spacing to prevent shading and ensure even light distribution. Prioritize energy efficiency by using LEDs with high radiant efficiency and minimal heat output.
This approach enables photosynthesis enhancement while preserving outdoor usability and visual comfort.
Smart Budgeting for Winter Prep: Cost-Saving Tips
Smart budgeting for winter prep starts with a clear plan: outline essential tasks, estimate costs, and set a realistic spending limit before you buy. You’ll guard against impulse buys and keep priorities front and center, aligning your needs with available seasonal discounts.
With disciplined budget planning, you maximize value without sacrificing protection for your garden.
- Prioritize core protections: insulation, windbreaks, and protective covers
- Compare prices from multiple suppliers to catch seasonal discounts
- Reuse and repurpose where safe, avoiding wasteful replacements
- Schedule purchases in off-peak periods for lower rates
- Track expenses with a simple spreadsheet to stay within limits
This approach keeps your winter prep efficient, economical, and effective, ensuring calm-season resilience for your outdoor spaces.
DIY Winter-Proofing Hacks You Can Do Today
What simple, effective hacks can you tackle today to winter-proof your garden? Start by inspecting containers and pots; relocate delicate specimens indoors or onto the warm side of a sheltered wall, and add a thick layer of mulch to stabilize root zones.
Seal drafty borders with garden fabric or low-energy, breathable windbreaks, then insulate vulnerable irrigation lines and hoses. Consolidate hoses, drain excess water, and winterize sprinklers to prevent freezes.
Group heavy furniture and moveable décor under shelter to protect against gusts. Switch to winter fashion for outdoor gear—toughened gloves, insulated boots, and reflective vests boost safety while you work.
Plan meals around holiday recipes that reuse garden produce, minimizing waste as you prepare for frost.
Storage and Reuse: Conserving Resources for Next Year
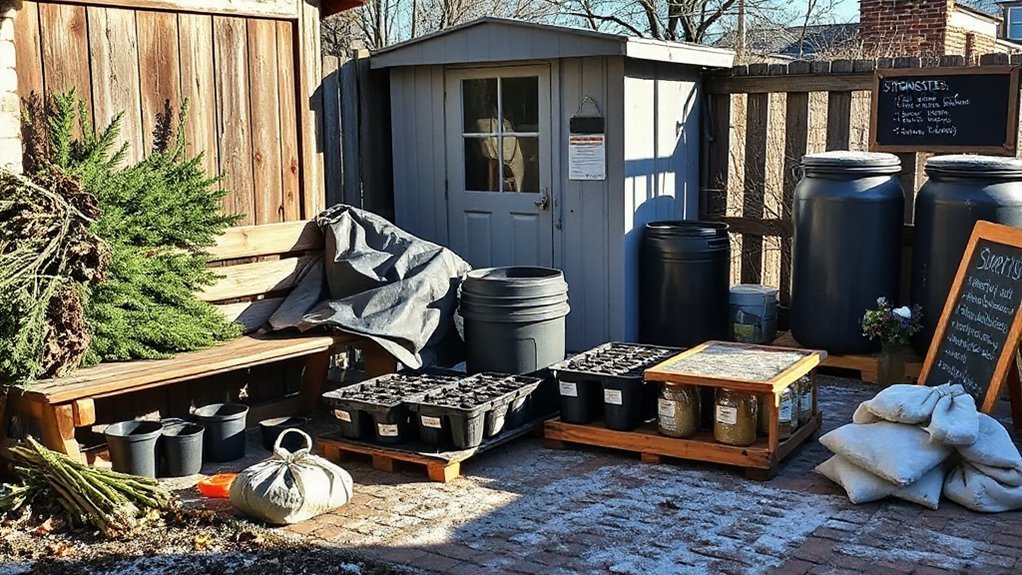
Even as frost edges creep in, you can extend your garden’s value by storing tools and reusing resources for next year. Focus on practical organization and waste reduction so every item earns another season.
Begin with repurposing containers for seed storage, bulbs, and small hardware. Clean and label jars, crates, and bins to prevent mixups.
Maintain soil health by composting leftovers, plant debris, and kitchen scraps. Aerate and balance green matter with browns.
Salvageable materials—stakes, netting, and pots—store dry and ready.
Plan a reuse calendar to minimize new purchases and reduce clutter.
- repurposing containers for seeds and bulbs
- cleaning, labeling, and storing garden tools
- composting leftovers with browns and greens
- preserving soil with dry mulches and scraps
- organizing materials for easy next-year access
A Simple Post-Winter Recovery Plan
Clean, sharpen, and sterilize shears and trowels to prevent disease spread as you prep for the season. Test soil moisture and add light amendments if textures are poor, avoiding overcorrection.
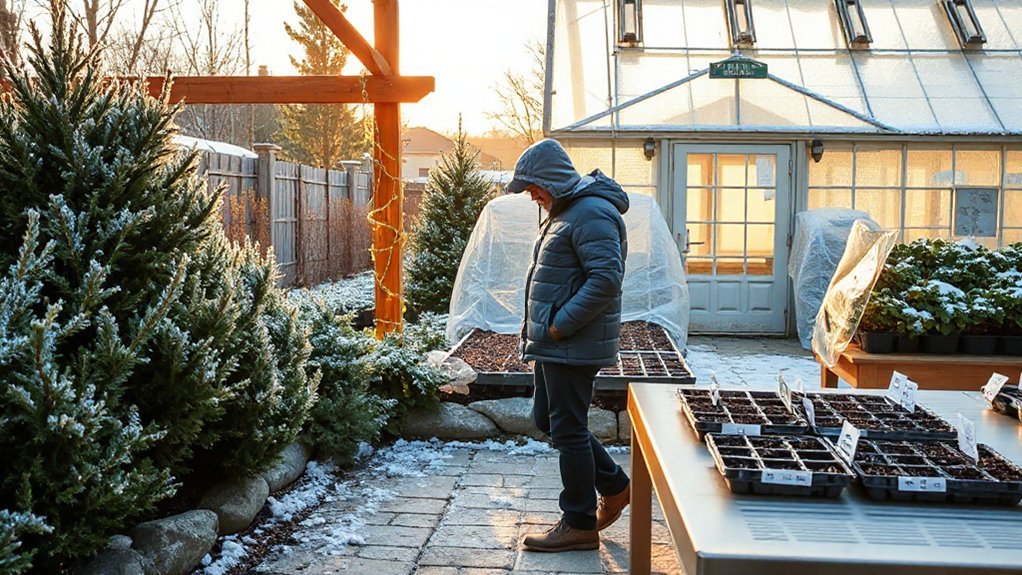
For indoor setups, schedule Indoor germination of hardy seeds to kickstart early growth without exposing seedlings to chill.
Clear pathways, rotate beds, and mulch where needed to retain warmth. Schedule weekly checks for new growth, and document outcomes to refine next year’s plan.
Conclude with a concise, actionable calendar.
Frequently Asked Questions
How Early Should I Start Winter Prep for 2025?
Start about six to eight weeks before typical frost dates, giving your winter garden time to acclimate and protect young transplants. Plan frost protection methods now, and stagger tasks so you’re ready when colder snaps arrive.
Which Plants Require the Most Frost Protection?
Frost protection is essential for sensitive seedlings; these require the most coverage and shelter. Frost tolerant plants endure colder nights with minimal care, while you shield sensitive seedlings with blankets, cloches, or row covers during unexpected frost events.
Can I Reuse Insulation Materials From Last Year?
Yes, you can reuse insulation materials, but inspect first for moisture, mold, or tears. Store cleanly, label, and patch where needed. Reusing insulation reduces waste, conserves resources, and provides economical, practical winter material for protection.
What’s the Best Way to Protect Container Plants?
To protect container plants, use indoor overwintering techniques and mulch insulation around pots; bring them indoors when frost threatens, and place near a sunny window. Mulch insulation helps retain moisture and temp, reducing stress on roots.
How Can I Budget for Unexpected Winter Weather Costs?
Set aside an emergency fund and create a dedicated budget line for weather surprises. You’ll implement cost saving tips, track expenses weekly, and prioritize essential fixes, ensuring you’re prepared without derailing your plans when winter costs arise.
Conclusion
As you finalize your winter garden plan, you’ll safeguard both beauty and bounty with practical, budget-smart steps. Prioritize the frost-risk nights, shield key plants, and insulate containers. Mulch thoughtfully, reuse materials, and stash supplies for spring’s rush. Your prep will pay off when you welcome a smoother recovery and less waste. Think of this season as a seed-sown investment—a small, steady act now yields resilience later, like a quiet, reliable clockwork of your garden’s year.


