
If you’re tackling a DIY renovation, you’ll want a clear goal, a realistic budget, and a practical plan before you lift a tool. This guide shows how to outline high-impact updates, prepare your starter toolkit, and prioritize safety and permits. You’ll learn to schedule milestones, troubleshoot common hurdles, and build confidence as you go. The path isn’t glamorous, but solid planning keeps momentum—and consequences—in check. Ready to start shaping your space, step by step.
Key Takeaways
- Start by defining clear renovation goals, prioritizing high-visibility fixes like lighting, paint, and storage for quick impact.
- Create a detailed budget with material costs, permits, contingency, and a weekly variance review.
- Build a starter toolkit and safety plan, including PPE, proper ventilation, and organized storage.
- Plan sequencing and scheduling with phased tasks, dependencies, and milestones to maintain momentum.
- Manage materials proactively: confirm availability, sources, backups, and schedule inspections to avoid delays.
Define Your DIY Renovation Goal: What Will You Create?
To define your DIY renovation goal, start with a clear question: What’ll you create, and why does it matter to you? You’ll frame a concrete outcome, not a vague dream, then map measurable aims you can verify during the project.
Identify core functions, spaces, and how you’ll use them daily, because purpose guides decisions. Next, assess constraints—time, access, structural limits—and wire them into a practical scope.
Use design inspiration as a benchmark to test ideas against real needs, ensuring aesthetics don’t outpace function. When you explore material selection, prioritize durability, ease of maintenance, and cost alignment with your timeline.
Clear goals keep choices focused, reducing scope creep and keeping your renovation efficient and aligned with your intended outcomes.
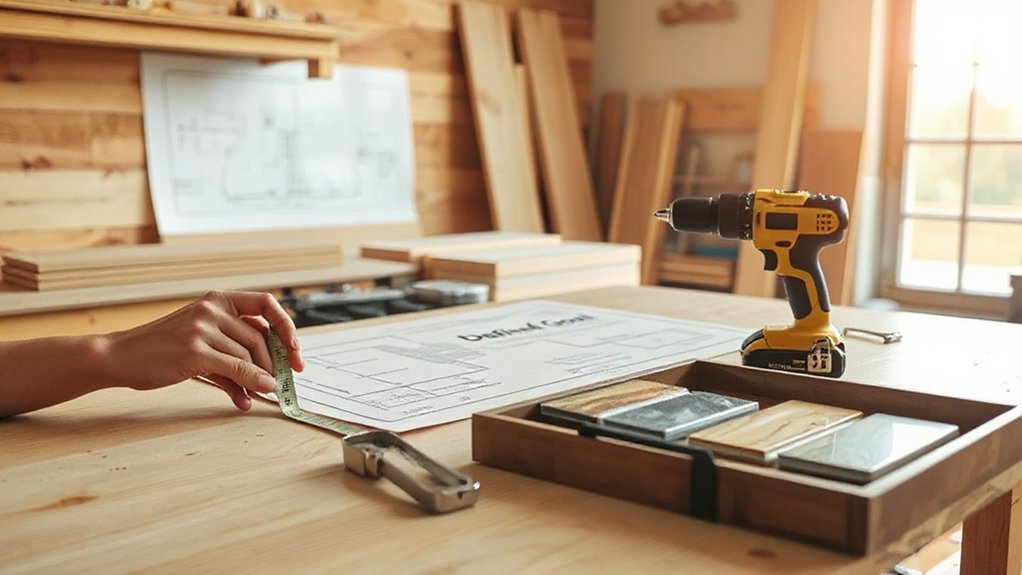
Set a Realistic Budget and Create a Plan
A realistic budget begins with a clear tally of all costs and a practical plan to cover them. You’ll identify every line item—materials, labor, permits, and contingency—then assign realistic prices based on current quotes.
Budget planning isn’t about shaving dollars; it’s about preventing overruns. Set a target that fits your resources and timeline, and build a buffer for surprises.
Establish measurable milestones and a payment schedule that aligns with progress. Document assumptions and revise weekly as prices shift or decisions change.
Prioritize essential expenses first, then optional upgrades if funds allow. Tie the budget to your goals by recording what each expenditure enables, and track variances to stay on course.
End each phase with a brief recap to support disciplined goal setting and informed decisions.
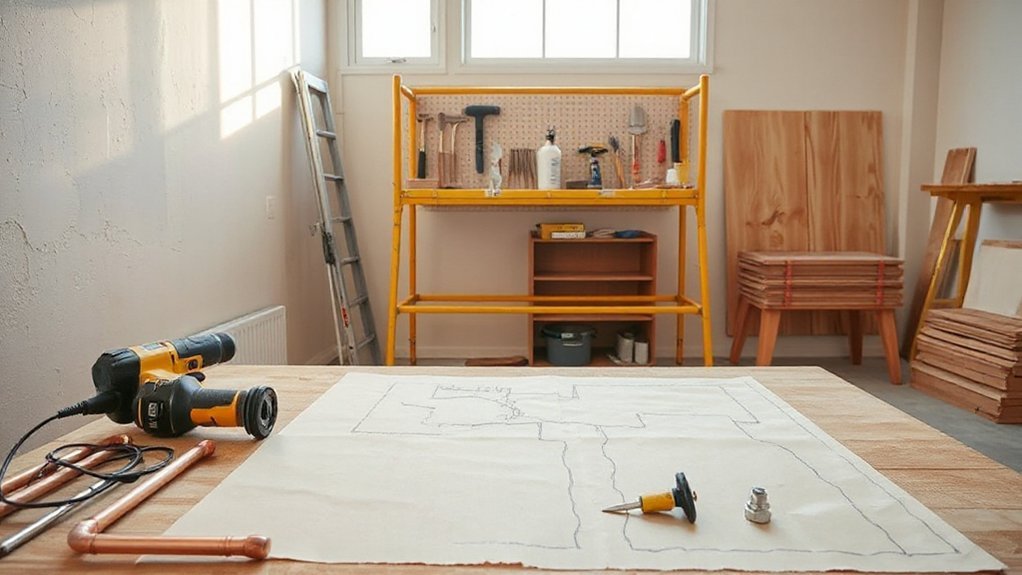
Build Your Starter Tool Kit for Beginners
Starting with a solid starter kit makes DIY renovations faster and safer, so build a concise, purpose-driven set of tools you’ll actually use. You don’t need every gadget on day one—focus on reliability, not novelty.
A basic hammer, tape measure, utility knife, level, and square form your core. Add a cordless drill with bits, adjustable pliers, a screwdriver set, and a small pry bar for versatility. Include a carpenter’s pencil, Safety glasses, and a work apron to stay organized.
Choose quality over quantity; sharpen blades and test batteries regularly.
For finishing touches, consider decorative accents that elevate projects without overcomplicating work.
Prioritize energy efficiency: caulk, insulation sealant, and weather stripping to improve outcomes and value.
Plan storage that keeps tools accessible and protected.
Safety First: Protect Yourself and Your Space
Prioritize your safety by selecting appropriate Personal Protective Equipment and ensuring a proper fit before you start.
Maintain good Ventilation and Airflow to control dust and fumes.
Follow clear Tool Safety Procedures to prevent accidents.
Stay focused, plan your moves, and address hazards as soon as they appear.
Personal Protective Equipment
- Protective gear that fits well and stays in place
- Clear, practiced safety protocols for each task
- Inspection and replacement routines to prevent failures
Ventilation And Airflow
Identify airflow patterns that minimize cross-contamination between dusty zones and living spaces, and prioritize continuous exchange during active work. Choose ventilation systems with sufficient capacity for the room size, debris load, and solvent use, and guarantee seals around doors and windows limit leaks.
Use temporary exhaust for quiet, persistent removal of dust, then verify with a smoke test or airflow meter. Maintain clear pathways for air movement, and schedule resets after changes in layout or materials.
Regularly inspect filters, ducts, and fans to sustain consistent ventilation performance.
Tool Safety Procedures
Tool safety isn’t optional—it’s the foundation of every project. You must respect tools, environments, and regulations to prevent injury and damage. Before you start, inspect equipment, unplug when adjusting, and wear eye protection, gloves, and sturdy footwear. Maintain clean workspaces, secure cords, and store gear properly to avoid trips or misuse.
Know power sources, circuit limits, and shutdown procedures to minimize hazards. When handling Electrical wiring or Plumbing installation tasks, double-check connections, tests, and labeling to prevent shocks or leaks. Follow manufacturer guidelines and local codes to guarantee compliance and quality.
Communicate with helpers, keep children and pets away, and document procedures for future reference. Safety first protects both you and your project’s progress.
- Inspect, PPE, and secure workspace
- Verify sources, labeling, and shutdowns
- Communicate and document procedures
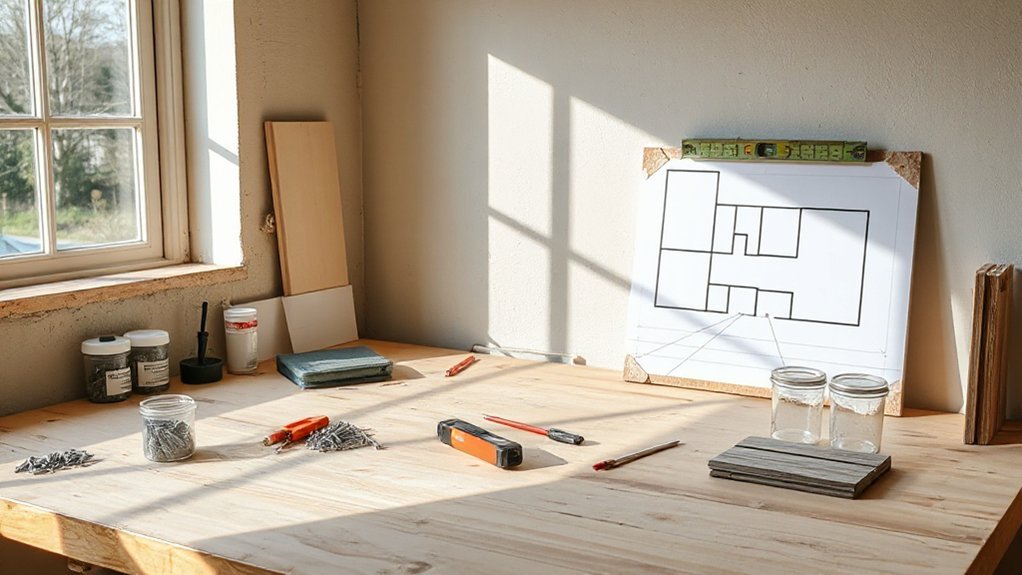
Permits and Planning Essentials for Small Projects
When planning small DIY renovations, you should start by confirming what permits, if any, your project requires and whether your local building department has specific rules for minor changes. You identify applicable permit types, timelines, and fees upfront to avoid delays.
Review zoning regulations to ensure your use, setbacks, and occupancy align with current codes. Document dimensions, electrical loads, and any structural implications, even for cosmetic updates.
If permits are required, submit drawings or sketches with concise scope notes and a project schedule. Obtain approvals or provisional feedback before beginning work.
Schedule inspections at key milestones and address any deficiencies promptly. Maintain clear records for future property transactions and potential code updates.
This disciplined approach minimizes risk and keeps your project compliant and on track.
Materials 101: Surfaces, Fixtures, and Finishes
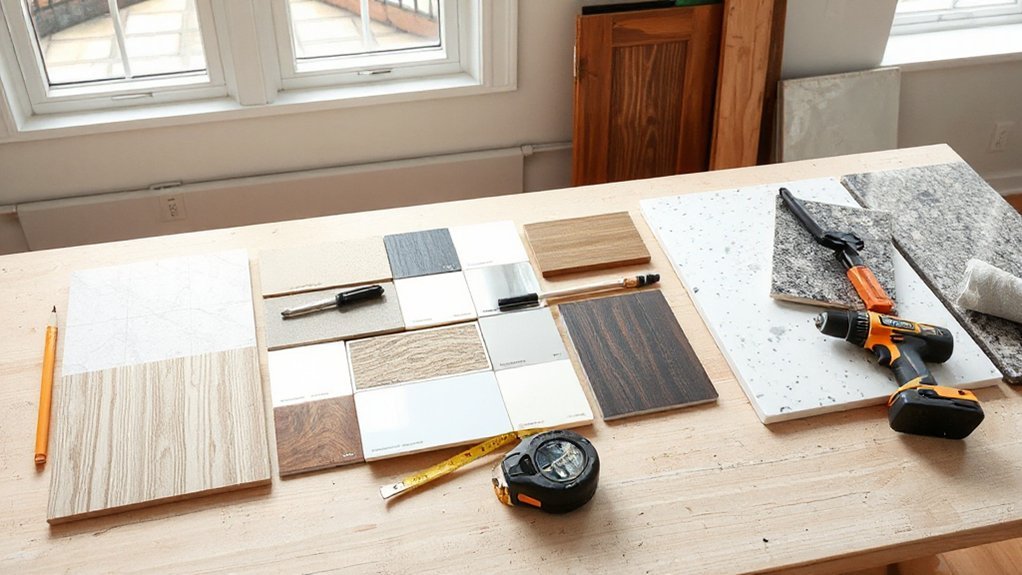
Choosing durable surfaces and reliable fixtures sets the foundation for long-lasting renovations. In this section, you’ll learn how to select materials that withstand daily wear while minimizing maintenance.
Prioritize surface textures that hide minor scratches and resist staining, and match fixture styles to your overall design language. Durability, ease of cleaning, and availability should guide every choice, not only aesthetics.
Plan for moisture exposure, temperature changes, and load demands, then verify warranty details and installation requirements. This approach reduces rework and budget surprises.
Remember to compare samples under real lighting to judge color and texture accuracy. Surface textures and fixture styles influence perceived quality and function just as much as price.
- Material performance over time
- Consistent finishes across rooms
- Compatible installation methods
Pick a Beginner-Friendly Room Project
Start with a simple space you can complete quickly, like a refreshed entryway or a small shelf project. Look for budget-friendly tasks that yield visible results without overhauling the room, and choose one you can finish in a weekend.
Prioritize safety by planning clear steps, gathering the right tools, and avoiding high-risk procedures.
Choose Simple Space
Wondering where to begin your DIY renovation? You’ll choose a simple, high-impact space that teaches fundamentals without overwhelm. Pick a room with clear boundaries, natural light, and a defined purpose.
Focus on essential updates first—paint, lighting, and organization—as these yield noticeable results fast. This approach supports Creative expression and Space personalization, while keeping scope manageable for a beginner.
Plan around a single focal wall or a few key features to avoid drift. Use basic tools, measure twice, and document progress to reinforce good habits.
By starting small, you build confidence, avoid costly mistakes, and set a practical pace for future projects.
- Define purpose and focal area for immediate impact
- Prioritize cost-effective upgrades with visible results
- Integrate personal style through color, texture, and layout
Budget-Friendly Projects
Looking for budget-friendly, beginner-friendly room projects? Start with a small living-space refresh that delivers impact without complexity. Choose a beginner-friendly room project like reimagining the coffee nook or a single-wall refresh.
Plan around a tight budget: prioritize high-visibility updates first, such as lighting, paint, and storage solutions. Use eco-friendly materials where possible to reduce costs and environmental impact, like low-VOC paints, reclaimed wood shelves, or cork flooring tiles.
Leverage versatile, timeless elements to maximize value, including neutral bases and vintage decor accents that pair well with modern pieces. Minimize disruption by selecting projects that don’t require major plumbing or electrical work.
Measure twice, cut once, and document progress to stay organized, focused, and efficient throughout the process.
Safety First Steps
Safety comes first when tackling a beginner-friendly room project, and a focused plan helps you avoid injuries and costly mistakes. You’ll set clear scope, check tools, and confirm power is off before any cut or drill. Follow safety protocols and stay within your skill level to minimize risk and protect your space.
- Assess the room for hazards and secure loose fittings before you start.
- Wear appropriate PPE, use insulated tools, and keep a first-aid kit handy.
- Verify electrical, plumbing, and structural elements with a simple test and double-check before proceeding.
Sticking to these steps builds hazard awareness and keeps momentum steady. Plan, pause to reassess, and proceed only when conditions are safe. This approach prevents surprises and elevates quality.
Quick Fixes With Big Impact for Beginners
Quick fixes can deliver big results for beginners if you start with simple, high-impact changes. You’ll prioritize efficiency, choosing tasks that improve perception and function without overhauling systems. Focus on lighting, finish, and layout tweaks that cost little but read as intentional upgrades.
Creative lighting isn’t just ambience; it defines zones, highlights features, and changes room feel with minimal demolition. Swap low-cost fixtures for brighter, more efficient options and layer light sources to avoid harsh shadows.
Apply color schemes that expand space and unify design without heavy repainting. Reframe clutter, install smart storage, and refresh hardware to sharpen the overall look.
Measure twice, plan once, and test ideas in stages to validate impact before committing resources.
Common Hurdles and How to Troubleshoot Them
Common pitfalls derail projects if you don’t spot them early, so start with a clear checklist of common issues and fixes.
Follow a step-by-step troubleshooting guide to diagnose problems quickly, document your actions, and adjust as needed.
Then budget for overruns and set realistic timelines so you keep momentum without burning out.
Common Pitfalls and Fixes
Ever run into a snag mid-project? You’ll recognize common pitfalls and fix them fast. Start with planning misreads: remeasure twice, confirm material specs, and align with your goal. Don’t rush purchases; avoid supplier delays by locking color palettes and furniture arrangements early. When changes arise, trace the root cause before redoing work, saving time and money.
- Color palettes misalignment: test swatches in lighting, adjust tones, and document decisions.
- Furniture arrangements blocking access: redraw layouts, measure clearances, and verify traffic flow before moving heavy pieces.
- Subpar fasteners or tools: replace worn bits, choose corrosion-resistant options, and keep a basic kit on hand.
Staying disciplined keeps projects on track. Use these fixes to maintain momentum without compromising quality.
Troubleshooting Step-by-Step Guide
When you hit a snag, a systematic, step-by-step approach helps you pinpoint the root cause and apply a practical fix fast. Begin by restating the problem in concrete terms you can test, then gather a minimal set of tools for a controlled check.
Verify measurements, fit, and alignment first; if a component won’t seat, reassess orientation and clearance before forcing it. Document each test result briefly to avoid repeating errors.
If aesthetics fail, evaluate color coordination and lighting, not just function, since perception changes with mood.
Revisit your plan for conflict points and adjust one variable at a time to isolate the issue. When solutions emerge, implement quickly, test again, and confirm stability.
Finally, recheck safety and finish details like furniture placement to maintain harmony.
Budgeting and Time Management
- Define a fixed scope with measurable milestones
- Build a realistic budget plus a 10–15% contingency
- Schedule weekly reviews to adjust priorities and timelines
Schedule It: Realistic Milestones and Timelines
A solid renovation timeline starts with a clear, realistic schedule that you can actually follow. Set milestones that are specific, measurable, and reachable within daylight hours.
Break tasks into logical phases: design inspiration, material selection, permitting, demolition, rough-in, finishes, and cleanup. Assign dates to each phase, plus buffer days for unforeseen delays.
Prioritize dependencies: you can’t install cabinets before walls are prepped, or wiring before insulation is in. Build in overlap where safe, but avoid overcommitting resources.
Allocate practical daily targets, not grand overhauls, and track progress with a simple tracker or calendar. Review weekly, adjust for supply delays, and confirm lead times with suppliers.
Document changes to avoid scope creep and keep the project under control.
Learn While You Work: Build Confidence and Skills
As you work through the plan, you’ll learn by doing, building confidence and sharpened skills with each task. You’ll approach each step methodically, measuring outcomes against goals and adjusting techniques as you gain feedback. This hands-on process cultivates learning patience and developing creativity, because problems require calm analysis and inventive solutions.
Stay focused on fundamentals—measuring, cutting, fastening—then refine your approach with efficiency in mind. Document results, note errors, and repeat successful methods to cement competence. By embracing practice over perfection, you progress faster and build reliable routines for future projects.
Your growing toolkit becomes a proof of capability, not luck, empowering you to tackle progressively tougher tasks with clarity and control.
- Embrace iterative learning to improve accuracy and speed
- Record outcomes to reinforce developing creativity
- Reflect on mistakes to cultivate learning patience
When to Tackle Medium-Scale Renovations
Choosing when to tackle medium-scale renovations hinges on clarity of scope and adequate preparation. You should assess timing considerations by mapping milestones, permits, and supplier lead times before you pick a start date.
Medium-scale work demands more planning than small projects, yet it stays doable within a single season if you pace tasks and budget buffers. Evaluate project complexity honestly: framing, electrical, plumbing, and finishes raise risk and require trades or inspected steps.
If you’re coordinating contractors, secure written agreements outlining scope, schedules, and contingencies. For DIY execution, confirm you can sustain momentum without interruptions and that you won’t exceed your capacity.
Start when you have a realistic schedule, material availability, and a clear sequence of trades or tasks. This reduces surprises and protects quality and cost.
Frequently Asked Questions
Do I Need a Professional for Minor Projects?
No, you don’t always need a professional for minor projects, but assess cost considerations and risk first.
If the task is simple, you can save money and expand skill development by DIYing. Stay precise: measure twice, cut once, and follow safety rules.
When in doubt, consult a pro for electrical, plumbing, or structural work.
Weigh time, quality, and potential rework against contractor rates to decide whether you should DIY or hire.
How Long Will a Beginner Project Take?
A beginner project usually takes a weekend or two, depending on scope and your pace. Start with a clear plan, and you’ll map a practical project timeline that fits your schedule.
You’ll learn by doing, and each step boosts your skill development. Expect delays from measurements or materials, but stay focused and adjust.
Keep notes on what worked and what didn’t, so future projects flow smoother. Stay pragmatic, organized, and you’ll finish faster than you expect.
What Safety Gear Is Essential for DIY?
Protective eyewear and respirator masks are essential for DIY safety. You should always wear ANSI-rated safety glasses or goggles and a properly fitted respirator when sanding, cutting, or handling chemicals.
Keep ears protected if you’re using loud tools, and gloves for skin. Inspect gear daily, replace damaged parts, and follow manufacturer guidelines.
Don’t skip safety checks, and store equipment cleanly after use. Your careful setup prevents injuries and long-term health issues.
Can I Reuse Old Materials Safely?
Yes, you can reuse old materials, but evaluate for safety first. Inspect for structural integrity, rot, cracks, and embedded hazards. Test for lead paint or asbestos where applicable, and wear appropriate PPE during handling.
Recycling materials can save costs, yet confirm they meet current codes and load requirements. If in doubt, consult a professional.
Prioritize material safety, verify dimensions, and treat reused items as if new to maintain project safety and durability.
How Do I Handle Measurement Errors Early?
Yes—calibrate early to avoid chaos. When you measure, you’ll stay precise and avoid costly regrets.
Use measuring accuracy as your north star, and set up calibration tools before you cut a single piece.
Double-check with a second tool or a known reference, then confirm with a third reading if the numbers wobble.
Document deviations, adjust, and recheck.
Your method stays tight, your project stays on track, and you finish with confidence.
Conclusion
You’ve got a clear goal, a realistic plan, and the right basics to start. As you move forward, expect smooth progress with careful choices and efficient sequencing. If a snag appears, view it as a polite nudge toward better understanding, not a derailment. Keep safety, measurements, and documentation steady, and you’ll build confidence with each small win. Finish with thoughtful tweaks, not rushed surges, and your space will feel steadier, brighter, and truly yours.


